Classic Trucks! Builds
Want more content like this?
Join the PowerNation Email NewsletterVideo Transcript
Today on trucks, we'll introduce Project Sport Sierra by bolting on some of the hottest aftermarket add ons available in the sport truck market. After that, we'll hit the road and show you how to hunt down a classic project vehicle. How does a 55 Willie's wagon sound?
Then it's back to the shop to slip some waterproof seat covers on a Jeep Wrangler.
That's all today on trucks.
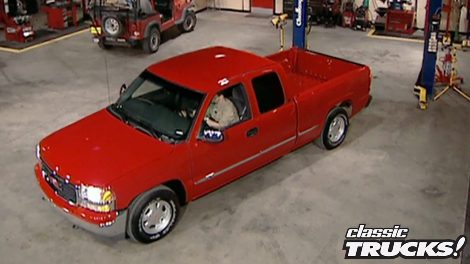
Welcome to this week's show, everybody. There's no doubt smaller trucks are quite the rage when it comes to street modification such as lowering ground effects tunnel covers and billet grills. But that's not to say a full size truck can't benefit from the same upgrades. So we're going to take this brand new GMC Sierra with its vortech V8 under the hood and transform it from a work truck to a classic ride that'll turn heads on the street.
Now, we're gonna do that by using aftermarket add ons that you can put on in your driveway
on a working man's budget.
We're gonna get started on project Sport Sierra by addressing an area that you look over and a lot of sport truck builders overlook and that's the hood, Keystone restyling products in Toledo, Ohio makes this Ram style good hood. It's gonna scoop up lots of attention for our Sierra
before we can give a ride. It's facelift. We need to get rid of this stock hood.
First thing we're gonna do is pull off this emergency light underneath.
Then you can undo the hinge bowls.
That's a good idea to have somebody give you a hand so you don't damage the stock hood. Keep in mind you can sell it to help offset the cost of the project.
One of the most important things to look for when buying a fiberglass hood is its construction. This one has a full bottom panel to match that factory look. It's also bonded around the edges and is internally reinforced for maximum strength to prevent warping. Now, like Mel said, that's all very important, but you have to
make sure
that you've got steel reinforcement in your hinge mounting area. Now, the reason for this, this is a high stress area that can get sloppy or even crack if not properly supported bottom line is going directly into fiberglass,
just doesn't get it all that mind. Let's go ahead and get this thing in place. Ok. Sounds good.
Now, once the hinges are secure, you can carefully lower the hood to check your gaps. Now, you may have to add some shims to the hinge itself or adjust your hood stop to get perfect alignment,
uh starting to look good, man. It looks great.
Now, I know what you're thinking. The paint doesn't match. There's a reason for that.
Always check the fit of your parts before you paint them. That way if you have to do any modifications or if you scratch them, you don't destroy a good paint job.
Now, we'll turn our attention to the tail end of our Sierra. We'll get started by knocking off some of the edges like the tailgate bumper and spare tire.
The reason we're doing this is to get that smooth sport truck look we're after.
Now, there's a lot of roll pans out there to choose from. Some are made out of fiberglass and some are made out of plastic and there's nothing wrong with either of those two choices, but
we're gonna go with an all steel pan from Sir Michael's in Huntington Beach, California.
Now, some of the neat features include this recessed license plate box. Look at this special cut out so you can relocate your tail lights down into the pan. That's cool. That really is. Now to avoid scratching the paint during test spin in our truck, we're gonna lay masking tape down the bedside. So we don't scratch it with the pan,
the pan bolts directly to the back of the bed below the tailgate. Once you have it where you want it, make your marks
and drill the hole, then you can bolt it down with the screws that come with the kit.
We also need to secure the bottom of the pan to keep it from flapping in the breeze.
The kit comes with this bracket
that hooks right to the bottom lip of the pan
and then bolts directly to the frame.
These custom tail light boxes have four bulbs and a mini billet grill to cover them up. It also comes with a well marked electrical harness that splices directly into your stock harness. Now, what this means is you can lose your stock tail lights completely and still be street legal. Hey, Stace, you about ready for these lights.
Just a
sec. All right, thank you.
Now, we can make our harness connections. Once again, these are well marked. Your backup lights go to the inside behind the white lens, your break and tail lights go to the center behind the red lenses
and your turn signal goes to the outside behind the amber lens.
Oh, yeah. Don't forget to hook up your ground when you bolt these things in.
Keep in mind if you install a roll pan with tail lights like this one,
you may have to do some trimming for clearance of the light boxes.
Another neat feature on our roll pan
is this license plate flip kit that can be installed to flip up or down. This gives you easy access to a frame mounted tow hitch if you decide to lower your truck, like we're gonna do our sport Sierra later on it also allows access to your spare tire too.
Installations and no brainer two bolts, hold it in place.
The last modification we need to make is to the spare tire mount now because this pan rolls down underneath. We need to move the spare a couple inches forward so it doesn't hit the pan.
Now, this bracket bolts right to the existing holes and moves the hoist a couple inches forward to give us the clearance that we need.
Another cool feature about a metal pan is that you can take this seam here and leave it stock like it is or you can weld it in for a really smooth look. Now, the moment of truth, mel go ahead and hit the lights,
turn signals,
reverse
brakes.
All right.
Speaking of breaks, we need to take one ourselves. Don't go away. We'll be right back
later on trucks. We'll show you how to hunt down a classic project vehicle. But first, it's more project sport Sierra.
Welcome back to the shop. Now, we've already put a custom ram air style hood and a rear roll pan on our project Sports Sierra.
Now we're gonna turn our attention to the business end with one of the most popular add ons out there and that's a tono cover. Now, not only do they smooth everything down for that cool sport truck look, but they're also good for performance because they eliminate bed turbulence.
Now, when it comes to tunnel covers the options are endless. There's fat ones, skinny ones, leaky ones and even rolling ones. We're gonna go with the smoother
from California Customs. It has dual recess locks and an ultra low profile that blends into the body lines for added strength. There's a one inch thick honeycomb center to prevent warping. This is real nice as well. A carpeted inter liner.
The first thing you need to do is set the cover down on the bed,
then you can mark where the hinge points are on the front rail.
Now, this is the main reason we don't have our parts painted before we put them on. As you can see this was damaged in shipping. Now, it's not bad enough to hassle with sending it back.
But if it was already painted, that's the pits, you have no choice but to have it redone
mel. Give me a hint with this. You got it.
All right, straight back.
That's pretty good right there.
After you get the tunnel out of the way place, the hinges on your mark, drill the holes
and loosely mount them so you can adjust them later on.
Now, one of the special features of this cover are these L brackets.
They go right here in the front corner
and they support this front rail to keep the hinge from flexing on you.
Now, we can put the cover back on, tilt the back end up and push the flat pins through the hinge holes once you've done that,
lower the cover
at this point, center the cover on the bed.
This is why we left our hinges loose.
Now, once you have it, how you want it, mark your hinges
and then take the cover off one last time
and then tighten the hinges down.
Now that we have our cover exactly where we want it. I need to mark the locations for the brackets of the lift struts
on this application, we need to go 17 inches behind the strut stud that's built into the bottom of the cover.
Then you can pop on your struts
and give it a test.
Now, like we said before, this cover comes with dual recess locks. Now, a lock does more than just provide security.
This cover has a rubber seal that runs all the way around the outer edge.
And when you lock the lock down that seals the rubber and makes everything waterproof. Now, installation is a snap
when you put on your lock cam, make sure that it points to the side rail of the truck in the locked position.
Now you can mount your bracket,
center it over the cam.
I like to tip it down just a little bit. So when you turn your lock, it snugs everything down,
I'm taking off this tailgate cover so everything will sit nice and smooth.
Of course, we'll have to come in here later and weld up these holes before we shoot some paint on it.
We're not done with our tunnel cover just yet though. Now it's time to add a little cool factor with this arrow wing, which like our Ram style hood is made by Keystone Restyling product. Now, the trickiest part of this application is getting the holes in the right place. The kit comes with locator guides to help in that process.
Then you can set your wing in place. But before you tape down your marks, make sure you have access to your keyhole.
Then you can drill the holes using the guides
and bolt it on.
Tell you what stace our sports here are starting to look pretty good. Yeah, it is. And the last thing we're gonna do on our truck today is put some teeth in the front end with this billet grill.
We got this grill from Hunter's Custom Automotive in Nashville, Tennessee. Now, believe me, all billet grills are not created equal some fit and some don't,
some just snap into place and others are a little more involved than that.
With this one, we need to remove the stock grill. We're gonna start by taking off this shroud
with a Phillips screwdriver, released the four clips
and out she comes,
make sure you lay something down to protect your chrome. Now, this original grill needs to be cut out of here and you can do that with a hacksaw,
but I prefer to use a cut off tool.
Now you can set in your new grill,
then mark your holes and drill them.
Once you're happy with the fit, tighten it down,
snap in the stock grill assembly.
And finally, the radiator shroud,
it doesn't fit any better than that and it looks great.
Well, now that we have some of the most popular add ons fitting, how they should, we need to roll it into a booth and shoot some paint on it. We can leave the tunnel and the roll pan on the truck, but we need to remove the hood so we can shoot underneath it.
Now, the next time that you see project sports Sierra, it'll have that monochromatic paint job that's so hot right now. Then we'll put a lowering kit on it and get it to stance it so desperately needs. Stay with us. Trucks will be rolling back at you after this
up. Next on trucks will hit the road in search of a classic off road project. Hunting willies is coming up.
We have a lot of people asking us about motor swaps, suspension kits, axle upgrades and paint.
So we decided to hunt down a classic vehicle that we can upgrade and in the process try to answer as many questions as we can.
We also thought it'd be a good idea to take you with us to hunt down a vehicle and show you what to look for when buying a project of your own.
First and foremost, decide what you want what you want to do to it and stick to it. This will allow you to lay out a basic budget that'll help you see the project through to the end.
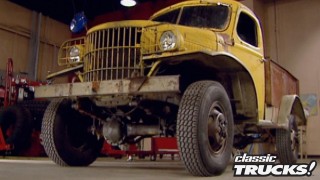
We're gonna look at a couple of old Willie's wagons because we know we want four wheel drive and we need something big enough to put a V8 into.
Let's face it. Everybody loves an old Willie's.
Now, the first one is a 62 that the owner says it's still running strong does have some rare features like an original PTO winch and an overdrive. But since we're doing a drive train swap, that doesn't really matter to us.
One look at these rear quarter panels and you can see you're gonna have to spend some time and money just to get the body straight.
Now, replacement panels are available. But I guarantee if it looks this bad on the outside, there's a lot more cancer up underneath. Take that into consideration before you buy
this old wagon. Definitely has some potential. So we don't want to write it off the list just yet, but there is a 55 out there. We wanna check out before we make a final decision
like mel said before, this is a 55 which has a split windshield which is really cool.
The body is in much better shape too, the cow and the hood really straight. It's pretty rare for these not to be full of filler.
The only Rush spot is right here where it looks like somebody tried to fix this with fiberglass and some sort of funky tape.
Well, the good news is we've got a lot of thick metal here. So that's a pretty easy fix.
Yeah,
this really has a stock Hurricane six cylinder. Unfortunately, it's locked up tighter than Fort Knox. But remember that's not really a problem for us because we're gonna swap everything out anyway. Here's a blast from the past a six volt system. We'll definitely have to change that out. But look how solid it is around the inner fender and frame. That's definitely a plus.
It's important to take a good look at the running gear, especially on a four wheel drive.
As you can see these steering knuckles are leaking.
You can just figure on these breaks being bad and the spring is pretty well sprung. Make sure you factor all that into your budget.
Now, the interior on this thing is like looking into a time capsule still has the original seats as well as the OEM gauge cluster and look at this. The original Willie's floor mats are still in it.
Check this out. The original oak slats are still in the back. Those are usually long gone and this floor man that's solid.
Nothing wrong with the tailgate either.
All the hinges still work. Uh Here's the problem.
No spare tire mel we're gonna have to deduct for that
every little bit helps, man.
It didn't take long for us to decide which one was for us. Given the project we're going to do
so. After some serious deliberations with its owner, we loaded our 55 onto the trailer and started dreaming about the possibility.
What
you do
until
again.
Welcome back to trucks. Now, a lot of you guys own four wheel drive vehicles out there, but you're not spending your time banging around on a trail. No,
you're more into dropping a kayak into white water or catching some waves on a surfboard or a jet ski.
The problem is you're sopping wet, you jump inside your stock seats aren't waterproof so they go to pieces way before their time.
But the folks at
Weakley Hawaii figured if a wetsuit can protect your skin, why can't it do the same for your seats? So they designed a custom fit cover. That'll do exactly that. You have 200 color combinations to choose from. So you can personalize just about any vehicle. The design is simple but effective. You have a layer of neoprene rubber that's waterproof and washable and it's bonded to a half inch piece of foam for comfort.
The best thing about these covers is you don't have to remove anything. They just slide right on.
Now, the back is held in place by a piece of Velcro
snugs. Everything up
the bottom is just as easy.
It's held in place with these adjustable straps
that slide between the seat and the frame here and then tighten down underneath
and once you have it in place,
just sense those down.
Oh, another thing if you have any creases in your cover, don't worry about it. They'll go away in a couple of days
on our Jeep Wrangler. We can also cover the rear seat installations just as easy as the front, adjustable straps on the bottom. Velcro strips on top.
Man. Those fit like a glove, don't they? Yeah, they do. They look pretty cool too.
One of the biggest questions that people ask about seat covers in general is how they hold up under the sun.
Well, weak cos
got that covered with this UV protectant that reduces fading and damage from the sun
as well as keeps the rubber flexible. So it last now everybody knows that moisture can cause some funky smells. Well, they also have an odor eliminator to take care of that problem.
You can also get this shampoo that allows you to clean your seat covers while they're still in the vehicle. And unlike anything else washable, the more you wash them, the longer they last this whole set for our Jeep Wrangler goes for about $300 which is a whole lot cheaper than having your seats reupholstered
and now truck gear, parts, tools and equipment for pickups and sport utilities.
If you spend any time at all under the hood of your vehicle, then you probably spend just about as much time hunting down small nuts and bolts when you're ready to put everything back together.
Summit racing equipment can help you avoid that frustration with this magnetic tray.
It goes for about $7. It'll hold your small metal parts and fasteners in place so they won't come up missing when you need them most. It's also made of stainless steel and has a rubber foot to help prevent scuffing and scratching.
Now, anybody who's ever driven a late model Jeep Wrangler knows that the stock shifter on a five speed transmission can be a little sloppy. Well, Hurst has finally taken care of that situation with their billet plus shifter.
It's got a shorter throw and stiffer springs for quicker shifts.
It also has a removable handle and that cool black knob make the shift to hurst for about 225 bucks
for those of you who do body work. The tools you use to bump the metal can be worth their weight in gold. This kit from Eastwood includes body hammers as well as various dollies that'll work out any bend or contour. You can imagine a basic eight piece kit goes for about 100 and 30 bucks, which will be money well spent when you see what paint looks like, sprayed over flawless body work, that's gonna do it for truck gear. Here's a preview of next week's show.
We
will show you outdoorsmen how to build the perfect home away from home with an F 150.
After showing you how to catch your limit in comfort. We'll show you a 72 blazer that was built to catch your eye on the boulevard.
Then it's time for a lesson on the do s and don't of buying used hearts at a swap meet. That's all next week on trucks.
Well, that's gonna do it for this week's show. We look forward to trucking again with you next week. Are you ready to go? Ready?
I do like those seats. They're cool. Very cool.
So, what are we gonna drop this, uh, sports gear to
453 inches in the
front
in the rear
trucks is an RTM production.
Show Full Transcript
Then it's back to the shop to slip some waterproof seat covers on a Jeep Wrangler.
That's all today on trucks.
Welcome to this week's show, everybody. There's no doubt smaller trucks are quite the rage when it comes to street modification such as lowering ground effects tunnel covers and billet grills. But that's not to say a full size truck can't benefit from the same upgrades. So we're going to take this brand new GMC Sierra with its vortech V8 under the hood and transform it from a work truck to a classic ride that'll turn heads on the street.
Now, we're gonna do that by using aftermarket add ons that you can put on in your driveway
on a working man's budget.
We're gonna get started on project Sport Sierra by addressing an area that you look over and a lot of sport truck builders overlook and that's the hood, Keystone restyling products in Toledo, Ohio makes this Ram style good hood. It's gonna scoop up lots of attention for our Sierra
before we can give a ride. It's facelift. We need to get rid of this stock hood.
First thing we're gonna do is pull off this emergency light underneath.
Then you can undo the hinge bowls.
That's a good idea to have somebody give you a hand so you don't damage the stock hood. Keep in mind you can sell it to help offset the cost of the project.
One of the most important things to look for when buying a fiberglass hood is its construction. This one has a full bottom panel to match that factory look. It's also bonded around the edges and is internally reinforced for maximum strength to prevent warping. Now, like Mel said, that's all very important, but you have to
make sure
that you've got steel reinforcement in your hinge mounting area. Now, the reason for this, this is a high stress area that can get sloppy or even crack if not properly supported bottom line is going directly into fiberglass,
just doesn't get it all that mind. Let's go ahead and get this thing in place. Ok. Sounds good.
Now, once the hinges are secure, you can carefully lower the hood to check your gaps. Now, you may have to add some shims to the hinge itself or adjust your hood stop to get perfect alignment,
uh starting to look good, man. It looks great.
Now, I know what you're thinking. The paint doesn't match. There's a reason for that.
Always check the fit of your parts before you paint them. That way if you have to do any modifications or if you scratch them, you don't destroy a good paint job.
Now, we'll turn our attention to the tail end of our Sierra. We'll get started by knocking off some of the edges like the tailgate bumper and spare tire.
The reason we're doing this is to get that smooth sport truck look we're after.
Now, there's a lot of roll pans out there to choose from. Some are made out of fiberglass and some are made out of plastic and there's nothing wrong with either of those two choices, but
we're gonna go with an all steel pan from Sir Michael's in Huntington Beach, California.
Now, some of the neat features include this recessed license plate box. Look at this special cut out so you can relocate your tail lights down into the pan. That's cool. That really is. Now to avoid scratching the paint during test spin in our truck, we're gonna lay masking tape down the bedside. So we don't scratch it with the pan,
the pan bolts directly to the back of the bed below the tailgate. Once you have it where you want it, make your marks
and drill the hole, then you can bolt it down with the screws that come with the kit.
We also need to secure the bottom of the pan to keep it from flapping in the breeze.
The kit comes with this bracket
that hooks right to the bottom lip of the pan
and then bolts directly to the frame.
These custom tail light boxes have four bulbs and a mini billet grill to cover them up. It also comes with a well marked electrical harness that splices directly into your stock harness. Now, what this means is you can lose your stock tail lights completely and still be street legal. Hey, Stace, you about ready for these lights.
Just a
sec. All right, thank you.
Now, we can make our harness connections. Once again, these are well marked. Your backup lights go to the inside behind the white lens, your break and tail lights go to the center behind the red lenses
and your turn signal goes to the outside behind the amber lens.
Oh, yeah. Don't forget to hook up your ground when you bolt these things in.
Keep in mind if you install a roll pan with tail lights like this one,
you may have to do some trimming for clearance of the light boxes.
Another neat feature on our roll pan
is this license plate flip kit that can be installed to flip up or down. This gives you easy access to a frame mounted tow hitch if you decide to lower your truck, like we're gonna do our sport Sierra later on it also allows access to your spare tire too.
Installations and no brainer two bolts, hold it in place.
The last modification we need to make is to the spare tire mount now because this pan rolls down underneath. We need to move the spare a couple inches forward so it doesn't hit the pan.
Now, this bracket bolts right to the existing holes and moves the hoist a couple inches forward to give us the clearance that we need.
Another cool feature about a metal pan is that you can take this seam here and leave it stock like it is or you can weld it in for a really smooth look. Now, the moment of truth, mel go ahead and hit the lights,
turn signals,
reverse
brakes.
All right.
Speaking of breaks, we need to take one ourselves. Don't go away. We'll be right back
later on trucks. We'll show you how to hunt down a classic project vehicle. But first, it's more project sport Sierra.
Welcome back to the shop. Now, we've already put a custom ram air style hood and a rear roll pan on our project Sports Sierra.
Now we're gonna turn our attention to the business end with one of the most popular add ons out there and that's a tono cover. Now, not only do they smooth everything down for that cool sport truck look, but they're also good for performance because they eliminate bed turbulence.
Now, when it comes to tunnel covers the options are endless. There's fat ones, skinny ones, leaky ones and even rolling ones. We're gonna go with the smoother
from California Customs. It has dual recess locks and an ultra low profile that blends into the body lines for added strength. There's a one inch thick honeycomb center to prevent warping. This is real nice as well. A carpeted inter liner.
The first thing you need to do is set the cover down on the bed,
then you can mark where the hinge points are on the front rail.
Now, this is the main reason we don't have our parts painted before we put them on. As you can see this was damaged in shipping. Now, it's not bad enough to hassle with sending it back.
But if it was already painted, that's the pits, you have no choice but to have it redone
mel. Give me a hint with this. You got it.
All right, straight back.
That's pretty good right there.
After you get the tunnel out of the way place, the hinges on your mark, drill the holes
and loosely mount them so you can adjust them later on.
Now, one of the special features of this cover are these L brackets.
They go right here in the front corner
and they support this front rail to keep the hinge from flexing on you.
Now, we can put the cover back on, tilt the back end up and push the flat pins through the hinge holes once you've done that,
lower the cover
at this point, center the cover on the bed.
This is why we left our hinges loose.
Now, once you have it, how you want it, mark your hinges
and then take the cover off one last time
and then tighten the hinges down.
Now that we have our cover exactly where we want it. I need to mark the locations for the brackets of the lift struts
on this application, we need to go 17 inches behind the strut stud that's built into the bottom of the cover.
Then you can pop on your struts
and give it a test.
Now, like we said before, this cover comes with dual recess locks. Now, a lock does more than just provide security.
This cover has a rubber seal that runs all the way around the outer edge.
And when you lock the lock down that seals the rubber and makes everything waterproof. Now, installation is a snap
when you put on your lock cam, make sure that it points to the side rail of the truck in the locked position.
Now you can mount your bracket,
center it over the cam.
I like to tip it down just a little bit. So when you turn your lock, it snugs everything down,
I'm taking off this tailgate cover so everything will sit nice and smooth.
Of course, we'll have to come in here later and weld up these holes before we shoot some paint on it.
We're not done with our tunnel cover just yet though. Now it's time to add a little cool factor with this arrow wing, which like our Ram style hood is made by Keystone Restyling product. Now, the trickiest part of this application is getting the holes in the right place. The kit comes with locator guides to help in that process.
Then you can set your wing in place. But before you tape down your marks, make sure you have access to your keyhole.
Then you can drill the holes using the guides
and bolt it on.
Tell you what stace our sports here are starting to look pretty good. Yeah, it is. And the last thing we're gonna do on our truck today is put some teeth in the front end with this billet grill.
We got this grill from Hunter's Custom Automotive in Nashville, Tennessee. Now, believe me, all billet grills are not created equal some fit and some don't,
some just snap into place and others are a little more involved than that.
With this one, we need to remove the stock grill. We're gonna start by taking off this shroud
with a Phillips screwdriver, released the four clips
and out she comes,
make sure you lay something down to protect your chrome. Now, this original grill needs to be cut out of here and you can do that with a hacksaw,
but I prefer to use a cut off tool.
Now you can set in your new grill,
then mark your holes and drill them.
Once you're happy with the fit, tighten it down,
snap in the stock grill assembly.
And finally, the radiator shroud,
it doesn't fit any better than that and it looks great.
Well, now that we have some of the most popular add ons fitting, how they should, we need to roll it into a booth and shoot some paint on it. We can leave the tunnel and the roll pan on the truck, but we need to remove the hood so we can shoot underneath it.
Now, the next time that you see project sports Sierra, it'll have that monochromatic paint job that's so hot right now. Then we'll put a lowering kit on it and get it to stance it so desperately needs. Stay with us. Trucks will be rolling back at you after this
up. Next on trucks will hit the road in search of a classic off road project. Hunting willies is coming up.
We have a lot of people asking us about motor swaps, suspension kits, axle upgrades and paint.
So we decided to hunt down a classic vehicle that we can upgrade and in the process try to answer as many questions as we can.
We also thought it'd be a good idea to take you with us to hunt down a vehicle and show you what to look for when buying a project of your own.
First and foremost, decide what you want what you want to do to it and stick to it. This will allow you to lay out a basic budget that'll help you see the project through to the end.
We're gonna look at a couple of old Willie's wagons because we know we want four wheel drive and we need something big enough to put a V8 into.
Let's face it. Everybody loves an old Willie's.
Now, the first one is a 62 that the owner says it's still running strong does have some rare features like an original PTO winch and an overdrive. But since we're doing a drive train swap, that doesn't really matter to us.
One look at these rear quarter panels and you can see you're gonna have to spend some time and money just to get the body straight.
Now, replacement panels are available. But I guarantee if it looks this bad on the outside, there's a lot more cancer up underneath. Take that into consideration before you buy
this old wagon. Definitely has some potential. So we don't want to write it off the list just yet, but there is a 55 out there. We wanna check out before we make a final decision
like mel said before, this is a 55 which has a split windshield which is really cool.
The body is in much better shape too, the cow and the hood really straight. It's pretty rare for these not to be full of filler.
The only Rush spot is right here where it looks like somebody tried to fix this with fiberglass and some sort of funky tape.
Well, the good news is we've got a lot of thick metal here. So that's a pretty easy fix.
Yeah,
this really has a stock Hurricane six cylinder. Unfortunately, it's locked up tighter than Fort Knox. But remember that's not really a problem for us because we're gonna swap everything out anyway. Here's a blast from the past a six volt system. We'll definitely have to change that out. But look how solid it is around the inner fender and frame. That's definitely a plus.
It's important to take a good look at the running gear, especially on a four wheel drive.
As you can see these steering knuckles are leaking.
You can just figure on these breaks being bad and the spring is pretty well sprung. Make sure you factor all that into your budget.
Now, the interior on this thing is like looking into a time capsule still has the original seats as well as the OEM gauge cluster and look at this. The original Willie's floor mats are still in it.
Check this out. The original oak slats are still in the back. Those are usually long gone and this floor man that's solid.
Nothing wrong with the tailgate either.
All the hinges still work. Uh Here's the problem.
No spare tire mel we're gonna have to deduct for that
every little bit helps, man.
It didn't take long for us to decide which one was for us. Given the project we're going to do
so. After some serious deliberations with its owner, we loaded our 55 onto the trailer and started dreaming about the possibility.
What
you do
until
again.
Welcome back to trucks. Now, a lot of you guys own four wheel drive vehicles out there, but you're not spending your time banging around on a trail. No,
you're more into dropping a kayak into white water or catching some waves on a surfboard or a jet ski.
The problem is you're sopping wet, you jump inside your stock seats aren't waterproof so they go to pieces way before their time.
But the folks at
Weakley Hawaii figured if a wetsuit can protect your skin, why can't it do the same for your seats? So they designed a custom fit cover. That'll do exactly that. You have 200 color combinations to choose from. So you can personalize just about any vehicle. The design is simple but effective. You have a layer of neoprene rubber that's waterproof and washable and it's bonded to a half inch piece of foam for comfort.
The best thing about these covers is you don't have to remove anything. They just slide right on.
Now, the back is held in place by a piece of Velcro
snugs. Everything up
the bottom is just as easy.
It's held in place with these adjustable straps
that slide between the seat and the frame here and then tighten down underneath
and once you have it in place,
just sense those down.
Oh, another thing if you have any creases in your cover, don't worry about it. They'll go away in a couple of days
on our Jeep Wrangler. We can also cover the rear seat installations just as easy as the front, adjustable straps on the bottom. Velcro strips on top.
Man. Those fit like a glove, don't they? Yeah, they do. They look pretty cool too.
One of the biggest questions that people ask about seat covers in general is how they hold up under the sun.
Well, weak cos
got that covered with this UV protectant that reduces fading and damage from the sun
as well as keeps the rubber flexible. So it last now everybody knows that moisture can cause some funky smells. Well, they also have an odor eliminator to take care of that problem.
You can also get this shampoo that allows you to clean your seat covers while they're still in the vehicle. And unlike anything else washable, the more you wash them, the longer they last this whole set for our Jeep Wrangler goes for about $300 which is a whole lot cheaper than having your seats reupholstered
and now truck gear, parts, tools and equipment for pickups and sport utilities.
If you spend any time at all under the hood of your vehicle, then you probably spend just about as much time hunting down small nuts and bolts when you're ready to put everything back together.
Summit racing equipment can help you avoid that frustration with this magnetic tray.
It goes for about $7. It'll hold your small metal parts and fasteners in place so they won't come up missing when you need them most. It's also made of stainless steel and has a rubber foot to help prevent scuffing and scratching.
Now, anybody who's ever driven a late model Jeep Wrangler knows that the stock shifter on a five speed transmission can be a little sloppy. Well, Hurst has finally taken care of that situation with their billet plus shifter.
It's got a shorter throw and stiffer springs for quicker shifts.
It also has a removable handle and that cool black knob make the shift to hurst for about 225 bucks
for those of you who do body work. The tools you use to bump the metal can be worth their weight in gold. This kit from Eastwood includes body hammers as well as various dollies that'll work out any bend or contour. You can imagine a basic eight piece kit goes for about 100 and 30 bucks, which will be money well spent when you see what paint looks like, sprayed over flawless body work, that's gonna do it for truck gear. Here's a preview of next week's show.
We
will show you outdoorsmen how to build the perfect home away from home with an F 150.
After showing you how to catch your limit in comfort. We'll show you a 72 blazer that was built to catch your eye on the boulevard.
Then it's time for a lesson on the do s and don't of buying used hearts at a swap meet. That's all next week on trucks.
Well, that's gonna do it for this week's show. We look forward to trucking again with you next week. Are you ready to go? Ready?
I do like those seats. They're cool. Very cool.
So, what are we gonna drop this, uh, sports gear to
453 inches in the
front
in the rear
trucks is an RTM production.