How-To Videos How To Make A Fiberglass Hood

How To Make A Fiberglass Hood

Learning how to make a fiberglass hood is an excellent way to create a customized, lightweight body panel for your vehicle. Building a custom part allows you to add features like a contoured lip or delete factory trim while keeping the hood as light as possible. By casting a mold off your original steel hood, you can create a unique, one-off piece that fits perfectly. This process requires patience, but it will bring you one step closer to driving your completed vehicle.

Preparing The Steel Plug

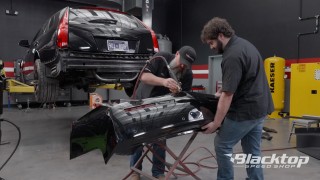
To build fiberglass parts, you must start by creating a plug from your original steel hood. It is a lot easier to modify the steel hood before making the mold rather than trying to modify a fiberglass hood later. Transfer the measurements from your intake onto the steel hood and lay out exactly where to cut the hole. However, do not cut the hole out yet. You want to keep the steel hood as rigid as possible while you build the mold off of it.

First, sand blast the steel hood. Seal it up with epoxy primer. Use 80-grit sandpaper to knock down the surface so your filler will stick. If you want to delete the factory trim, smooth off the contours left behind. The temporary part you are building is called the plug, which only needs to last long enough to pull a mold.

You do not have to spend all your time hand-forming pieces. Apply plastic filler, modeling clay, or even papier mache, as any of these could work as long as they hold shape long enough to make the mold. While the plug is disposable, the mold will have the exact same shape. Therefore, the plug must be straight.

Building The Contoured Lip

Now, start building the lip. Leave your tape on up to this point because it creates a slight edge that acts as a guide. Use a razor blade to cut a notch out of a plastic spreader. You can use this custom spreader to shape your bondo.

It will take several coats to build the lip, so shape and sand the surface as you go. You can forget the rule about not putting filler on thicker than a dime. Pack it in until it is full. Make sure to spread it in several thin layers to avoid heat buildup.

Once you finish smoothing the plug out, prime and paint it just like any other body panel. The plug must look perfect. This is because any flaws in the plug will show up as the exact same flaws in your final hood. At this stage, seal the finished plug with wax.

Creating The Fiberglass Mold

Use a wax specifically designed for plugs to seal any pores in the surface. This wax is thick. It is harder to polish off than standard car wax. Apply three coats of wax before moving the plug into the paint booth.

Next, spray on the water-based release film using conventional spray equipment.. This creates a barrier to help the cured mold pop off the plug. Do not lay it on too heavy. Doing so will cause it to fisheye, so build it up in four or five light coats.

Now, spray on the tooling gel, which is designed to withstand numerous heat cycles. Since it sprays like spackle, use a primer gun with the biggest fluid tip you have. Apply three coats of tooling gel to get the needed thickness.

After about an hour, you can stick down some glass. Use standard 2 oz mat and a tooling resin, which is more stable than production resin because it won’t shrink or move. Use a roller to work all the air bubbles out. This rolling action pushes the mat and the resin deep into the gel coat.

Make sure to keep the roller clean by dipping it in lacquer thinner now and then, or it will start to grab the mat and tear it up. You must apply a total of four layers of fiberglass. Once the glass is laid down, add plywood bracing. This plywood bracing keeps the mold in position so it does not shrink or move as it cures. Finally, pop the mold apart from the plug.

Making The Final Fiberglass Hood

Once you pop the pieces apart, get the mold ready to make your new Comet hood. Clean the mold up, remove the parting film, and wax it. You must trim, wax, prep, and clean the mold completely before you lay down the standard gel coat. This gel coat forms the actual face of your brand new hood. Standard gel coat is much cheaper than tooling gel, although it is not designed to withstand numerous heat cycles.

Next, lay down standard 2 oz mat. Build up two layers of fiberglass, allowing the mat to dry in between. While a street hood would normally be three or four layers thick, using only two layers keeps your hood as light as possible. You can go back and add an aluminum reinforcement later. Before laying down the final layer of fiberglass, you can place a custom tag underneath the glass to identify your one-off muscle car piece.

After curing, pop your completed hood out of the mold. Trim the edges. Sand them down to square the panel up, then set it on the car. You must build some stanchions and pins to complete the installation. Once you finish this minor trimming, you will have a nice, lightweight hood that is ready to rock.