Classic Trucks! Builds

Video Transcript

Hey, welcome to trucks. Today we're jumping right back on a project called the Little Red wagon.

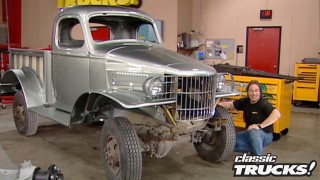
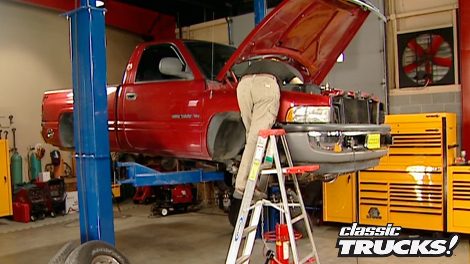
And the subject is this 99 dodge. Now, the purpose of this build up is to show you how to build a nice well rounded, dual purpose truck.

Something that's tough that you can take to work and go hunting with and

go four wheeling with like an old power wagon. But at the same time,

still look good and be a real tire smoker on the street like the old little Red Express.

As cool as that concept is though. You can't go out and buy a truck like that. No,

you have got to build it and that is what we're showing you

last week. When we introduced this project, we dealt with the performance part of it,

put on a super charger and a hood and headers and brought the exhaust out to the sides of the bed. Today, we're gonna deal with the off road part. We got a lot of cool stuff to show you. So let's dig into the suspension, get this thing up in the air.

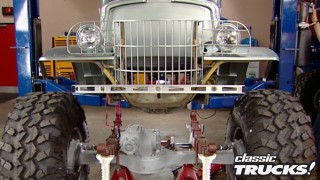
The kit we're gonna be using comes from a skyjacker and it's gonna pick that dodge up five inches, which is perfect because it's gonna look good, but it's not too much to where we can't still use the truck. Now for the rear, we got new leaf springs and hardware

for the front. We have great big coil springs, new upper and lower links. Urethane bushings at one end, big old hi joints at the other for nice flex.

And we have a whole pile of shocks because we're going dual shocks on the front,

dual steering stabilizer and of course all the bracketry and hardware to put it in. Now, notice there's not a lot here on this table. This kit goes in pretty easy.

One thing that we got that is not included in the kit is this transfer case indexing ring.

Now because I've got so much power under that hood.

I wanted to relieve the angle of that front drive line a little bit. This ring allows you to clock the transfer case down just a little bit and relieve that angle. Now, you don't have to put this on to a five inch lift, but

because of that application, it's a pretty wise thing to do.

First, we need to put the truck on a diet by getting rid of a bunch of unwanted parts like wheels and tires,

then dig in with both hands.

Now, the track bar

and the drag link

and the sway bar,

those are all gonna be reused So for now, we'll just pop them loose and let them hang

the next pieces to go in. The junk wagon are, well,

pretty much everything.

If it can be unbolted, it probably needs to come off.

Once everything is all disassembled,

it's time to start putting on the new skyjacker stuff. Now, the new lower links just go into the stock location.

The upper links bolt to the new relocation brackets

at this point. It's just a matter of putting in the new coil springs

followed by the Sharks.

And then the track bar location is lowered with a big beefy bracket to retain proper alignment

and to keep the truck from wandering all over the road,

then we'll replace the stock pitman arm

with the new Skyjacker unit,

reconnect the track bar

and install the drop brackets for the sway bar.

We'll follow that by hooking everything back up,

putting on the dual stabilizers.

And before you know it, your truck has a new suspension under it just five inches taller and a lot tougher.

Ok, to get the rear up in the air, that's pretty much a matter of just bolting in these new shocks and springs in place of the stalkers. Now, I've shown you that process many times. So you know how to do that

instead, while we're still up here on the front,

I wanna address an issue that always comes up any time you're building this kind of truck brakes.

You did think about your brakes, didn't you? I mean, you got more power going under the hood and obviously bigger tires are going on.

You need better brakes.

Here they are. This kit is from Stainless steel Brake Corporation and it's a direct replacement for what came stock on the front of that old dodge. Now, the kit is very simple.

You get new slotted rotors,

calipers and of course pads. Now, if you need more braking than this, you can also get a rear disc brake conversion kit from stainless steel brakes,

includes the rotors, the calipers, the bracketry, the hardware, everything that you're gonna need to convert from your stock drum brakes

to rear discs. Yeah, this is a cool kit now to install both of these is very simple. All you do is pull off the old components,

bolt on this new stuff,

bleed the system and you're done.

Ok. What about those bigger wheels and tires? Well, sitting right over there and if you want to see them,

you need to come back after the break.

Welcome back to trucks

and the little red wagon. Now, the whole idea behind this project

is to show you how to build a nice well rounded vehicle, something that's just as comfortable zipping down the highway in rush hour traffic

as it is banging down an old logging trail or four wheeling with your buddies. Now, so far today we've put on a skyjacker five inch lift

and upgraded to stainless steel brass. Now

it's time to finally put on some wheels and tires.

All right, tires. Since this is a dual purpose rig, we need a dual purpose tire

for those. We went to Toyo and got this new tire called the open country A T.

Now, the size we're using is 35 inches tall,

12.5 inches wide.

And we're putting it on a 17 inch rim, which is gonna look really nice for that five inch lift.

Now, the tread is nice and aggressive. You can see you've got a lot of cycling cut into the tread,

that's gonna give us a lot of traction when things get wet and slippery, but

this is not so aggressive to where it's gonna howl like an old dog when you're going down the highway.

Matter of fact, these are really quiet on the road which makes this the perfect tire for that kind of truck

for wheels. We made a call to weld racing and got what they call the dune five. Now, as you can see, this is an upgraded version of a five spoke.

It's got simulated rivets around the inside as well as the outer rim. So it's got a nice rugged look. The thing is fully polished, so it's gonna look awesome on the street. But

well, wheels are also famous for their strength because they're forged, which means this is incredibly strong for any kind of hardcore use. So once again,

you got the best of both worlds here.

Ok. It looks really good so far.

But what is missing?

Well, for a heavy duty off road truck, the power wagon had a huge winch and bumper on the front. And if you use your truck having a heavy duty bumper is more than just for looks. It is a tool and I've got something to show you.

Now, that is an awesome looking bumper.

This comes from a place called Buck Stop Truck Warre

and this is a serious piece of work. It is made out of quarter inch steel.

All the welds are smooth down,

everything is powder coated. This is a nice looking bumper

and look at this. You have holes here for a six inch off road light.

You have access panels like your stock bumper had.

Of course, this is for your fair lead roller where your winch comes through,

got a receiver hitch built right into the bottom

and then you have an access panel up here

so you can get down and work on your winch. Now, the winch

mounts back here inside tucks out of the way. So you don't even see it

now to mount one of these on the truck, you have huge mounting brackets bolt right to the frame

and you have mounting points built right into the bumper. Now, the rear bumper

is just as nice. Once again made out of quarter inch steel,

all smooth down.

You have pockets here for four inch off road lights.

Then you have some diamond plate on top. So where you can stand on it.

Now, the best part about these bumpers though,

they're a direct bolt in replacement

for what came stock on your truck.

And it doesn't get much more heavy duty than this. Now,

about a winch.

Well, there it is. I'd like to tell you about it, but

you're gonna have to wait till after the break.

I hate that for you.

Welcome back to trucks. When we left off, I had just introduced these massive bumpers from buck stop truck wear.

Now I'm gonna show you what kind of winch and lights we're gonna put on them.

The winch we're gonna be using is this Ramsey Patriot 12,000, which means this is a 12,000 pound winch.

It gives us plenty of power to pull out a full size rig,

but the mounting points are still the same as the smaller 9000 pound winch, which means this will fit just about any winch bumper. Now, with Ramsey, you got some choices here. You can go with the standard style remote

or you can use the wireless remote if you don't wanna have to dink with this cable. This is a pretty slick set up.

Now, another thing that it's a good idea to get

is an accessory package because you got the tree strap and snatch block and all this other stuff every time you need that winch,

you're gonna need some of this stuff and the winch doesn't do you any good if you can't hook it up to anything. Ok. Lights. We made a call to KC highlights and for that front bumper, we got the six inch slim line driving lights.

Now, you can use these things with a stone guard

or without,

we're gonna use them without, because this way we're gonna fit that front bumper perfectly.

Now, for the rear,

we got these four inch KC 50 series off road lights. Once again, these are gonna bolt right into that rear bumper and peek right at that opening. Now, both of these sets of lights feature 100 watt H three halogen bulbs. So we're gonna have plenty of lighting in front

and at the rear.

Now, both kits come with all the wiring

relays, harnesses, everything you're gonna need to hook this stuff up and make it work, which is exactly what we're gonna do. Now, we're gonna put all this stuff into those bumpers.

Yeah.

Ok. Let's go first.

Well, there it is

all 310 pounds of it and

you can't tell me that that is not awesome. Now, obviously, we have added some serious weight to the front of this thing

and some serious power under the hood and in doing so,

we have created a weak point in this truck and I wanna talk to you a little bit about that before we go today and it's the clutch.

We are going to solve our clutch problems with this dual friction clutch from center force. Now, they call this dual friction because the clutch disk has two different styles of friction material on it.

One for smooth engagement,

one for holding capacity.

Now, to go with that, we got their high performance pressure plate and throw out bearing. Trust me, this will handle whatever you wanna throw at it.

Now, in a couple of weeks, we're gonna roll the little red wagon back

and we're gonna finish that thing off by putting on some really,

really,

really cool stuff. And you do not want to miss that.

When we're talking about big rigs, everybody knows that they've got a big diesel engine, a lot of power, then they're pulling a big heavy trailer and all that weight and all that power comes together

in this little clutch assembly. Now, obviously, this is a lot bigger than what's in your street truck. But considering the amount of power and the amount of weight being pulled,

this is still pretty small. So how does it work? And how does it go all those miles?

That's what we're gonna show you

how it works is brought to you by Wyotech.

All right, Danny, today's subject is big rig clutches. Of course, the first question we always get is what are they made out of? So we have the older style fiber clutch,

the new ceramic clutches. Let's talk them through it.

The first one is the fiber. Um, you notice how much surface area that we have here to contact, either the flywheel

or the pressure plate. Um, we are still using these clutch plates today, but you don't use them as much. Not as much. Most of the trucks are around the ceramic. Ok. Why would a trucker still want to use something like that? It's a little bit more forgiving when you back into the dock or something, you can slip them just a little bit more. They burn up real good. They

do. If you want that smell, you want the

fiber to them.

Ok. Now, a ceramic clutch, why is that better? Um I think the pluses to this um is when it does come in contact with the center plate or the flywheel, they do grab, you're not gonna slip this plate. So you've got four contact points and that grips better than a full disk. It really does. I mean a lot of it is just because of the material that it's made out of. Ok. And obviously that material is very hard.

So what happens to the flywheel and the pressure plate, it kind of takes a beat.

It sure does. It'll remove some material in here. And so most of the wear usually is in these,

the center plate or the pressure plate, other than that is the disc, but these discs will last a long time. They will what, 300,000 miles? Oh, yeah, I would say that that would happen. A lot of it just depends on the maintenance and the driver, but they sure can do that.

Now, this big old boy, the 15

inch pressure plate.

What does this thing weigh? Oh, my. It's too much.

That's why you don't want to muscle.

I don't want to do

it.

And I notice there's some wear in there from this sort of clot

as you can kind of feel them in here. The little ribs, of course, there's no way to repair that. You just have to replace it.

All right, let's show them how this all goes together.

Starting out with the first,

the first

one, the first plate is gonna go in up against the pressure plate itself. All right, now we're gonna, we have to have a contact plate.

So we put the center plate in. All right, right in the dogs of the pressure plate

and the final one going against the center plate and then finally up against the flight.

And of course, the two clutch plates give us much more contest. A

lot more power

have always had,

always had the DS,

never a single

thing up just like that.

All right.

Well, now, hopefully you have a better idea of how the clutch works in the big rig.

So now just pick that up and put it up

to get that fly

wheel, you know,

you know, there is one thing that is almost inevitable as your truck gets older, rust in the floor pans.

Now, I've shown you in the past how to build custom floors and, but that's a long involved project.

What would you say if I said you might be able to skip some of those steps

and you probably say, man, that's bitching and you'd be right, bitching products has floor pan kits to help you out.

Now, the kits start with heavy gauge steel, floor pans that saves you one step.

They already have beads rolled into them that saves you two steps. It gives you more strength.

They have custom formed panels so you can make your own transmission hump, saves you three steps.

And then

you've got all the bracing. You're gonna need to brace up the floor and make it strong. It saves you four steps.

And since this is a universal kit,

well, you can cut this thing down and fit literally anything and that my friends

is bitching.

You know, when it comes to off roading, I am always looking for bumpers that not only look good

but will also handle the most extreme off road situations.

And these bumpers from Daystar products will definitely do both.

Now for the strength part,

they're made out of heavy duty,

thick walled tubing,

all the mounting points for your lights and your winch are built right in out of heavy steel plate.

The tubular design will give you superior strength

but also keep the weight down

and of course they look really good. Now, if you add to that,

the aluminum front skid plate, well, you got some of the best looking bumpers on the market and they're tough too.

So if you are ready for some bumpers that are not gonna fold up in the rocks and still keep looking good for you

day star products is worth a look.
Show Full Transcript