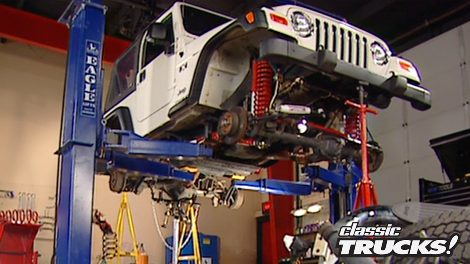
Classic Trucks! Builds

Video Transcript

Hey, welcome to trucks and Project Tomb Raider Rubicon. Now, if you missed last week's show, well, let me bring you up to date to what we're doing here. This is the 2003. Jeep TJ rolled it into the shop completely stocked and basically transforming it into a rig like you saw in the movie Tomb Raider Two. Now, the reason

is to show you what kind of potential these Jeeps have if you add your labor to some aftermarket parts.

Now, the best part is the kid that owns this rig. His name is Galen. Neither he nor his father have any idea what I'm doing to this thing.

They think I'm like changing the oil or something. So they are both gonna be very surprised when they not only see the Jeep but also the big old pile of parts that we have left over.

Ok. We've got this thing sitting right with four inches of lift and 35 inch tall tires. Unfortunately,

we've got a lot of rubber sticking out on the sides and that brings up a couple of issues. Number one,

we're gonna be slinging a lot of mud and rocks down the side of the rig and also on vehicles around us. Number two, we could end up with some tickets because most states have long

about this much rubber hanging out.

Now, we got a solution. It's right over here on the table.

These are bushwhackers pocket style flares for the Jeep TJ. Now, as you can see,

these are considerably larger than those stock flares and they've also got these cool recessed pockets for the mounting hardware.

But the big surprise here is how easy they go in, check this out.

All you have to do is remove the stock flares

and then the new pocket flares mount right in their place using new hardware in the original holes. No, drilling

the front flares go on just as easy and they also use the stock marker light. So this looks like a factory set up

as you can see those pocket flares give this Jeep a much t for rugged look.

Ok. Now it is time to come inside and deal with these seats. Now, the stock seats are fine

for stop driving,

but

they leave a little bit to be desired when you're bouncing down a trail. So

we definitely need something better. Take a look at this.

These are the master craft Rubicon suspension seats. Now, if you think this is just some sort of a plastic seat and little bit of foam padding, no, think again,

these are an off road racing suspension seat just like the off road racers are using.

Now, I know most of you have no idea what I'm talking about. So, first let's clear up what a suspension seat is and why they're so good.

Now, most seats are some sort of a shell that use foam padding or springs to absorb shock. Problem is

if you hit hard enough, you're gonna bottom out, you're gonna feel it all through your body, especially in your kidneys,

a suspension seat,

it's got a perimeter frame. Then you have this suspension liner that's stretched over it and tied down

and this basically suspends between the frames. Then your foam is on top of that. Of course, you sit on top of the foam.

Now, basically, since you are suspended in air,

kind of like a hammock,

well, you don't bottom out when you hit bumps, you just kind of float along with them. So these are extremely comfortable when you're driving down the road.

And the only thing to be planted in when you're bouncing around off road, these are the same kind of seats that Ivan Stewart

Walker, Evans, Kurt Leo

have been crossing finish lines with for over 30 years. Now, the Rubicon style seat

got the adjustable headrest,

adjustable lumbar support

and you've got the slots cut for your five point harness if that's what you're gonna use.

So now

all we have to do is put them in, this is how to do it

first. We'll unbolt the seat from the floor,

then

remove it from the vehicle.

Now, we can learn a few things about Galen.

All right. Looks like, uh, he spills a few things while he drives.

Obviously he likes Doritos. Um, looks like he wants to be a golfer and obviously

he really stinks at it,

then unbolt the seat from the riser

and we can add the seat

to the swap

me

since we definitely want our passenger side seat to still tip forward so people can get in the back.

You're gonna wanna relocate this cable from over here where it was originally over to this side. Now it just presses into this existing tab and that's it.

Then install these studs that come with a kit

slide on some spacers

got a seat belt adapter

and then you've got this little arm grease it up here in the center,

you hook the cable to that,

put it on. Now you're ready for your seat.

All

those new front seats are ready to go in. But first, I'm gonna deal with this rear seat because now is the perfect time to do it while you still have the fronts out.

Now, it is super simple because master craft has got these covers

just slide over it and they're held in place with zippers and Velcro.

And this not only lets you retain your stock fold and tumble rear seat,

but look at this,

it's gonna make it match those new front seats. Perfectly

to install the bottom part. Just lay the material over the cushion,

tuck it in here and back

and along the sides

and up underneath in front,

then flip the seat forward,

zip it up and work out the wrinkles.

The seat back is even easier because it just slides down over

and then fastens with Velcro underneath. And that is it

now, just like with any upholstery work though. It's a lot easier if you do this when the material is warm.

Once the rear seats done, all we have to do is bolt on these front seats

and then step back and take a look at this. These are awesome

and they not only look 1000 times better. This is a far superior seat all the way around. Now, for those of you that think we've lost a little functionality. Look at this still slide, flip the lever

forward, you can still get people and junk back here in the back. This is the suite

now that takes care of the seat install and brings us up to a break, but don't go far because when we come back,

I'm gonna show you how to stay in these seats. Even if you're upside down, we'll be right back.

These are great.

Hey, we're back. Now, what I'm working on here is a 2003 Jeep TJ

calling it Project Tomb Raider. Now, the reason for that was there was a really cool Jeep in the Tomb Raider two movie. And most people think, oh, that was a one off hand built rig. Totally unobtainable.

Well, the fact is most of the parts on it or are they

in the aftermarket?

So the purpose for this build up is to show you how to build something that's just as cool, even more functional than what you saw in the movie. All you do is add aftermarket parts to your time and your sweat.

Now, of course, the fact that the kid that owns this, Jeep has no earthly idea what I'm doing to, it

just makes it that much more fun.

When we left off. I had just finished installing these new suspension seats. Now we're gonna move on to an area

where a lot of people make mistakes and that is in the restraint system because

they think these stock belts are gonna do the job. No. Now your stock belts are great when you're driving down the road

and notice they're compatible with these new seats. This is really nice. But

when you go off road,

these are not gonna get it. And the reason being these stock belts were designed to protect you in an accident,

but they will do absolutely nothing to hold you in that seat. When you're driving along on an off camper situation

or going down a very steep hill or if you happen to roll over, you might get lucky

and catch a lock, but nine times out of 10, you're gonna get upside down and slowly fall out of your seat. It's not a good thing.

So you need to upgrade your restraint system and Mastercraft has those systems. Let's take a look at it.

This is your basic five point harness. You get your big three inch wide lap belt,

quick release latch. Then to that,

you add your shoulder harnesses

and here is your anti submarine belt goes down between your legs, keeps you from sliding out from underneath.

Now, most people will never use a complete five point harness. You just don't need it.

Most wheelers will start with the lap belt

and then as they get a little wilder, a little crazier maybe do some racing,

they'll add the shoulder harnesses, but no matter what you do, you need to know how to put these in, right. So they work properly. Now, this is how to do it.

All right, to mount the lap belts. All you do is drill down through the floor

and mount the hardware that comes with the kit. Now, notice it comes with a big washer for the backside.

So that bolt doesn't pull out through the floor when you need it the most.

Then of course, your belt just runs up through the seat

and holds you in place. All right,

let's deal with some of the misconceptions that people have about restraint systems. First of all, your lap belt, that is your main belt. This is what's gonna hold you in this seat.

Your shoulder harnesses are what keep you from pitching forward and having a bad encounter with a dash.

Unfortunately, the biggest mistake that people make with shoulder harnesses

is that they bolt them right down to the floor. Oh, no, no bad, bad. Now, the reason being is as you pitch forward, that's gonna line your spine right up with that mounting point. So as you pull against the harness, it's gonna pull back and it's gonna compress your spine,

which can rupture discs, do all kinds of stuff. It's just as bad as hitting the dash. So to mount your shoulder harnesses,

you want your mounting point to be right behind the seats or at least a pivot point like this.

So you pull horizontal.

Unfortunately, on most vehicles that means you're gonna have to mount some sort of a bar

behind the seats to mount that harness, which means it does away with your rear seat pretty much. Now, since this is not a hardcore vehicle yet,

and Galen's still gonna want to use his back seat some,

we're gonna wait on that until he's ready to go to that step.

Hey, welcome back. You know, one of the challenges that you face when you custom build vehicles is to not only build something that's different

but also build something that's useful and hopefully makes a design statement that no one's ever done before. That is a tough order.

Well, that's what the guys at bully dog technologies had in mind when they came up with the idea for a truck called Bold Elegance.

Well, the very first thing that came to us was the thought of designing the sides to, to fold down,

to give a new presence in the market, something that hopefully no one else had ever thought of.

So the first thing they did was get a 2003 Ford F 250 super duty,

which of course is packing the power stroke diesel.

Then they took it over to Alton Company Incorporated and let the cutting begin.

I kind of took a look at this. I didn't realize it was something so complicated to

showing me this pick up the box sides coming down like whoa.

Now the Ford was already long with its extended cab,

but that's not near long enough for a tailgate party.

So the truck was stretched and stretched until a full size door could be added in front of the stock rear door, making this a six door rig,

but that was still not enough. So 12 inches was also added behind the rear door.

All of this stretching opens up huge interior space where people can sit inside if the weather's bad

and just kick back in the cool leather seats,

crank up the custom stereo

or just look out of the dual moon roofs.

Now long is one thing but tall is also important, especially for a four by four.

So this rig is rolling on a Kelderman air ride suspension

that's controlled by Dakota digital.

And that lets you go from 4 to 8 inches of lift

with just the flick of a switch.

That way you can take the party out of the parking lot off the road to the River Lake Mountain,

whatever scenic spot you wanna enjoy the party at

and getting stuck shouldn't be a problem,

But getting dirty might be

all right up to now, the truck seems fairly normal normal. That is until you get to your destination, start flipping some switches, then you better hold on

first. The tunnel cover it lifts straight up as in vertical. Now, this not only allows head room

but it also shields you from the sun or the rain.

Then

hydraulic rams kick in and the bedsides rotate and lower

until they lay flat down to act as tables or benches

or a stage for dancers. Hey,

just depends on how crazy you want your party to be.

Now, this isn't all just hacked together.

Now, all the edges are metal finished. The wheel wells are finished out with leather. So as crazy as it may sound,

this all looks like a factory option.

Of course, no tailgate party is complete without food and drink

and a swing out grill will make sure nobody goes away hungry

and a cooler, make sure nobody goes away dry at

least before half time

and speaking of half time, if you wanna watch the tube and I

just flip a switch and the rear window drops down,

revealing dual TV screens in back of the cab.

So you can keep in touch with how your team is doing or who's winning the race.

Now, like I said before, this rig is packed in a power stroke diesel for a couple of reasons.

Well, we felt like the heavy duty diesel pickups needed a presence in the sport utility market.

And also it's the perfect platform for bully dogs put on their own diesel performance parts

that you've not only seen me install on the show,

but also that you can get for your own truck,

things like the Watchdog computer control system,

their high flow air intake

and of course,

who can forget their awesome propane injection and nitrous kits

that will make a diesel engine really stand up and bark.

All of that allows this big old monster to boil the hides with the best of them.

As you can see this, this is an amazing vehicle so amazing. In fact that it won the Ford design award at the SMA

show this year.

And that is impressive.

So does that mean that Ford's gonna build some of these na not anytime soon.

Unfortunately, the only way that you get to experience the bold elegance truck

is to make really good friends with the guys at Bully dog. And that means

you get to stock that little refrigerator

a lot.

You know, a lot of the parts that we feature here on the show can be a little expensive like that engine. Now, while that's really cool and you usually get what you pay for.

Sometimes it's kind of nice to see some parts that are cheap

and do what they say they're gonna do.

For example, this fram extra life air filter. What does it do?

Well, it's got special fibers inside the filter element

and it filters out more di

than other filters, which means cleaner air goes in the engine, which means the engine runs better and lasts longer. It's that simple and the cost

just about what you paid for that greasy burger and fries you had for lunch. Now, when you're spending the kind of money that you are for this type of engine,

that kind of money is a wise investment. The greasy burger and fries. Oh, that's up to you.

Speaking of keeping clean air in your engine,

you four wheeler guys know that that can be a little tough, especially if you play around in the water because

the water is always deeper than you think it is. So how do you keep from drowning out?

Very simple. You install a safari snorkel from quadrate.

Now, this allows you to relocate your air intake out of the engine compartment up the side of the vehicle to up over the top of the windshield frame

which puts it above the driver's head, which means you are going to have trouble breathing long before the engine does.

Now, the kit includes the snorkel, the hosing, all the hardware and the cutting templates that you're gonna need to put this in. Yes,

you need to cut a hole in the side of your rig. But if you're going to do any kind of deep water crossing or if you just want to keep cool, fresh air coming down into your engine.

Give quadra

a call

and get you a snorkel.
Show Full Transcript