Classic Trucks! Builds

Video Transcript

You know, there comes a time in every project when all the fabrication and fitting is done

and it's finally time to start putting things back together and

doing something with all these parts you've been accumulating for, who knows how long.

Now, of course, the amount of time you spent fabricating and fitting will directly affect how easy it all goes back together.

But one thing is for sure, this is where it all starts to pay off because this is where you really start to see the fruits of your labor.

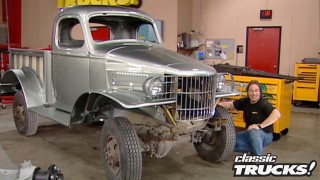
So follow along as we jump into the final stages of project crazy horse.

First things first when you're working on an older vehicle, one of the worst jobs to have to do

is to try to restore and reuse old hardware, what a pain in the butt.

So, investing in a new hardware kit is one of the smartest things you can do.

Now, this is made by totally stainless specifically for the early Bronco

and you can get it from auto crafters.

Now look at this,

this is literally every nut and bolt and screw that you're gonna need to reconstruct the body of that Bronco.

It's all 100% stainless steel

and it is all marked and labeled exactly where it goes. This is a huge time saver. Now, we also got some other stuff from auto crafters, hardware, weather stripping,

new dash pad, firewall cover headlight and tail light trim. Look at these mirrors.

This is a bullet style mirror that was on the early Shelby Mustangs and they look great on an old Bronco.

If you've got an early Bronco auto crafters probably has some parts you need

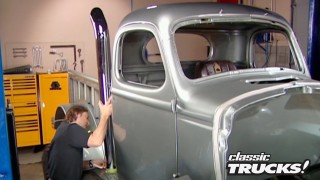
since this is a half cab truck. The first thing I'm gonna do is bolt in this bullhead and notice I've already drilled my holes for my roll bar.

That's because it's a lot easier to do with that bullhead out.

Now we're ready for the roll bar. We got this dual bar from wild horses and it pretty much just slides into place and this brings up a safety issue. Don't just bolt the bar to the floor. It's not strong enough. You're gonna have to use some sort of backing plate behind there.

So the bolts don't rip out if you roll it over or wreck it.

Most bars don't come with backing plates. So you're gonna have to make them.

So with the pattern marked on some steel plate,

cut it out,

then drill your mounting holes.

Finally bolt the bar in

back inside the cab, got the metal dash in place and those new digital gauges that we got from wild horses. Now, is that cool or what?

Now, the new dash pad slides over the metal dash and is held in place with some of those stainless steel screws.

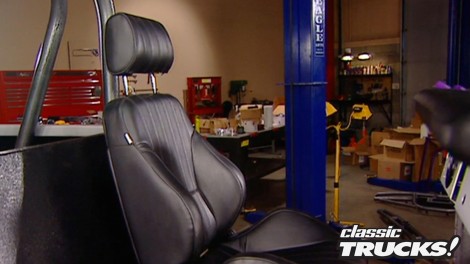
We also got these pro car rally seats from wild horses.

And since I've already built on my bracketry, it's just a matter of bolting these in.

Next up is the restraint system and you need something good, especially if you're gonna be wheeling the reg hard. Now, I'm gonna use a complete five point harness that I got from Crow Enterprises.

And it consists of a big three inch wide lap belt,

three inch wide, shoulder belts and a two inch wide and a submarine belt to keep you from sliding out from underneath.

And of course, they're all connected

at a quick release latch.

Now, the good thing about using a kit like this is you don't have to use it all all the time. If you're just going down the road to the store, just use the lap belt. Things are a little more serious.

Use the shoulder belts. If you're running Baha,

now

you're probably gonna have to use all five.

Ok, where to bolt them frame or body.

Well, if you've got a vehicle that's got a body bolted down onto a frame, you need to bolt to the body. And here's why even though they're bolted together, that frame is gonna move and flex a little differently than the body, especially if you've got a body left and if your seatbelt let's go all the way down to that frame.

You can actually get pinched in your seat by your seat belts in some extreme situations. Not good.

So we're gonna go to the body,

but you need a strong mounting point, not just to the floor pan, you don't want those bolts to come pulling out. So we

gonna have to use a backing plate just like we did with the roll bar.

All right

up to now, everything has been pretty much sliding right back into place. Now it is time to cut the hole for the new shifter in these brand new floor pans. That's pretty much a matter of just lining up the cut lines with the transmission underneath. Now,

notice I have drilled some perimeter holes from below

so we know exactly where that shifter opening needs to be

a jigsaw Sawzall or a cut off tool work best for these type of cuts

for shifters. Of course, our Atlas two transfer case comes with its own shifter levers.

But for the transmission, uh we're gonna go with B and M short throw sports shifter to give a shorter firmer shifts

and it just bolts on to that NV 3550 tranny

using four bolts

on the Bronco. The transfer case shift levers come right up under the driver's leg. But notice that these levers are custom bent so they clear

while I'm under here. It's a good time to put in these massive drive shafts that I got from high angle drive line. Now, they not only build ultra strong drive shafts,

but I've got a pretty severe angle kicking out of the front of this transfer case

and this shaft has a CV joint that'll go up to 42 degrees.

That's plenty.

And this is heavy.

Next, we're gonna turn our attention to the body. Now, obviously, this body has been cut for fender flares and we're gonna put some back on there.

But your average fiberglass Bronco fender flare

is just not enough flare for that big attire. So

we made a call to James Duff Enterprises and got these huge four inch trail flex flares

that are gonna look absolutely smoking on the side of this Bronco

and they are more flexible than you can imagine. You can absolutely punish these things on the trail and never have to worry about breaking them or ripping them or tearing them.

Oh, that's nice

to mount the flare

clamp. The fiberglass mounting flange to the fender in the proper location.

Then just mark inside the flange.

Now cut out the fender with a jigsaw.

Make sure you protect your paint with masking tape

with your flange screwed into place. Take your flare

and set it over the flange

then just mounted on with a supply of hardware and that

is it. Now, look at that. That looks really good, doesn't it? I told you it would and you guys can quit cringing that. I cut into that really nice paint.

I know you were now while we're here. What about this gas cap? Oh, you're gonna love this because I wanted something cool that had kind of a competition look. So I went to Moon Eyes. Got this 4.5 inch polished aluminum flip cap looks like it came off of an old Shelby Cobra. It's gonna look awesome on that Bronco

and mounting it up is just a matter of cutting the flange to fit the body line, drilling a few holes.

That is sweet.

Now, I told you when we started, we were gonna go fast and we have, but you can sit back now, take a break and relax because

we have to take a break but don't go too far because when we come back

more crazy horse.

Welcome back to trucks if you're just getting here.

Oh, you got some catching up to do because we are reassembling crazy horse and we're going pretty fast. So let me bring you up to date and what we've done so far. First we put in the roll bar, the seats, seat belts,

shifters, dash

drive shafts,

and then we put on big fender flares and a really cool gas cap.

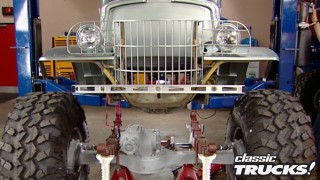
Yeah, I told you it was a lot, but we're not done yet. Now we're gonna move to the front of the rig and deal with some issues under the hood.

Now, obviously, we're gonna run power brakes on this thing and you should too, if you're running any kind of a big tire or doing performance driving where that power assist can help you get things stopped.

Now, the kit we're using is from James Duff includes the master cylinder,

the booster, the mounting bracket, even the proportioning valve.

Now, you're probably wondering about this kind of weird looking mounting bracket and that pivot shaft. Well, it's got a purpose check it out

since the engine compartment on the Bronco is so tight.

You really don't have any room here where the stock master cylinder was to run a power booster.

What this bracket does

is relocates everything

off to the side here so you can run a booster, you can still get your valve covers off, work on your headers.

That's really nice. But the best part is

it bolts right here to the stock holes.

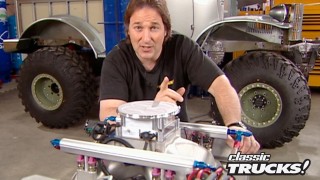
All right on to the engine. Now, obviously, it looks really good, but it is a little naked, meaning

that it doesn't have any accessories on it. But we're gonna change that if you will follow me over to the table

first, let's talk about brackets and pulleys.

Now you can spend forever hunting the salvage yards trying to find the right stuff and if you do find it, well, you gotta clean it up and paint it and make it work. Oh, a much better option is to go to March performance, get some of their aluminum brackets and pulleys. In this case, we're going with a serpentine system.

This is the setup for power steering.

This is the setup for your alternator

and this is the setup for air conditioning. Of course, you have your crank and your water pump pulleys.

All right, they look good. Now, how about after I get them really muddy?

Well, Marsh performance puts a poly coating on all their stuff. So you don't have to polish them all the time and they'll always look good.

All right. How about accessories? Well, we knew we needed to have something tough, so it was only fitting. We went to tough stuff performance for those. Now, the alternator is a powerful 100 amp alternator with a one wire hook up.

The starter is a just as powerful gear reduction starter. So we don't end up stranded on the trail

for those of you that have ever burned up a starter. You know exactly what I'm talking about

for power steering. We got a Saginaw power steering pump that will work really well with that James duff box down on the frame

and to keep everything cool, we got a super cool water pump. Now, don't let this fancy chrome finish here fool you. These are tough high performance parts. First.

They just happen to put them in a really nice package.

Installing the brackets is just a matter of bolting them on using the supplied bolts. And the spacers

and the accessories just bolt onto those. Now, here's what we've got got a dual serpentine system.

One belt runs from the crank over the alternator over the water pump,

the other belt runs from the crank over the power steering over the air conditioning compressor. If you're gonna use that

under the idler and back down,

simple clean and when they get muddy,

all I have to do is hose them off. Now, take a look at those, those look good.

The last thing I'm gonna put on today is just as simple as those pulleys and brackets.

And it's a radiator and a fan shroud because

one of the biggest problems you run into when you're four wheeling is overheating.

So we got these from James Duff Enterprises. This is a nice thick aluminum radiator made specifically for the Bronco

and it'll handle a high horsepower engine and keep it cool.

Now, all your fittings are welded into place. You even have bungs for automatic transmission. Since we're using a five speed. We'll go ahead and just plug those

fan shroud is always a good idea

because this focuses your air flow through the radiator, keeps the fan from pulling air in from the sides. And of course, these just mount up in the stock location

using these brackets that come with the kit

and that's it.

No, really. That's it. We need to take a break. But when we come back,

I'm gonna take you someplace where you can't normally go

sa

just can't get enough of trucks. Check us out online at Trucks tv.com.

It's called S

A,

it stands for Specialty Equipment Market Association.

And basically it's the aftermarket.

Recently we hit the show in Nashville that's geared to just trucks and truck accessories.

And here's just some of what we saw

for trucks. This Studebaker body kit for a late model El Camino was incredibly cool,

especially with its vintage Mopar motor.

The Chevy avalanche was well represented with this candy orange creation

that had been modified from one end

all the way to the other.

They even had off roaders like this massive new H two

famous rigs like this Godfather's hot wheels S 10

and even crazy stuff like this flame, Dakota Snowplow.

This is also the place to check out new products. See what

sa picks as the new products of the year.

We look at how functional it is, you know, is it a product that people can use? And we look at the style, we look at the technology behind it.

The engineering,

of course, we had a few of our own favorites.

Hey, what's the deal here, man?

Can we get a little service over here

on this one? I was skeptical at first

but walked away, very impressed after the demonstration.

And finally, we got the scoop on the new certification programs.

A has teamed up with a se a leader and automotive certification to create programs to allow our member installers to demonstrate their proficiency, demonstrate that they are the quality place to get an installation job done. And at the same time that allows people who love their cars and trucks to know that the person that is getting to do this work is going to be dead on the money.

What's this all about? How it works?

Oh,

it works

brought to you by Wyotech.

When you're talking engines, there's no doubt that the diesel is unique, but one of the most unique points is

it doesn't have any spark plugs. Never has, never will. So how does it get its fire? Well, it gets it through injection and we are gonna show you how it works. All right, Dan, why don't you walk us through the basic set up of a diesel fuel injection?

This is a 24 valve Cummins ISB engine which you'll find in a lot of the C or the Dodge pickups today. Yes, you will

out with it. This is the, the lift pump with a transfer pump. Um, there are several different styles of these gear pump, uh plungers. This specific one is electric and what it does is brings the diesel fuel up out of the tank through the lift pump. Of course, through the filtering system

have that because we don't want it going into our injection pump.

Now, how about the injection pump? Tell us about that. You can see it it kind of looks a lot like a distributor. You can see all these lines kind of go all the way around.

And what it does is each one firing and firing order 153624, right around to the top of our cylinder. Now this is gear driven off the cam. Right. Yes, it is. From the crank shaft to the cam to the, to the gear pump itself. Ok. A big question about diesels. Look how nice and pretty these lines are. And then you get up here and it's like

what happened to them? What is this? They're ugly.

What happens is, is we want every one of these cylinders to have the same amount of fuel and the way that we can do that is to keep every one of these lines the same length.

And so we're, of course, we're different distances between the injection pump. All right, and the injector itself. And so we kind of have to wind these around a little bit, sort of the same length. Now on a, like a multi port fuel injection on a gasoline engine, you've got maybe 60 pounds of pressure at the injectors. Ok. On a diesel, what do you have? And we can be anywhere from 5000 to 25,000 pounds of pressure going in there, depending up on the engine and the size of the manufacturer. So now just to show you what that really means, we've got a little demonstration here for you. Now, Dan, tell us what we got here. What this is is it's actual injection tester and what it does is we just talked about um setting this at 5000 to 25,000 pounds of pressure and that's what this actual tester does. This is the actual tester. This is the actual injector, ok. Put your glasses on there

and pump away on the handle.

Oh, that's awesome.

Now, keep in mind pack that big flame into that little tiny combustion chamber. At how many times a minute? What? 1821 100? That's great, man.

Hit that again. We would go

and this is how many P si

about 323,200. It goes to 5000

and now you know how it works. We gotta rig one of these

in my truck man. We'll keep them from behind you. This is better than flame throwers. This is awesome

quick

since we're talking about a lot of Bronco stuff today. Here's a question for you.

How would you like to have air conditioning in your early Bronco? Yeah.

Well, now you can with this kit from auto crafters, this is a complete heating air unit with everything from the compressor, the condenser, a wiring harness, the switches,

the outlets, the ducting, the hardware, the whole

even the heat and air unit itself. Now, since this is made specifically for the early Bronco,

it installs fairly easily. Something you can realistically do in a weekend.

So if you like to drive that old Bronco a lot and you wanna keep it cool. Well, auto crafters is just a phone call away. Now, if you're working on a project two wheel drive, four wheel drive doesn't matter

one area that in the past that you've always been kind of limited to what you could find is in your cables

and that was before low

car came along. Now, they specialize in custom cables like throttle cables. Here's an electronic transmission, kick down

chrome brackets and springs for your throttle. Look at this emergency brake cables. Now, if you're not into the Brady Stainless, look, you can get any of this stuff in the black housing.

Of course, you can get speedometer cables, but they're not just about cables. They also have accessories

like emergency brake handles, gas pedals,

custom dipsticks. Matter of fact, if you're working on something weird

and you need a special cable or a dipstick and it's not in their catalog,

heck, they'll custom make it for you and it'll be awesome if you're working on any kind of project car, truck, motorcycle, it doesn't matter. Low car is a number you gotta have in your little black book. If you're into smoothing out the contours of your truck, nothing will quite help do that. Like a rear roll pan

and ground force has got some pans that you need to take a look at.

Now. These pans are made out of a BS plastic for greater flexibility

and impact resistance.

They've got the license plate box molded right in to keep you legal and very smooth.

And the best part is you can install one of these in a weekend and that includes painting it

not bad for something that'll change the look of your truck as much as this will. Well, this wraps it for today. Next week we're gonna finish off crazy horse bumper winch, get it ready for the trail. And then in the weeks following that,

we got some more cool stuff planned for you. We'll see you next week.
Show Full Transcript