Classic Trucks! Builds

Video Transcript

Today on trucks. Project Rolling Thunder picks up some speed when the guys strap a supercharger on their stock 5.9 L Dodge Power Plant.

After that, they've got one wild machine to show you that GM will make available to anyone who wants one, the Hummer H two.

Finally, we'll give you some more ideas for your toolbox and shop. That's all today on trucks.

Welcome to this week's show everybody. If you were with us last week, then you saw the introduction of Project Rolling Thunder. We put a Hodgkiss

performance suspension on our stock Dakota RT followed that up with a killer wheel and tire combination

as well as an all steel cow

induction hood and that takes care of the rolling part. Now it's time to deal with the thunder. Now, since we have the Ford Lightning in our sites and all those are supercharged.

Well, we need to put a supercharger on this just to equal out the playing field a little bit.

Now, the blower we're gonna run is from Power Dy. And of course the kit comes with all the hoses, brackets and fuel modifications you're gonna need as well as the blower itself that you can get neither a sat

and finish or polish like ours is here. Also, keep in mind the best thing about this setup is it's emissions legal in all 50 states. Now, for those of you that don't know the power di is a centrifugal style supercharger, which means it's turned by a belt

that draws air in here, compresses it with this special impeller and then blows it out here.

Now, you can see by this cutaway that this is a belt driven supercharger, which makes it a lot quieter than a gear style

and it's also seal lubricated, which means you don't have to run a line up here to lubricate the housing

and also that keeps it a lot cooler, which is very important with a supercharger.

Now, before we start bolting our upgrade on, we need to find out what our baseline numbers are. So we can accurately measure our horsepower increase when we're finished with the project

stays. We're getting just under 200 horse at the rear wheel. That's pretty impressive. It's not bad for a stock vehicle. Keep in mind though, this is a 360 it'll kick out a whole lot more than that.

So after it cools down and we disconnect the battery,

we're gonna tear into that fuel system.

The first thing we need to do is set the supplied fuel system up against the driver side frame rail

and then mark the holes,

then drill out the hole

and finally bolt it to the frame.

Now, up here in the engine compartment, we had to mount the fuel regulation unit to the firewall as well as the fuel system, relay to the inner fender on the driver's side. Now that we have both units mounted up, we can go ahead and run the fuel and electrical lines down the firewall underneath the space.

You got it man. Yep, I've got it.

Now, we can make the connections from the regulator down to the fuel system

using the diagram supplied with the kit.

Then we'll make our connections from our relay

and then finish up the electrical under the hood

over here on the passenger side of the engine compartment. We also had to pull out the air filter box as well as the intake tube.

Now we have to remove the computer because it has to be relocated.

Once you have the relocation bracket in place,

you can remount your computer.

Now, for the engine disassembly, we took off the drive belt,

we also need to take the stock coil off of its location down on the block to make room for the super charger.

And we're gonna remount this thing up here on top of the valve cover

using the hardware that's supplied with the kit.

This is also the perfect time to change your spark plugs. Now, paradigm suggests you run a heat range or two colder than stock. They also recommend you stay away from platinum and use standard ones. It's also a really good idea whenever you're changing plugs to check the gaps before you install them.

Now, one of the main concerns with putting on a super charger is detonation. So to help prevent that, we're gonna upgrade the fuel injectors as well with these 24 pounders that we got from Power Dyne. Now, these don't come with a kit, they will cost a little extra, but it's money well spent.

Now putting these guys in is a piece of cake. All you do is pop off the fuel rail,

then we can pull out the old injector,

put on the new one.

Now, it's a good idea to use some oil around these old rings

that'll help it slide in real well and seal up at the same time.

There's still a few things we need to do to make room for our super charger. Number one,

we need to move the dipstick back. Now, there is a supplied bracket that's gonna relocate the tube

and once we have that in place, we can reattach the stick to it.

Now we're ready for the air inlet plate and filter. Now it utilizes this hole right here in the inner fender which allows it to draw in plenty of cooler air from outside the engine compartment.

Now we have to do is mark and drill our holes before mounting it up.

Now, the only thing you have to watch here is that you have plenty of slack in your wiring harness. So the plate doesn't pinch it.

Now, we're ready for the blower mounting plate.

Now, it slides right in here.

Bolts to the front of the head

where the coil and the belt tensioner used to be,

looks like you're about ready for this. But

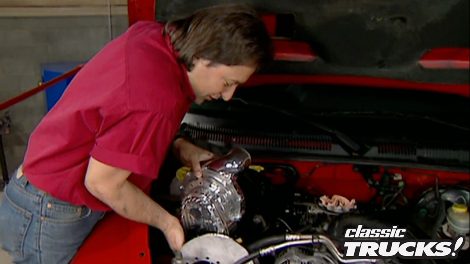
now it's time for the crown jewel and that's the super charger. Now it bolts right to this bracket using the hardware that comes with the kit.

As you can see, this is a really clean installation

because it tucks real nice down here into this corner.

Now, with the supercharger and the belt tension are pulling in place. It's time for the hookups.

Now for the fresh air, I've hooked this flex hose to the filter and it rolls around and into the supercharger intake.

Now it's time for the supercharger outlet tube.

Now, the Oboe goes to the outlet of the supercharger.

The other end goes to the factory bonnet

that sits down on the throttle body.

Once all that's in place, we can reroute the valve cover vent from the bonnet down to the air intake plate.

Then we'll cap the hole in the bonnet with a cap that comes with the kit.

All we have left to do is put this new belt on and we'll be finished with the blower part of the project. But right after the break, it'll be time for the fun part and that's hooking up the electrical. Don't go away. We'll be right back.

Electrical, don't you love it?

Oxymoron? Fun Electric.

Actually. Paradox. I guess it would be,

wouldn't it?

Later on trucks, we've got one extreme machine from General Motors to show you. But up first we still have some work left to do on project rolling thunder's ignition system.

Thanks for staying with us. Everybody. Now, if you're just joining us, we just finished putting a power

on super charger on project rolling thunder. Now, we could stop right there and have a lot of fun with it.

But if you want one of these things to perform to its full potential, you really need to upgrade the ignition system too.

And

that we went to crane for one of their fireball high six ignition systems

that comes with a manual timing control, a universal trigger as well as a high performance coil. Of course, for the best results, we're also gonna go with a brand new set of their low resistance plug wires.

Now, I know that that seems like that's a lot of stuff to find a place for since each application is a little different. That's exactly what you need to do first spend a little time deciding where you're gonna mount each piece. Keep in mind you gotta keep them away from engine heat,

they gotta stay dry

and you definitely want to mount a place where the wires are gonna be long enough to hook everything up. And with all that in mind,

looks like the best place for this ignition box. It's gonna be back here behind the battery. So we're gonna take that off first.

Now, all you have to do is drill the holes,

then mount your box and reinstall your battery.

One of the neat things about the high six box is that it comes with a control module that allows you to manually adjust the retard in relation to the boost, which gives you maximum performance without pinging or what's really better known as detonation. Now, you can mount this unit anywhere you want, but we're gonna put ours right under the dash here. So it's out of the way, but we still have easy access.

Now, back under the hood, I went ahead and disconnected the supercharger outlet tube to give me some room to work and to show you what we're doing when we mount the coil and the trigger. Now don't be afraid to move some of these stock pieces around. Give yourself some room

on the dodge. If you move this vacuum regulator just a little to the side, this will open up plenty of room here on the firewall to mount your coil and your trigger. Just remember any time you move a piece like this, you need to check your hoses and your wires to make sure they're long enough because you may need to lengthen them.

Now, that space has the coil and trigger mounted,

I can go ahead and change the spark plug wires. Unfortunately, this is probably one of the most overlooked areas when it comes to engine upgrades.

But all it takes is one bad wire to keep your motor from running its peak performance. Now, the best way to do this is to take out one wire at a time like I just did

and replace it with a new one

that's roughly the same length. Now, what this is gonna do for you is keep you from getting your wires crossed up.

Now, it's time to tie everything together and the hookups really are pretty simple. Now, the high six block goes to the retard module inside the cab

as well as the coil and the trigger. Now, the trigger eliminates the need to have to splice into your stock wiring harness and it hooks to the original coil.

Now that continues to be hooked up here because that makes sure that your fuel injection and your onboard diagnostic system continues to work out. Should

this, of course, goes to the new coil?

Well, that pretty much finishes up the blower and ignition upgrade on project rolling thunder, but we still have a few tricks up our sleeves before we show you the numbers. Now, if you're curious what that's gonna be, well, you're gonna have to come back next week because it's time for us to take a break. We'll be right back after this

up next on trucks. We'll take a look at one Hummer of a vehicle that GM is slated for production.

Welcome back to trucks. Everybody.

You know, when the

humvee first came on the scene as the military replacement for the Jeep,

it was arguably as good as it gets off road

and just like the Jeep, it wasn't long before civilians like Arnold Schwarzenegger had to have one for himself. So in 1992 the Hummer was made available for those chosen few with deep pockets.

And the fact is we've been fortunate enough to be able to drive some of the most radical versions of this vehicle from off road. America's punched out big block 502 version

to the same machine that Rod Hall drove to one of his numerous Baha 1000 titles.

But unfortunately, the Hummer was never designed for the street, at least until now introducing G M's future production vehicle, the Hummer H two.

Now, as you can see the H two styling is similar to the production Hummer, but it's been cleaned up quite a bit with fewer exposed rivets and fasteners as well as some softer, more rounded lines.

It does retain the five door design but with a shorter and more narrow wheelbase for better maneuverability.

Speaking of maneuverability getting in and out of this thing is made much easier thanks to doors that are offset from the body.

Visibility is also much better with a wrap around windshield as opposed to the two piece design that was on the original Hummer.

Now, the front end is definitely Hummer with a modern flare from the integrated winch and Brill to the redesigned hood

under the hood is a Vortex 6 L V8. But get this, we've heard some rumors that uh the new

Duramax diesel just might be an option for this thing. Oh, yeah.

The modern styling cues continue with an upgraded version of the wheels with bead locks as well as custom cut 35 inch good years. Moving to the rear, the exhaust exits high in the bumper which keeps it safe from harm.

Now, I know the question that you're probably asking is does the H two come with those expensive portal style axles that made the original Hummer so awesome off road?

Well, the answer is no because most people don't need anything near that hard core, but don't get the wrong impression here.

What you will find are skid plates to protect the entire underbody of the vehicle,

a heavy duty four wheel independent suspension

and short front and rear overhangs for great approach and departure angles

behind the power operated canvas, sunroof. It becomes quite clear that GM spared nothing on the interior either

with four suede and leather bucket seats.

The dash is heavily accented with aluminum trim and classic style gauges. While contemporary touches include a GPS DVD CD

and of course you have to have the OnStar satellite system.

Well, there it is. You knew it was bound to happen.

You got a refined, less expensive version of the testosterone ridden, big boy, the Hummer.

And if you're anything like us, it's pretty obvious GM is gonna have a hit with the H two.

Just can't get enough of trucks. Check us out online at trucks, tv.com.

Welcome back. Now, if you hang around the shop for very long, sooner or later, somebody's gonna start talking about tools.

That's because they're cool and you obviously gotta have them. But the real question is, what do you really need to do some of the projects like we do here on the show. Now, as you might remember, we started this series a couple of weeks ago talking about some essential hand tools. Every shop's gotta have today, we're gonna continue that and throw in a few specialty tools while we're at it.

The first thing we wanna show you is a tool that no box should be without and that is a torque wrench, especially if you do any kind of engine building.

Now with these, you definitely get what you pay for. So make sure that you spend some money

and get a good one because cheap ain't gonna get it here.

Now, you wanna get a couple of different sizes so you can crank anything from 5 ft pounds all the way up to those big 300 ft pound suckers. Finally

make sure you get one for inch pounds because sooner or later you're gonna need one of these too. Another thing you can't live without is a good assortment of pliers. And we're not just talking about different sizes of

standard plier. We're also referring to specialty pliers, everything from bent to straight needle nose dikes and cutters as well as adjustable channel locks. Believe us having a good set of these around can really help save the day

because the truth is you never really know what you're gonna need until you're knee deep into a project.

And by then it's a little too late to figure out you don't have what you need

next up is the tool that most people call the miracle tool. That's because it's part vice part wrench part pliers actually makes a pretty good hammer when you get right down to it. That's the vice grip.

Now, you need at least three different sizes of these in your box as well as some specialty versions like these needle nose. Now, since working on a vehicle involves a lot of metal work. Having some special clamping versions of the vice grip can literally mean the difference between

taking 30 seconds clamping a couple parts together, drilling a well placed hole or taking 30 minutes chasing the parts all over the place and still not getting the hole where you want it.

Now, it probably goes without saying, but you have to have a good selection of Phillips and flathead screwdrivers and almost as important as those are some really big screwdrivers and pry bars. Now, don't get the wrong idea here, you're not gonna twist any screws loose with these. Now,

these big old boys are gonna be used for twisting wedging and yanking out those really stubborn parts.

And once you've had a few of these in your box for a while, you're not gonna know how you got by with it.

Now, one of the most used tools in a shop like this is the drill, which means you've got to have some quality drill bits.

So instead of going out and buying a bunch of small sets like this and piecing them together and get what you need,

we strongly suggest going out and buying a large set like this right off the bat. Now you're also gonna wanna invest in some big bits like this

because eventually you're gonna need those too.

Now, keep in mind the quality drill bit is not cheap. But if you invest in them right off the bat, you'd be a lot better off than having to go out and buy them to replace the cheapies that you burn up.

Just like we told you the last time we talked about tools, we've only scratched the surface of what you need in your box and your shop today. But don't worry in the weeks to come, we'll continue to give you an idea of the things we think are really necessary to get the job done right the first time.

So you wanna lower your truck in the front, but you're too cheap to get an aftermarket lowering kit. Well, it is possible to do it the old fashioned way and cut the coil springs a couple of things to remember here though. Don't ever use a cutting torch to cut a spring.

The heat will affect the tinsel strength and basically kill the spring if you're gonna cut them, use a cut off tool or Sawzall also to keep from dropping things too far, only cut off about a quarter of a coil at a time, then refit the spring, set the truck down on the ground, see how much you've dropped. Now, obviously, this is gonna take a lot of time to do it, right. But it is possible to get the look you're after safely by using these tips

and now truck, gear, parts, tools and equipment for pickups and sport utilities,

no matter what kind of truck you're working on. Most people recognize the benefits of relocating the battery from the engine compartment back to the bed or to the floor

up until now, though most battery boxes aren't exactly what you call attractive.

Well, that was until bitching products came out with their thin aluminum battery cover made specifically for the Optima battery.

Now, you can mount this thing straight up sideways or heck even upside down if you spend a little time polishing and painting this thing. It'll really knock your eyes out.

You can pick up one of these boxes without the battery for about 100 and 75 bucks.

One of the best things about a truck is being able to reach over the side of the bed to put things in or pull things out. Problem is you open up the side of your bed to some pretty nasty scratches and paint chips in the process. Well, here's an idea called the Scratch Guardian

that makes that problem. A thing of the past. It's a vinyl cover that's held in place with magnets

to protect the side of your bed when you're putting it to work. Now, things get messy. You can easily clean it up with soap and water. And when you're finished, all you have to do is pull it off, fold it up and put it under your seat, protect the side of your truck with the scratch Guardian, starting at about 30 bucks.

That's gonna do it for truck here. Let's take a quick look at next week's show.

We'll dive into the cab of the Harry Hauler to show you how to lay down some brand new custom floor pans. We'll also steer you in the right direction on a couple other goodies for our 34 international.

After that, we'll introduce you to a pro stock truck pilot who's making a difference in the lives of kids from the inner city of Atlanta.

That's all next week on trucks.

Well, that's gonna do it for this week's show. We appreciate you hanging out with us. Yeah, we got more trucks to roll at you next week. What are you doing? You know, I've been looking at this. It wouldn't take much to cut this top off of this

trucks is an RTM production.
Show Full Transcript