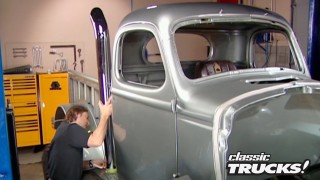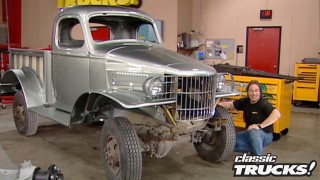
Classic Trucks! Builds

Video Transcript

Today on trucks, the guys roll project trail boss into the shop and tear into the top end of their stock straight six as they try to ring out as much horsepower as possible from their CJ seven.

Then they've got the latest from Ford to show you. It's part truck, part SUV, and it's called the sport track.

After that, we'll finish up with our U joint and drive shaft tech. That's all today on trucks.

Welcome to this week's show everybody. You know, there's all kinds of upgrades out there. Thanks to a healthy aftermarket, but one thing everybody wants, whether they're into the street stuff or the off road thing is horsepower. So today we're gonna take care of a common misconception among you off road guys who think the only way you can spend these big old tires off road is with V8 power ready to pull this off. You ready to go.

Now, the one thing that people don't realize that there is a lot of potential in the stock straight six in the Jeep,

it's got a lot of torque and it's a lot lighter than a V8.

The fact is you don't need to go through the hassle of swapping in a V8 just to get the power of one. We're gonna show you how to do that.

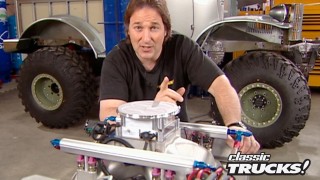
Now while stay starts tearing apart the trail boss, I'll go ahead and show you the kit we're gonna use. We got ours from Clifford Performance who specializes in in line four and six cylinder motors and comes with everything you'll need

including a new 4.0 head. It's been fully dressed with brand new valves, a cam lifters, roller rockers as well as a brand new header.

And like we said before, this project isn't near as involved as doing a full blown motor swap.

You will have to disassemble things a good bit. I've already started by disconnecting the battery taking off the air cleaner. Now it's time to get rid of this old carburetor and you can see that somebody's already done some creative plugging work on these vacuum ports to try to get this thing to run better. Unfortunately, with that carburetor, it's pretty much a lost cause. Strongly recommend replacing this carb. If you're gonna do this project.

Now, before we go any further, we need to drain the fluids on our straight six. We'll go ahead and get started with the radiator.

After that's drained,

we'll pull the plug on the oil pan.

Now, with the fluids drained,

we can go ahead and pull out the fan shroud,

followed by the fan itself.

Now it's time to pull the stock intake manifold. Now, the first thing we had to do is take off the heater hoses as well as all the electrical connections. Now, it's a good idea on a project of this size

to mark all your wires and hoses. So you remember where they go when you put it all back together.

Now, if the radiator hose is out of the way, we can go ahead and remove the radiator itself. After that,

we need to pop out the ac condenser. Now, we know ours is already dry so we can go ahead and pop off the hose. But if your ac is charged up, you need to take it somewhere and have it discharged before you pop the hoses off to protect yourself and the environment

next up is the power steering pump. Now, the good news is you don't have to take these hoses off, just make sure that you wire, tie the pump up out of the way. So it doesn't hang by the hoses and damage them.

Then we'll pull off the exhaust system

followed by the exhaust manifold.

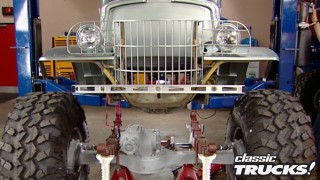
Now, since we are replacing the cam with the motor still in the vehicle, we have to take off the front grill. So we have plenty of clearance to pull the cam out on our jeep it unbolts from both side fenders as well as the cross member. Also, keep in mind you need to disconnect your wiring harness from the headlights before you pull the grill off. Also, we're gonna have to lose that winch for clearance as well.

Right.

Well, the disassembly of the driver's side is complete. Now, we can tear into the other side of the engine. Now, since that head needs to come off, air conditioning, compressor, alternator and all the brackets need to come off first,

since we're replacing the entire valve train. First thing you need to do is make sure the motors at top dead center before you start tearing things down.

That way, it will be a whole lot easier to set your timing when you put everything back together later on. Now that we have the timing set, we can go ahead and pop off the pulley and the damper.

Now that mel has the motor set at top dead center,

we can go ahead and mark the rotor and the housing on the distributor for reference later on.

Now, the fuel pump is also run by the cam. So that don't need to come out. We'll also take off this coil. So we'll have room to get in there, clean up the block to paint

it.

Now that we have enough clearance to remove the head, we can go ahead and start tearing it down.

First thing we need to do is remove the valve cover.

After that, we can unbolt the rocker assemblies and pull those off,

then slide out the push rods.

Now we can unbolt the head and remove it along with the lifters. Now, this thing's pretty awkward and heavy, so I'll get Stacey to give me a hand with that.

Now, on this build, the only parts we're gonna reuse from the stock motor are these push rods. Everything else you see here, it's gonna have to make an appearance for local swap meet.

We're about ready to get that cam out of there, but first we need to take off this timing cover. Now, a big tip here when you're taking off the cover, make sure that you lift it

and go around and make sure that the gasket is free from the cover. If you don't do this,

you'll damage this gasket and you'll have to take off the pan to replace it.

That includes unbolting the motor mounts, jacking the motor up, taking off the starter. In other words, you need to be careful here.

Now you can take off the timing set

and then carefully. So you don't damage the bearings, slide out the cam.

If you're really starting to feel nervous, go ahead and take a breath because we're finished with the tear down on this project. Now, even though we steam clean the motor before we started the project, we still wanna hit the block with a good degreaser like this flow way we got from cano laboratories. Once we have everything cleaned up really nice, we're also gonna hit it with a high temperature engine paint to really make things pop another thing you wanna clean up or any parts that you're gonna reuse. Take a few minutes, toss them in a parts cleaner, clean them up, throw some paint on them. That'll make it a lot nicer. When you go to reassemble this stuff, tell you what, man, we got a lot of cleaning and painting to do, but right now we need to take a break. Don't go away. The best of this project is still to come.

This is cool. This is gonna be neat.

Later in the show, Stacy has some more you joint and drive shaft tech to walk you through.

But up first, the guys are gonna finish tweaking the top end of the trail boss as they look to squeeze V8 horsepower out of their straight six.

Welcome back. Now, if you're wondering what this big mess is. Well, it's the remains of our stock 2 58 6 cylinder

that we've torn down to make room for some upgrades we got from Clifford performance. Now, of course, before we can put the good stuff in. Well, we had to clean it up a little bit. That's right. During the break, we cleaned up the block and shot it with a good high temperature paint while we're at it. We also sprayed some black on the frame. Now, the reason for doing all that is for more than just looks because with everything cleaned up, it's a whole lot easier to work on it

and find potential problems like small leaks. Once you have everything put back together,

finally, we can start putting things back together. First thing you wanna do is lube up the cam real well and then carefully slide it into the block. So you don't nick the cam bearings.

We're gonna follow that up with a new timing set. Now, this doesn't come with the kit, so we pick this up separately. Now, strongly suggest upgrading the plastic style gears for ones that are all metal and they'll last a lot longer.

Now, line everything up

and slide it in place, make sure your timing marks stay lined up and don't forget

your oil slinger on the crank shaft.

Another thing we recommend you pick up for this project is a complete gasket kit for the engine. Now, keep in mind you're not gonna use every one of these, but it's a lot easier as well as cheaper to spring for the whole set. That way you don't have to hunt down each one individually. Now, as you can see, I've already installed the new oil seal into the timing cover itself so we can go ahead and bolt that on.

Now, it's time for the lifters. Now make sure that you fill them with oil before you install them. That way you'll have instant lubrication when you start the engine and you won't have to wait for the lifters to pump up.

Now, once you have them full

go ahead and give them a good shot of cam lube

and then install them using this special tool. Now, you don't have to use one of these tools to do this.

But on a straight six, the lifters go down so far inside the block. If you don't have one of these, you'll sure as heck wish you did.

And they're available at any auto parts store.

Now, the key to this kid is to

special 4.0 head. You can only get from Clifford. Of course, they've done all the necessary tweaking. So it'll bolt onto our stock 258. By the way, they also claim we're gonna pick up as much as 100 and 20 extra horse just by bolting on their kit.

Ready to get this thing on ST

Yeah,

ready to go. Let's do it. Ok.

Installing the head is pretty well straightforward. Now, one thing to keep in mind about a straight six though the torque sequence is a little different than that of a V8. You wanna start in the center and work out in a circular pattern.

Now, we can slide in the push rods

followed by these really cool roller rockers. Now, those are trick because they reduce friction. They won't flex

and they won't cause any kind of wear on your valve guides.

Now, once you have these guys in place,

you can set your valves by rotating the crank and following your firing order,

the final piece of our upgrade is this custom header that's not only gonna flow a whole lot better than the old stock manifold, but it also has all the fittings to keep us emissions legal and the fit.

I couldn't be any better.

Well, now that we have the top end taken care of, you're probably wondering what we're gonna do with that old corporation system

to find out. You're gonna have to watch next week. right now. We need to take a break. We'll be back after this.

This thing's gonna rock. You know, these three sixes are a lot stronger than people think they are

later in the show. We'll finish up with our U joint and bribe chef tech.

But that's after we take a look at the latest from Ford, the all new sport track is up next.

Thanks for staying with us, everybody.

Well, there's no mista

in the blue oval, but the rest of this vehicle is anything but familiar and that's because it's brand new for 2001 introducing what Ford is calling the sport truck.

Now, this vehicle was designed with the best of both worlds in mind. Part truck, part SUV.

But the big question that came up for us, is it a truck and SUV clothing or is it an SUV that's trying to be a truck?

Now, the sport track is based on the Ford Explorer and nowhere is that more evident than behind closed doors where comfort is the key and leather buckets await. Both passenger and driver

Ford didn't rest on past Laurels though the sport track also grabs some attention with white face gauges and optional six disc CD player. Not to mention Titanium accents on the dash

and the door handles.

Also like the explorer, you can fit five adults in this thing pretty easy and you can need a little bit more storage space,

the rear seats fold down. Now, another cool thing, the rear window retracts so you can have access to the bed and it also has a safety feature so you don't pinch a finger.

Finally, we get to the truck part of this vehicle. Now, at first glance, the bed isn't as long as a regular truck, but at more than 4 ft, you got plenty of room to haul a mountain bike or even a load of topsoil, drop the tail gate

and flip the cargo cage out and you've got more than 6 ft of space.

Now, like most trucks, this bed was made to take a beating, but Ford's doing it a little bit differently.

The entire bed is made out of sheet molded composite plastic, but don't worry,

it can take it.

Now, here's another cool thing. You've got a 12 volt outlet that you can plug a converter into so you can run your power tools or a refrigerator or whatever

the

track is motivated by a 4 L V6. That's good for just over 200 horses and is backed up with a five speed automatic tranny

thanks to a stiffer frame and specially tuned suspension. The result is a quiet, confident handling package. Its great and heavy traffic are on twisty country roads

and with the shift on the fly four wheel drive option, it's not afraid to venture off road either.

It has both high and low range. And as long as you keep in mind, this isn't a hardcore off road vehicle. It'll take you anywhere you need to go.

Well, we think it's safe to say that Ford hit the mark with the best of both worlds. A little SUV and a little truck all rolled up into one. And since this vehicle is the first of its kind with an affordable base sticker of just under 23 grand,

we've got to give it two big thumbs up.

Just can't get enough of trucks. Check us out online at trucks, tv.com.

Welcome back to the shop. Now, if you were with us last week, we showed you some tips on drive shafts

as well as introduced you to the Spicer 5153 U joint that we got from Tom Woods custom drive shaft.

Well, this week we're gonna show you some more U joints as well as how to put it all together.

Now, the first one I wanna show you is the 5433. Now, it's the most expensive at 25 bucks. A pop,

but it is the best U joint that spicer makes. Now the reason being

it's got a grease fitting in one of the end caps now that eliminates the grease fitting in the body and makes this considerably stronger. Matter of fact, if you're doing any serious off roading or running down a drag strip, that's the one to use. Now,

next up is the 5625. Now it's a maintenance free joint. As you can see, there are no grease fittings anywhere on this. Now, that's great if you're running down the interstate.

But

when you go off road dirt and water can get down in these caps and since you can't reg grease them, that will shorten the life of that U joint

to install the joints, there's a couple of tricks that you need to know.

First of all,

you need to make sure that none of these needle bearings get knocked over inside the cap. If they do,

it won't seal down. Right. And you can't get your snappings in.

Now, since we don't have to map this particular joint,

we'll just pull off a couple of the caps,

install a U joint

and then press on one of the caps.

Now, I've used this socket to press this cap all the way in

that in turn, presses out the opposite Tron to where it's flush with the yoke.

Now, this allows you to put on your other cap

without disturbing the needle bearings. Now, all you have to do is press the caps on

and put on your snap rings.

Now, a couple of things to keep in mind about these bearing caps,

if you're really gonna hammer the vehicle, you may wanna use some lock tide on them.

That does a really good job of keeping that cap from rotating inside the yoke.

Another neat trick. Let's take a paint pen

and draw a line in the cap all the way into the yoke. This way, you can periodically look up underneath and see if the cap is spinning inside the yoke.

Now, with the U joints in place, all you have to do is slide the shaft back together.

Now, like we said before, it's very important that these yoke ends be in alignment with each other or in phase.

That way you won't have a nasty vibration on down the road.

Now, all you have left to do is put the shaft in grease it up and you're done.

Uh One last thing when it comes to U joints, when you're buying them, make sure you pick up a couple extra and keep them in your toolbox because

if you don't need them on down the road, somebody else will

for those of you that are into your own tune ups and it better be all of you. Here's a couple of things I wanna show you about spark plugs.

Now, there's basically two types of spark plugs you've got those, that seal with the taper

and those, that seal with the washer. Now to crank down the ones with the washer, once you have them finger tight, you're gonna wanna go about a half turn, you'll feel that washer crushed down and you'll be sealed up.

Now, for those with a taper, you only wanna go about 1/16 of a turn. That's because those crank right down against the head.

Now, one last thing, any time you're going into aluminum heads,

you're gonna wanna use some anesthesia compound on the plug. This will keep you from messing up the threads inside the head.

And now truck gear parts, tools and equipment for pickups and sport utilities.

You know, it's a well known fact airing down your tires when you go off road gives you better traction. We know a lot of you guys out there are using screwdrivers to do that,

but some performance products has made it possible to save time with their quick air deflator. Now, this thing breaks down into four individual pieces that screw right onto your valve stem. So you can air down all four tires at the same time, make quick work of airing down your tires with the quick deflator for about 10 bucks.

Now, if you've got an older vehicle with a carburetor and you spend any kind of time off road, well, you've either flooded it out or starved it out on a steep hill. Well, fortunately Hall

engine developments, decided to fix those problems came out with a fuel injection unit to replace your stock carburetor.

Now, as you can see, it comes with a GM throttle body injection,

an adapter for your stock manifold, a computer

and everything. You'll need to literally just plug it in and go. Now, this kid is four, Jeep goes for about 1000 bucks and his emissions legal and it takes care of all the problems associated with Carbury.

You know, there's one piece of safety equipment that all too often is overlooked by the weekend warrior

and that's a fire extinguisher. A PC makes it easy to look cool and be safe at the same time with their chrome plated many extinguisher. Now, believe it or not, this little guy can handle everything from liquid to electric

fires

and can even be recharged after it's been used. It also comes with a mounting bracket for permanent and easy access. Keep your day from going up in flames with an A PC mini extinguisher for about 65 bucks. That's gonna do it for truck gear. Here's a preview of next week's show.

The guys have already bolted a high performance upgrade onto the top end of their straight six. Next week, they'll go to work on the induction system by swapping out the stock carburetor with a multi port fuel injection.

After that, they've got a familiar looking vehicle that was also built by a familiar manufacturer.

Then it's back to the shop for a few tips on what you should carry in your toolbox.

That's all next week on trucks.

Well, that's gonna do it for this week's show. Yeah. But we're gonna take this sport track out and feed on it a little more before it goes back to forth.

We'll see you next week.

Trucks is an RTM production.
Show Full Transcript