Classic Trucks! Builds
Want more content like this?
Join the PowerNation Email NewsletterVideo Transcript
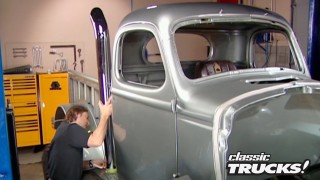
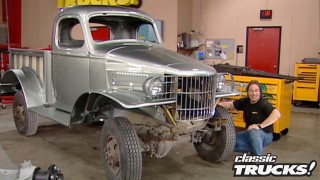
Today on trucks, we'll continue the restoration of project Hairy Hauler by chopping the lid on our classic international pickup three inches. Believe us, you definitely won't want to miss this television first.
After that, we'll show you a candy green drink from the shop of Tucci Engineering. That's in a class all by itself.
That's all today on trucks.
Welcome to trucks. Everybody
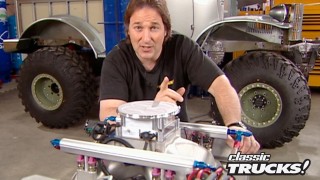
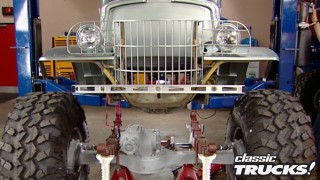
in the past few weeks, we upgraded the front, rear suspension on project Hairy Hauler. Just last week, we showed you how to put together a blower motor. We're gonna run on our 34 international this week we're gonna take you step by step through some custom work that absolutely scares most people and that's chopping the top.
Now, since we're after a sixties Gasser, look with this one, we can't leave the top, just stock. Let's face it. Nothing has the visual impact of a hammered lid.
Keep in mind this project is definitely a handful. But doing it yourself will save you a ton of money
and you'd really be surprised once you understand the basics, how few tools it'll take to complete a job like this.
In fact, all we're gonna need is a hacksaw saws on some tin snips as well as a good set of body tools and grinders like we got from the Eastwood Company.
Of
course, having a welder goes without saying at this point, let me bring you up to speed on what we've done so far.
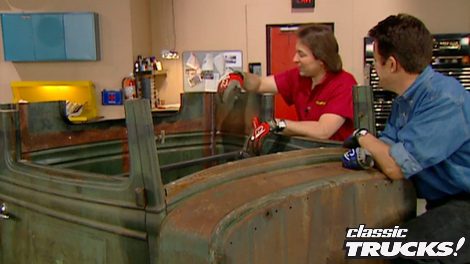
Now, these old trucks from the thirties have a wooden inner structure that's almost always rotten like ours was.
So we tore it out and we're gonna replace it with steel when the chop is done.
And before we can do the chop, we had to build this lower framework
that will support the cab
and the doors.
Once I get this cross member in place,
I'll have mel cut a couple of supports
that'll run from the cross member down to the inner door jam.
We're using smaller bars for the supports than we used on the framework. And the reason for that is we need to be able to remove them when the chop is done.
All these are gonna do for us is keep the body from flexing through the doors. When we cut the top off,
now we can tack wald them into place. There you go, man. Thank you.
Now, as you can see, there is a lot of prep work involved to chop on the top. Basically, we had to build a whole new inner structure
to get these door seams to line up. Perfect. Now, word to the wise here,
if you're working on an old truck or something brand new. If your door seams aren't lining up, stop, you gotta get those right first. Before you do any slicing.
If you don't, you're gonna have a heck of a time getting things to line up later on.
Now, once your door seems right and the body's properly stressed,
then you can lay out the marks for your chop. But before we can lay down those marks, we gotta pop the glass out of these old window frames. Keep in mind
the frames gotta be cut down as well.
After we have the glass popped out,
we need to slide the frames back in place
to make sure we have the right measurements for them too.
Now it's time to start laying out the chop. We're gonna go three inches because it'll look really cool.
We're gonna use this three inch wide masking tape to lay out the pattern.
Now, since we don't wanna lose the unique shape of this back window,
we're gonna take our chop
through the window in an area where this top piece and the bottom piece are the most vertical of each other. This way, we won't have to do a lot of extra metal work. When we weld them back together
for the front, we definitely wanna keep the function of the flip out windshield.
So we're gonna make our mark above the bracket and then back through the door.
Now, you can use the tape as your guide But as you can imagine, if you get into the edge of the tape with your saw, you're gonna lose your cut line. So, a really neat trick is to take a can of spray paint
and just shoot around the edges,
let it dry,
peel it back
and you've got a perfect guy to go to work with.
Finally, we can start cutting on this thing. Now, it's important to cut the top line first
because it's a lot easier to make the second cut and remove this piece with it still attached to the body, not the top
I've found for most of these cuts, a cut off wheel works the best because it's the easiest to control.
Now, it's important to stay consistent on your cut line because any wavering
and you'll open up a gap that you'll just have to fill later on.
Now, obviously, there's gonna be some places you can't get into with a cut off wheel. That's where you're gonna have to use either a sawa
or a hacksaw.
Now, around these windows, it's really fragile. So a Sawzall
is not gonna be your best option for this.
You want to use a hacksaw
after you get it started, then you can finish the job off with a cut off wheel.
The windshield posts and doors is where a Sawzall really comes into play.
Now, I've already cut around the outside with a cut off wheel, but most windshield posts have a center support that runs down the middle and that needs to be cut too. About the best way to get to it is with the saw, all
the doors will give you the same problem
because of their thickness. And the fact that these are 90% wood makes the saws all the perfect tool.
Well, now that we've made all our cuts, it's time to get the top off. Where are we gonna put this thing? And then over here where we won't fall all over it? Perfect.
Hey,
you
sure, we don't want to turn this thing into a convertible.
That's tempting. It's gonna look too good with a chop top though. Yeah, you're right. We need to take a break right now, but don't go away. We'll be right back.
I sure hope you know what you're doing at this point, buddy. Well, you know, I read a book once
up next on trucks. We'll continue our three inch chop on project Hairy Hauler.
Just can't get enough of trucks. Check us out online at trucks, tv.com.
Welcome back to trucks. Now, if you're just joining us, we're right in the middle of whacking three inches out of the top of our 34 international,
which means we're way beyond the point of no return.
But before we go any further, we want to give you some more pointers when it comes to cut. Now, you can see why that tape we used before is so important.
It keeps your cuts parallel so everything's gonna fit down real nice. It's also a good idea to hang on to all the old sheet metal because you'd be amazed at how much of that stuff you'll use before you're done.
One last thing to keep in mind about this chop, we have a straight vertical drop in the back, which is really nice. It makes things a lot easier.
But in the front,
the windshield posts and the front of the door have a slight rake to the rear.
So I had to tape them off straight to make sure I got the same full three inch drop in the front
that I got in the back.
Now it's time for the moment of truth
and setting the top back in place. Now, don't get alarmed when you see your tapered post out of alignment here
because that's normal and we'll deal with that later on
right now. We can turn our attention to the rear where you can see everything is lining up really nice.
Now, in the past customizer used a technique called hammer welding
and you do this with a gas welder,
make a tack weld and then while the weld is still red hot set down the torch,
grab a hammer and dolly
and hit the weld. Now, what this does is sink the weld down into the seam so you can grind it later on.
Well,
fortunately, we don't have to do that anymore with the mig welders.
All you have to do is leave a nice gap. So the weld will drop down into the seam.
Keep in mind any time you're welding in big panels like this warpage can be a problem.
So make sure you use spot welds and space them a good inch or two apart,
then go back and fill in the gaps with as many spot welds as you need until you have a full scene.
Grinding is an area where a lot of people make mistakes because you can generate enough heat with a grinder to warp the panels as well. So the idea here is to go slow and easy moving around that way, you don't get too much heat in one spot. Now, we're gonna use these flap wheels from the Eastwood Company that will allow us to grind and finish in one step
without gouging the metal.
While mel finishes up the back, I'm gonna get started on these windshield posts.
Now, like we told you before, these aren't just gonna line up when you put this top back on. It's your job to make them fit.
There's a lot of different ways you can do this. You can come down here and cut the post and tilt it back. Of course, that's gonna take a lot of metal work in the cow
and in the door
or you can come up here and make a couple of pie cuts and tilt this post forward.
Now if you don't want to lean the posts, you can make a cut all the way across the roof, move the front section forward and line it up,
then make a filler panel and weld the top back together.
Fortunately, we don't have to do any of that because our windshield frame is bolted to the top.
So all we have to do after we em bolt them is move them forward and weld them in.
Of course, one of the biggest challenges when it comes to chopping the top is that no two are the same. Now, I know a lot of you guys are sitting out there thinking these guys got really lucky with this one, but don't kid yourself, there's still plenty of metal work to be done.
And while Stacy is digging into the post, I can get started with the windshield frame. Now, the first thing we need to do
is cut it down using the marks we made earlier,
then we can mock the top hat into place
to make sure it's gonna fit. Now, as you can see by pulling the windshield forward, we opened up a gap up here. So what we're gonna have to do is make a filler panel for that just to smooth everything out.
Speaking of smoothing things out, we need to pay some bills to keep the accountants happy. Don't go away. We got more trucks for you right after this.
It's looking good, man. This is gonna fit. Well,
later in the show, we've got a pick up for you that'll turn you green with envy.
But up first, we need to finish chopping the lid on project Hairy Hauler.
Thanks for staying with us. Everybody. Now, you would think that since we have three inches sliced out of the top of the hauler that we'd be almost done with this project
wrong.
Now, we come to the part that can really make or break a good looking chop that's lining up the doors and windows. Here's something we'd really like to point out if you take the time to plan your cuts, take really good measurements and follow that up with clean welds and careful grinding. You can almost entirely eliminate the need for body filler.
Now it's time to tear into these doors. Now, since we didn't lean the windshield post back, this door seam should line up really nice. Everything's just too short.
So the first thing I'm gonna do is spot weld this front piece in place to keep it from moving.
Once you have it in place, we're gonna cut it right here. Now, the reason we're gonna cut it there instead of back in this area
is because we'll need to make a patch panel to fill the gap that's gonna open up here.
We'll be able to use the scrap that came out of this area because the radius is the same.
I'm using some creative bracing and a welder's magnet to hold everything in alignment.
Then I'm tack welding it here in the back so we can see what kind of gap we're dealing with.
Now, that space has the post tact in place,
I need to measure the gap,
then we can take one of the pieces of scrap and cut off the filler piece.
Now, don't be surprised if you have to do some extra filing and grinding to make this fit.
Here's that filler piece
Seth. Thank you.
Now, a lot of you guys might be tempted to fill in an area this small with just a whole bunch of wel.
That's not the way to do this, right.
You'll have a lot of warpage because of excess heat
and you'll have to do a lot of excess grinding.
Now, slide the piece into place, make sure everything's lining up,
then weld it in place.
Once everything's welded in, we can dress down the welds and the outside of the door is finished. But keep in mind
you also have to weld up the inner door to get the proper strength. Now, in the Hairy Hauler, the inner frame is wooden.
So we're definitely gonna have to replace that since you can't weld on it.
The last thing we need to do is deal with this rear window. Now, because of the shape of the window,
it pinches a little tight here in the corners. Now, there's a couple ways you can fix that.
You can come in here and make some pie cuts
and then bend the ends in until everything matches up.
Or we can take this scrap piece that we cut out
and graft it in. That's better because it already has the right contour. Now you use the same techniques we did on the top of the door,
cut out a piece, weld this in,
finish it up with a little hammer and body work
until everything matches up like it should.
Well, there's no doubt the old 34 international had some very cool lines the day it rolled off the assembly line.
But to turn our classic ride into the Hairy Hauler, the lid just had to be hammered and we think three inches was the magic number.
Sooner or later. Everybody's gonna use some silicone sealant for one reason or another.
The problem is once you're done with it,
you need to try to clean the goo out of the tip or leave it there and it hardens and then it's almost impossible to get out.
That's why most people use these tips one time and then throw them away.
Now, a neat trick is to take an old spark plug wire with a straight boot, cut the end off. Now you have an airtight cap to keep your silicone from drying out.
Welcome back to trucks. Everybody
care to take a guess.
Well, if you're thinking 39 GMC, you're right.
This candy green dream is the brainchild of Tucci. Engineering out of Marcy, New York.
And while it looks great, now this truck almost never got a chance to evolve.
The thing was just really too ugly to do anything to it all without completely doing a, a makeover on the whole truck. So
I didn't like it. I didn't really even want to work on it. And then we got talking about it a little bit and
started throwing some ideas around and I started to get excited about it,
like from there,
kept looking at it, looking at it.
We figured we had to chop it first thing.
Uh So that's what we did.
Now, a standard chop is usually about 2 to 3 inches, but
this ride was treated to a full six inches by leaning the front windshield post back
and slicing out metal from below the rear window to keep the stock size,
which by the way is about the only thing on this old GMC that's still stock resting inside the cab is a state of the art interior
that includes leather covered buckets, tilt wheel and a Plymouth Prowler dash that's all trapped by suicide doors.
Now, if you're thinking this rig is all show and no go, you're dead wrong.
Lurking under the hood is a healthy 406 Chevy with 11.5 to 1 compression.
Of course, it's stuffed full of horsepower goodies to make up one stout small block.
Now sitting on top may look like Weber's at first glance,
but what you're seeing is really a trick fuel injection system
and no, your eyes don't just,
those are Plymouth Prowler headlights.
No expense was spared on the undercarriage either.
It's got a fully independent front suspension with rack and pinion steering.
The stainless steel exhaust goes down the outside of the frame rail and in the rear they've installed a nine inch Ford that's held in place by a four bar set up. Of course, everything floats on a cushion of air. Thanks to those can over shocks.
The business end of this 39 GMC is where the body work really gets unique.
The bed itself is custom made.
The stock fenders were lengthened and brought to a point using 57 Cadillac bullets.
The tail lights are off of a 36 Chrysler
and this exhaust port began life as the grill opening on a 54 Pontiac.
This is classic hot rodding at its best.
The front end got the same kind of attention.
The fenders were worked and lengthened
and flow into smooth running boards.
The grill was handmade but retains the flavor of its stock heritage
and speaking of stock heritage, this candy green truck is all steel just like the factory version was in 1939.
We definitely want to do something different. Everything we try to do at the shop
is
different than everybody else is doing. It makes me feel uh a little bit guilty because some of these guys work their whole lives,
you know, and we work really hard to get this kind of recognition. And, uh, me and uh,
the Tucci engineering shop, we're, we're really lucky to be getting this kind of exposure already so soon.
And now truck gear, parts, tools and equipment for pickups and sport utilities
by now, just about everybody should know that a bed liner not only protects the bed of your truck but also increases its resale value. Now you can have it done by somebody else,
but the folks at Duple color have come up with a do it yourself kit
that you can spray on or roll on it, not only improves the looks of the bed of your truck but leaves a durable nonskid surface that protects against scratches, weather and rust. Get some extra life out of the bed of your truck with little help from the folks at Duple Color for about 60
box.
The age old question when you're working on an old rusty truck, is, is there a good penetrating oil for breaking loose rusty bolts? And the answer is yes.
It's called Arrow Coil from Cano Laboratories. Now,
this stuff has a creeping agent in it that allows it to seep into areas tighter than a millionth of an inch.
Then it dissolves the rust so you can take the parts apart.
Now, Croy is so good. It's used by everybody from GM to Caterpillar on their assembly lines. Get yourself some croy for 650 A can,
you know, you don't have to own a classic ride to get the most out of the absorber from MG. Clean tools. It's more absorbent than a,
a less expensive than a chamois
and dries without scratching.
It's also machine washable and it last for years under normal use. Heck, you, you can use the absorber for anything. You'd use a towel chamois or even a sponge on.
And by the way,
you don't have to settle for just one color choice either. MG Clean tools offer six choices for under 12 bucks a pop.
That's gonna do it for truck. Here, here's a preview of next week's show.
Next week the guys take a brand new two wheel drive Ford F 150
make it a prerunner
after that. You'll be inspired by the never give up attitude of off road racing champion Evan Evans.
Then it's back to the truck shop where Stacy has some new joint and drive shaft tech to fill you in on.
That's all next week on trucks.
Well, that's gonna do it for this week's show. We appreciate you hanging out with us. Yeah, we're looking forward to trucking with you again next week. All right, put some fire to this thing.
Alright, let's see what it'll do.
Trucks is an RTM production.
Show Full Transcript
After that, we'll show you a candy green drink from the shop of Tucci Engineering. That's in a class all by itself.
That's all today on trucks.
Welcome to trucks. Everybody
in the past few weeks, we upgraded the front, rear suspension on project Hairy Hauler. Just last week, we showed you how to put together a blower motor. We're gonna run on our 34 international this week we're gonna take you step by step through some custom work that absolutely scares most people and that's chopping the top.
Now, since we're after a sixties Gasser, look with this one, we can't leave the top, just stock. Let's face it. Nothing has the visual impact of a hammered lid.
Keep in mind this project is definitely a handful. But doing it yourself will save you a ton of money
and you'd really be surprised once you understand the basics, how few tools it'll take to complete a job like this.
In fact, all we're gonna need is a hacksaw saws on some tin snips as well as a good set of body tools and grinders like we got from the Eastwood Company.
Of
course, having a welder goes without saying at this point, let me bring you up to speed on what we've done so far.
Now, these old trucks from the thirties have a wooden inner structure that's almost always rotten like ours was.
So we tore it out and we're gonna replace it with steel when the chop is done.
And before we can do the chop, we had to build this lower framework
that will support the cab
and the doors.
Once I get this cross member in place,
I'll have mel cut a couple of supports
that'll run from the cross member down to the inner door jam.
We're using smaller bars for the supports than we used on the framework. And the reason for that is we need to be able to remove them when the chop is done.
All these are gonna do for us is keep the body from flexing through the doors. When we cut the top off,
now we can tack wald them into place. There you go, man. Thank you.
Now, as you can see, there is a lot of prep work involved to chop on the top. Basically, we had to build a whole new inner structure
to get these door seams to line up. Perfect. Now, word to the wise here,
if you're working on an old truck or something brand new. If your door seams aren't lining up, stop, you gotta get those right first. Before you do any slicing.
If you don't, you're gonna have a heck of a time getting things to line up later on.
Now, once your door seems right and the body's properly stressed,
then you can lay out the marks for your chop. But before we can lay down those marks, we gotta pop the glass out of these old window frames. Keep in mind
the frames gotta be cut down as well.
After we have the glass popped out,
we need to slide the frames back in place
to make sure we have the right measurements for them too.
Now it's time to start laying out the chop. We're gonna go three inches because it'll look really cool.
We're gonna use this three inch wide masking tape to lay out the pattern.
Now, since we don't wanna lose the unique shape of this back window,
we're gonna take our chop
through the window in an area where this top piece and the bottom piece are the most vertical of each other. This way, we won't have to do a lot of extra metal work. When we weld them back together
for the front, we definitely wanna keep the function of the flip out windshield.
So we're gonna make our mark above the bracket and then back through the door.
Now, you can use the tape as your guide But as you can imagine, if you get into the edge of the tape with your saw, you're gonna lose your cut line. So, a really neat trick is to take a can of spray paint
and just shoot around the edges,
let it dry,
peel it back
and you've got a perfect guy to go to work with.
Finally, we can start cutting on this thing. Now, it's important to cut the top line first
because it's a lot easier to make the second cut and remove this piece with it still attached to the body, not the top
I've found for most of these cuts, a cut off wheel works the best because it's the easiest to control.
Now, it's important to stay consistent on your cut line because any wavering
and you'll open up a gap that you'll just have to fill later on.
Now, obviously, there's gonna be some places you can't get into with a cut off wheel. That's where you're gonna have to use either a sawa
or a hacksaw.
Now, around these windows, it's really fragile. So a Sawzall
is not gonna be your best option for this.
You want to use a hacksaw
after you get it started, then you can finish the job off with a cut off wheel.
The windshield posts and doors is where a Sawzall really comes into play.
Now, I've already cut around the outside with a cut off wheel, but most windshield posts have a center support that runs down the middle and that needs to be cut too. About the best way to get to it is with the saw, all
the doors will give you the same problem
because of their thickness. And the fact that these are 90% wood makes the saws all the perfect tool.
Well, now that we've made all our cuts, it's time to get the top off. Where are we gonna put this thing? And then over here where we won't fall all over it? Perfect.
Hey,
you
sure, we don't want to turn this thing into a convertible.
That's tempting. It's gonna look too good with a chop top though. Yeah, you're right. We need to take a break right now, but don't go away. We'll be right back.
I sure hope you know what you're doing at this point, buddy. Well, you know, I read a book once
up next on trucks. We'll continue our three inch chop on project Hairy Hauler.
Just can't get enough of trucks. Check us out online at trucks, tv.com.
Welcome back to trucks. Now, if you're just joining us, we're right in the middle of whacking three inches out of the top of our 34 international,
which means we're way beyond the point of no return.
But before we go any further, we want to give you some more pointers when it comes to cut. Now, you can see why that tape we used before is so important.
It keeps your cuts parallel so everything's gonna fit down real nice. It's also a good idea to hang on to all the old sheet metal because you'd be amazed at how much of that stuff you'll use before you're done.
One last thing to keep in mind about this chop, we have a straight vertical drop in the back, which is really nice. It makes things a lot easier.
But in the front,
the windshield posts and the front of the door have a slight rake to the rear.
So I had to tape them off straight to make sure I got the same full three inch drop in the front
that I got in the back.
Now it's time for the moment of truth
and setting the top back in place. Now, don't get alarmed when you see your tapered post out of alignment here
because that's normal and we'll deal with that later on
right now. We can turn our attention to the rear where you can see everything is lining up really nice.
Now, in the past customizer used a technique called hammer welding
and you do this with a gas welder,
make a tack weld and then while the weld is still red hot set down the torch,
grab a hammer and dolly
and hit the weld. Now, what this does is sink the weld down into the seam so you can grind it later on.
Well,
fortunately, we don't have to do that anymore with the mig welders.
All you have to do is leave a nice gap. So the weld will drop down into the seam.
Keep in mind any time you're welding in big panels like this warpage can be a problem.
So make sure you use spot welds and space them a good inch or two apart,
then go back and fill in the gaps with as many spot welds as you need until you have a full scene.
Grinding is an area where a lot of people make mistakes because you can generate enough heat with a grinder to warp the panels as well. So the idea here is to go slow and easy moving around that way, you don't get too much heat in one spot. Now, we're gonna use these flap wheels from the Eastwood Company that will allow us to grind and finish in one step
without gouging the metal.
While mel finishes up the back, I'm gonna get started on these windshield posts.
Now, like we told you before, these aren't just gonna line up when you put this top back on. It's your job to make them fit.
There's a lot of different ways you can do this. You can come down here and cut the post and tilt it back. Of course, that's gonna take a lot of metal work in the cow
and in the door
or you can come up here and make a couple of pie cuts and tilt this post forward.
Now if you don't want to lean the posts, you can make a cut all the way across the roof, move the front section forward and line it up,
then make a filler panel and weld the top back together.
Fortunately, we don't have to do any of that because our windshield frame is bolted to the top.
So all we have to do after we em bolt them is move them forward and weld them in.
Of course, one of the biggest challenges when it comes to chopping the top is that no two are the same. Now, I know a lot of you guys are sitting out there thinking these guys got really lucky with this one, but don't kid yourself, there's still plenty of metal work to be done.
And while Stacy is digging into the post, I can get started with the windshield frame. Now, the first thing we need to do
is cut it down using the marks we made earlier,
then we can mock the top hat into place
to make sure it's gonna fit. Now, as you can see by pulling the windshield forward, we opened up a gap up here. So what we're gonna have to do is make a filler panel for that just to smooth everything out.
Speaking of smoothing things out, we need to pay some bills to keep the accountants happy. Don't go away. We got more trucks for you right after this.
It's looking good, man. This is gonna fit. Well,
later in the show, we've got a pick up for you that'll turn you green with envy.
But up first, we need to finish chopping the lid on project Hairy Hauler.
Thanks for staying with us. Everybody. Now, you would think that since we have three inches sliced out of the top of the hauler that we'd be almost done with this project
wrong.
Now, we come to the part that can really make or break a good looking chop that's lining up the doors and windows. Here's something we'd really like to point out if you take the time to plan your cuts, take really good measurements and follow that up with clean welds and careful grinding. You can almost entirely eliminate the need for body filler.
Now it's time to tear into these doors. Now, since we didn't lean the windshield post back, this door seam should line up really nice. Everything's just too short.
So the first thing I'm gonna do is spot weld this front piece in place to keep it from moving.
Once you have it in place, we're gonna cut it right here. Now, the reason we're gonna cut it there instead of back in this area
is because we'll need to make a patch panel to fill the gap that's gonna open up here.
We'll be able to use the scrap that came out of this area because the radius is the same.
I'm using some creative bracing and a welder's magnet to hold everything in alignment.
Then I'm tack welding it here in the back so we can see what kind of gap we're dealing with.
Now, that space has the post tact in place,
I need to measure the gap,
then we can take one of the pieces of scrap and cut off the filler piece.
Now, don't be surprised if you have to do some extra filing and grinding to make this fit.
Here's that filler piece
Seth. Thank you.
Now, a lot of you guys might be tempted to fill in an area this small with just a whole bunch of wel.
That's not the way to do this, right.
You'll have a lot of warpage because of excess heat
and you'll have to do a lot of excess grinding.
Now, slide the piece into place, make sure everything's lining up,
then weld it in place.
Once everything's welded in, we can dress down the welds and the outside of the door is finished. But keep in mind
you also have to weld up the inner door to get the proper strength. Now, in the Hairy Hauler, the inner frame is wooden.
So we're definitely gonna have to replace that since you can't weld on it.
The last thing we need to do is deal with this rear window. Now, because of the shape of the window,
it pinches a little tight here in the corners. Now, there's a couple ways you can fix that.
You can come in here and make some pie cuts
and then bend the ends in until everything matches up.
Or we can take this scrap piece that we cut out
and graft it in. That's better because it already has the right contour. Now you use the same techniques we did on the top of the door,
cut out a piece, weld this in,
finish it up with a little hammer and body work
until everything matches up like it should.
Well, there's no doubt the old 34 international had some very cool lines the day it rolled off the assembly line.
But to turn our classic ride into the Hairy Hauler, the lid just had to be hammered and we think three inches was the magic number.
Sooner or later. Everybody's gonna use some silicone sealant for one reason or another.
The problem is once you're done with it,
you need to try to clean the goo out of the tip or leave it there and it hardens and then it's almost impossible to get out.
That's why most people use these tips one time and then throw them away.
Now, a neat trick is to take an old spark plug wire with a straight boot, cut the end off. Now you have an airtight cap to keep your silicone from drying out.
Welcome back to trucks. Everybody
care to take a guess.
Well, if you're thinking 39 GMC, you're right.
This candy green dream is the brainchild of Tucci. Engineering out of Marcy, New York.
And while it looks great, now this truck almost never got a chance to evolve.
The thing was just really too ugly to do anything to it all without completely doing a, a makeover on the whole truck. So
I didn't like it. I didn't really even want to work on it. And then we got talking about it a little bit and
started throwing some ideas around and I started to get excited about it,
like from there,
kept looking at it, looking at it.
We figured we had to chop it first thing.
Uh So that's what we did.
Now, a standard chop is usually about 2 to 3 inches, but
this ride was treated to a full six inches by leaning the front windshield post back
and slicing out metal from below the rear window to keep the stock size,
which by the way is about the only thing on this old GMC that's still stock resting inside the cab is a state of the art interior
that includes leather covered buckets, tilt wheel and a Plymouth Prowler dash that's all trapped by suicide doors.
Now, if you're thinking this rig is all show and no go, you're dead wrong.
Lurking under the hood is a healthy 406 Chevy with 11.5 to 1 compression.
Of course, it's stuffed full of horsepower goodies to make up one stout small block.
Now sitting on top may look like Weber's at first glance,
but what you're seeing is really a trick fuel injection system
and no, your eyes don't just,
those are Plymouth Prowler headlights.
No expense was spared on the undercarriage either.
It's got a fully independent front suspension with rack and pinion steering.
The stainless steel exhaust goes down the outside of the frame rail and in the rear they've installed a nine inch Ford that's held in place by a four bar set up. Of course, everything floats on a cushion of air. Thanks to those can over shocks.
The business end of this 39 GMC is where the body work really gets unique.
The bed itself is custom made.
The stock fenders were lengthened and brought to a point using 57 Cadillac bullets.
The tail lights are off of a 36 Chrysler
and this exhaust port began life as the grill opening on a 54 Pontiac.
This is classic hot rodding at its best.
The front end got the same kind of attention.
The fenders were worked and lengthened
and flow into smooth running boards.
The grill was handmade but retains the flavor of its stock heritage
and speaking of stock heritage, this candy green truck is all steel just like the factory version was in 1939.
We definitely want to do something different. Everything we try to do at the shop
is
different than everybody else is doing. It makes me feel uh a little bit guilty because some of these guys work their whole lives,
you know, and we work really hard to get this kind of recognition. And, uh, me and uh,
the Tucci engineering shop, we're, we're really lucky to be getting this kind of exposure already so soon.
And now truck gear, parts, tools and equipment for pickups and sport utilities
by now, just about everybody should know that a bed liner not only protects the bed of your truck but also increases its resale value. Now you can have it done by somebody else,
but the folks at Duple color have come up with a do it yourself kit
that you can spray on or roll on it, not only improves the looks of the bed of your truck but leaves a durable nonskid surface that protects against scratches, weather and rust. Get some extra life out of the bed of your truck with little help from the folks at Duple Color for about 60
box.
The age old question when you're working on an old rusty truck, is, is there a good penetrating oil for breaking loose rusty bolts? And the answer is yes.
It's called Arrow Coil from Cano Laboratories. Now,
this stuff has a creeping agent in it that allows it to seep into areas tighter than a millionth of an inch.
Then it dissolves the rust so you can take the parts apart.
Now, Croy is so good. It's used by everybody from GM to Caterpillar on their assembly lines. Get yourself some croy for 650 A can,
you know, you don't have to own a classic ride to get the most out of the absorber from MG. Clean tools. It's more absorbent than a,
a less expensive than a chamois
and dries without scratching.
It's also machine washable and it last for years under normal use. Heck, you, you can use the absorber for anything. You'd use a towel chamois or even a sponge on.
And by the way,
you don't have to settle for just one color choice either. MG Clean tools offer six choices for under 12 bucks a pop.
That's gonna do it for truck. Here, here's a preview of next week's show.
Next week the guys take a brand new two wheel drive Ford F 150
make it a prerunner
after that. You'll be inspired by the never give up attitude of off road racing champion Evan Evans.
Then it's back to the truck shop where Stacy has some new joint and drive shaft tech to fill you in on.
That's all next week on trucks.
Well, that's gonna do it for this week's show. We appreciate you hanging out with us. Yeah, we're looking forward to trucking with you again next week. All right, put some fire to this thing.
Alright, let's see what it'll do.
Trucks is an RTM production.