Classic Trucks! Builds

Video Transcript

Today on trucks, the guys have already dropped their 66 board three inches all the way around

this week. They'll take care of the backside of their classic blue oval with a bed liner, tunnel cover and roll pan.

After that, they'll take you for a ride in the all new Dakota quad cat.

Then it's back to the shop to show you how to port and polish your heads.

That's all today on trucks.

Hey, everybody. Thanks for hanging out with us again this week. A couple weeks ago, we dropped our 66 Ford three inches all the way around now that we have it sitting where we want, it's time to turn our attention

to the business in. Now, a bed liner is almost standard equipment on a truck nowadays because it keeps your bed in great shape, finishes off the look and it always helps in the resale value.

But until now, you've only had a couple of choices. You've had the plastic drop in style which tend to be a little slick or

you've had the spray in type, which you really better like because once they're in, they're not coming out

which is exactly why we're gonna go with the bed rug from Wise Industries. Not only is it gonna keep things from sliding around,

but you can also pull it out to wash it, which is real important to us because we're still gonna put our forward to work.

The bed rug comes in two pieces that zips together to form a liner that's held in place with velcro strips, which obviously keeps it from flying out When you're cruising down the highway

with the liner zipped up,

you just drop it into the bed.

Now take one side and roll it up,

take one of these 3 ft pieces of Velcro

and stick it to the bottom of the bed rug.

Now, all you have to do is pull that tape when you're ready to stick it down

before you do that,

make sure the bed is super clean. So you get good adhesion.

Also make a note of where these drain holes are because you're gonna need to know that later on

for the front of the bed. All you have to do is make sure it's centered

and pressed down tightly in the corners.

Then

just take a few of the small pieces of Velcro

and place them evenly on the bottom strip

after that,

press it in place, working from the middle out.

Now for the top, you just repeat the same process that you used on the bottom.

Now, the sides are very similar to the front once again, you use the small pieces of velcro and line them up with these marks here in the foam.

This will give you the proper placement up against the bedside,

then just push it into place, starting at the front, working your way back. This will take care of any of these little buckles that try to sneak in there.

The last thing is the tailgate flap that mounts just like the front. Now, since the bed rugs waterproof, we can put it to work in the elements, but since it's also washable,

we can take it out any time we want to maintain the classic finish. It gives our truck man. I love the way that smooths that floor out.

No doubt. It's a custom fit man. Speaking of a custom fit, another thing that's very popular are hard tunno covers.

The problem is you can't really carry anything that's taller than the bed.

And if you want to take it off, you need to get a couple of friends to help you, then you gotta find a place to keep it until you're ready to put it back on.

Fortunately, Pace Edwards has come up with a way to save you a lot of time and hassle with their roll top cover, it comes with the roller canister,

the tunnel itself, a cover for the canister side rails and all the hardware you'll need to complete the job also, just like the bed rug, you can get this tunnel for just about any make or model truck out there.

Now, the roll top is lockable. So the first thing you need to do is

install the lock mechanism into the handle.

Now, the cover is made out of aluminum strips that are put together in such a way that they allow the cover to retract and fold one direction,

but they don't allow it to bend back the other. And this is what gives you your strength

also for a nice clean look. They covered it with padding

and then vinyl.

Now that space has the canister in the front of the bed, we need to put on the side rails. Now, these things need to be flush and level. So if you have any indentations on your bed rail, you're gonna have to use shims as you can see, we don't have that problem with our old fort.

Now, we can go ahead and mark them

drill em and mount em.

Now, you need to loosely mount the guide rails

with the supplied screws

and with the side rails in place, slide the top assembly back against the rails and then center it in the bed.

Now you can drill your holes and mount it.

Now, you need to adjust the guide plates on the side here. So you have at least an eight inch of clearance between the top

and the sides. Now, this allows for expansion of the aluminum on a hot day and once you have it, how you want it,

go ahead and tighten up these front screws.

Now, we can enroll the cover and lock it in back here at the tailgate.

Now, once again, you need to leave at least an eight inch of clearance on each side

before you tighten the screws in the back

while the cover is closed. And Stacey's adjusting the fit to the tailgate. I can go ahead and install these drain fittings in the bottom of the canister floor.

Now, once those are in place, we can mount the plastic cover.

Keep in mind it's real easy to over tighten these. So watch yourself because if you crack it,

you're gonna have to replace it.

Now, water runoff is definitely a factor with any type of tunnel cover. Now, with the Pace Edwards cover, the water runs down the sides and into the canister in front.

Now, remember those drain holes we told you about in the bed floor. Well, this is where they come into play.

We're gonna cut through the bed rug and run the supplied hoses through the bottom of the bed up to the drain fittings.

This will eliminate any small lakes in the bed of the truck.

A

really neat thing about this cover is the fact that it's spring loaded, which makes it really easy to open and close. And the low profile look is really cool on our own classic. There's no paint to scratch either. Stay with us. We got more trucks coming to you after this. I like the fact you can lock it too, man. Keep people from borrowing parts. Exactly.

Later on trucks, we'll show you how to put and polish your heads for maximum horsepower. But up first we need to hang a tow package and roll pan on our classic board.

Thanks for staying with us. Everybody. Now that we've cleaned up the bed of our old 66 Ford with the bed rug and a tunnel cover,

we thought we'd take care of the tail end with a roll pan.

And since we're gonna use this truck to tow a trailer once in a while,

I thought we put on a tow package too.

You know, there's a whole world of aftermarket

add-ons out there that really helps smooth out the look of a truck. But since we're dealing with the rear of our classic ride, nothing quite finishes things off like a roll pan.

So we're gonna go with this all steel pan from sir Michael's not only are these things custom made for your application, but they also feature a recess license plate and flip kit as well as a light fitting.

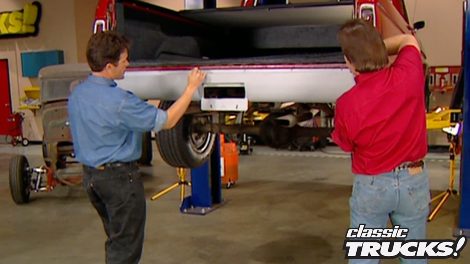
Now, you can see by this bumper that somebody's already done a little, uh, customizing up underneath, it gets a lot worse than this. I've raised up the truck so you can see what I'm talking about.

Somebody actually welded this sucker to the frame

and they cut some sort of slot here for clearance and they came up here and welded these bolts in. This is a mess.

So we're gonna take the torch and cut off the whole thing right there.

These pans from Sir Michael's are made to bolt right in, but like ST

just showed you you're bound to find some surprises, especially on these older trucks. So always take the time to look over things real good before you dive into a project like this. That way, you know exactly what kind of time and tools it's gonna take to finish the job. I'll go ahead and have Stace help me mock our p into place.

Got it. It's good on my side. Once we have it where we want it, we can mark it

and drill out the hole

now that we have the fit of a roll pan taken care of.

I'm gonna figure out where to mount this tow hitch

that we also got from, sir Michaels,

the front bolt mounts to the existing hole in the frame.

Then you just come back here and drill a hole for your rear mounting bolt. However, thanks to this uh, custom work that was done. We need to weld in this gap. So the rear of the frame has enough strength to handle the payload of the hitch.

Once you have your holes drilled,

then you can bolt it down

with the hitch in place. We can go ahead and put on the roll pin. Got it, man. Got it over here.

Good here. Now, don't be afraid to use shim's back here

to make sure everything lines up just right.

Also, you have some brackets that support the bottom of the pan and bolt right up to the hitch supports.

As you can see, once we got rid of that old bumper, these pipes hang way too far down below this roll pan. So we need to raise them.

Fortunately, this system has enough slack in it and we can raise it up and remount it to the frame without cutting it.

And that's really nice because even though these pipes may look bad, we

still have some miles left in it before we have to change the system.

We've already installed the light kit for the license plate that plugs right into your stock wiring. Now, all that's left to do is to put on the license plate flip kit

that really is a simple bolt on. Now, one of the really neat things about this setup is the receiver for your tow hitch, hides right behind the license plate. Man. That's cool. You can see with the tailgate in place just how much this smooths up the back of this truck. And one of the neat things about using metal is you can come in here and weld up this seam for a really clean look.

Uh It looks like we got some body work to do there also, if you wanna get really fancy, you can run your exhaust tips out through the roll pan. Yeah. Speaking of tips, we're not gonna run ours through the pan but stays,

those have gotta go. They're pretty rough, aren't they? There's no doubt about that. There's also no doubt it's time for us to take a break. Don't go away. We got more trucks for you right after this.

This is cool, man. Yeah, I wonder how old those tips are. Good. Question

up next on trucks. The guys are gonna take you for a ride in the 2000 Dakota quad cab.

Welcome back to trucks. Everybody, you know, for years, it seemed about the only thing that mattered in a truck was how big the bed and payload capacity was

lately though, the trend has gone to how big the cab is and how many doors it has. As of 2000, all the major manufacturers are finally starting to offer trucks with four doors.

And today we're gonna look at what Dodge has to offer with its brand new Dakota quad cab.

Now, one of the best parts about this version from Dodge is that all four doors are full size and open the right way. Once inside, you can fit five adults comfortably

instrumentation on this vehicle, although not exactly like the Ram or Durango is very similar, which means it's all straightforward

and functional.

The only drawback to making the cab bigger

is the Dodge had to shorten the bed to 5 ft three inches.

It's some good news though, the payload capacity stays the same at 1450 pounds, which is the largest payload of any truck in this class.

Another way this truck leads the competition is its motivation. Dodge has replaced the 5.2 L engine with a highly capable 235 horse 4.7 L V eight borrowed straight from the Jeep Grand Cherokee.

And for those of you who want a little more towing power, you can get this truck with an extra stout 5.9 L V eight.

Now, the quad cab isn't just an extended cab, Dakota with a short bed and two more doors.

Now, the engineers on this project gave it its own wheel base as well as special spring rates, front rear

and the four doors aren't the only new addition to this truck.

They also threw in rack and pinion steering for a responsive ride on road

and off.

Speaking of off road, it comes with 31 inch tires on 15 inch rims which gives you plenty of side wall for flex and load

and even with its independent front suspension,

it

has good articulation and a 43 to 1 crawl ratio on low range will give you all the grunt you need when the going gets tough.

Ok.

So has Dodge built the perfect light truck? Well, let's see. It's got great styling, four doors, plenty of payload capacity. V eight power four wheel drive and a balance suspension all for the base sticker of around 21 grand.

Well, we can definitely say that we like it, but

you're going to have to be the final judge on that.

If you want more trucks, check us out online at trucks, tv.com.

Welcome back to trucks in that never ending quest for performance. There's basically two types of horsepower cheap

and very expensive.

Now, since everybody wants the most bang for their buck, what would you say if we told you you could get some serious performance for say 50 bucks? Sound interesting.

Well, it'll take some labor on your part, but that price is definitely right. Well, now that we have your attention, what we're talking about here is porting and polishing your cylinder heads as far as the labor states told you about, part of what you're gonna need is a kit from the Eastwood company that comes with two types of abrasive rolls, one for big areas and this tapered one for tight areas.

It also comes with different length man rolls. So you can reach up into the ports.

Now, since an engine is basically a fancy air pump, the more unrestricted airflow, you can get

more horsepower you have. Now when you port an engine,

you basically remove any of the imperfections and restrictions in the cylinder heads

and the intake manifold, this gives you better air flow.

Now, you do this

by opening up the intake ports and the exhaust ports. So they're the same size as the gasket.

You also wanna come inside, smooth out these runners and the combustion chambers

before you can get started, you need to make sure your heads aren't warped or cracked and if there's any doubt, have them checked in a machine shop. Now, once they check out, you need to strip the heads down by removing the valves. Now, keep in mind if you're going to reuse the valves, it's always a good idea to put them right back in the same port they came out of. Now, once you've got them all stripped down, go ahead and bolt an intake gasket in place and mark around the openings.

Now, we can start grinding, ready to go, man. All right.

Now, you can see by these marks that Mel has made that there's a good bit of material that we can take off these heads to get them breathing easier. Now, by doing it this way, we're able to make these ports just as big as we possibly can.

No.

Now, once the ports are done,

we'll taper those back into the runner like you can see in this cutaway,

then

will reach in and smooth the walls of the runner and finally

we'll go around the bowls of the intake and the exhaust valves. Now, it's real important to remember when you're doing the runner and the bowls that you're just smoothing them off, you're not making them any bigger

because you don't want to get into these water jackets or you'll ruin the head.

And finally

when you go around the valve seat, be real careful because if you mess this up, you'll have to have a valve job done.

The intake manifold is very similar to the heads and that you wanna match the port to the gasket size and then grind it out. Now, there are a couple of things you wanna keep in mind like if you have an aluminum intake, it's always a good idea to use some grinders grease because that'll keep your rolls from getting all clogged up. Now, these 80 grit rolls leave the best finish on the runners because if you get them too smooth, you'll lose the turbulence you gotta have for a proper air fuel mixture

and just like your intake ports, your exhaust ports can stand a little massage too and you do those exactly the same way.

And one last thing on the heads is the combustion chamber.

Now, it doesn't hurt to smooth these out a little bit. But keep in mind

when you start grinding on a combustion chamber, you can change your compression ratio

and the cc of your head which is not good. So be careful. Now, all that's left to do is put your heads back together and reassemble the motor. Believe us, you're gonna be amazed at how much better your motor is gonna perform and how much easier you're gonna breathe. Knowing you only gave up about 50 bucks in a few hours of labor in your garage.

Everybody knows that after you rebuild an engine, you should prime the oil pump. So everything's well lubricated before you try to start it up.

Now you can go out and buy some fancy priming tools. But there is a cheaper and easier way to do this.

Just get an old distributor like at a flea market. Take off the gear,

take out the guts and slide the shaft out of the housing. This is what you end up with

now, just take that, put it in your drill.

Now you've got a way to prime the pump

and lubricate the engine. So you've got instant oil pressure when you go to start it up.

And now truck gear, parts, tools and equipment for pickups and sport utilities.

If you've ever tried to move something heavy or awkward around the shop or your driveway

and you know what a hassle that can be without a good set of dollies. A Kingsbury dolly can handle up to 1000 pounds each and comes in two sizes that'll fit a tire up to 13.5 inches wide.

The wood frames also reduce slipping and scratching, rearrange all your hard to move items and save your back at the same time with a set of four Kingsbury dollies starting at about 270 bucks

for those of you that are into or would like to be into custom painting. Nothing quite set your imagination free like an airbrush.

The Eastwood company offers this Pache

dual action airbrush system.

This allows you to blend or stripe or fade or fog or just anything that you can imagine.

Now, the kit comes with a complete airbrush plus a heavy duty compressor. So your gun doesn't sputter out on you when you're doing a hot set of flames. The pache from Eastwood, it's about 200 bucks.

You know, one of the ugliest areas on a stock vehicle is the gas tank door and let's face it. Not a whole lot of options to dress them up. Fortunately, amp research. Put some time and thought in this very cool looking aluminum door. These things are available for late model fords for about 100 and 50 bucks. But for you customizer, the options with this piece are endless. In fact, we think it's so cool. We're gonna put one on the wicked willies that's gonna do it for truck gear. Here's a preview of next week's show.

We'll introduce project Harry Hauler by installing a state of the art front suspension on a 1934 international pickup truck.

Then we'll show you the best of what our cameras caught at the four wheel Jamboree nationals in Bloomsburg, Pennsylvania and Indianapolis. After that, it's back to the shop for some gas tank restoration.

That's all next week on trucks.

Well that's gonna do it for this week's show. We appreciate you hanging out with us. Yeah, we look forward to trucking with you again next week.

We're

too

look at this.

That is awesome. Alright, what do you think

trucks is an RT M production?
Show Full Transcript