Classic Trucks! Builds

Video Transcript

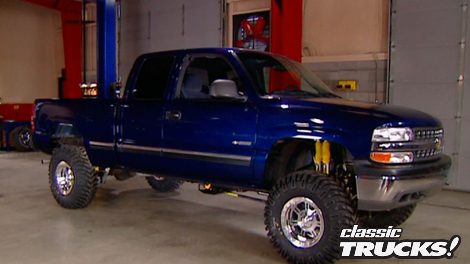
Today on trucks, we're gonna turn our stock Chevy pickup truck into a sinister Silverado by bolting on a six inch lift kit as well as some new wheels and rubber.

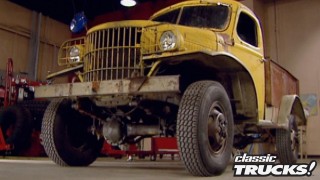
After that, we'll take a look at a classic ride from Dodge the 79 little red Express. Then it's time to roll wicked Willies back into the shop for a complete cooling system upgrade.

That's all today on trucks.

Hey, everybody, welcome to the truck shop. We appreciate you hanging out with us today. We're going to take a 99 Silverado and give it some elevation as well as new wheels and rubber. But hey, that's only the beginning of what we have in mind for this big old Chevy that from here on out is going to be known as Project Sinister Silverado. Now, one of the biggest projects to strike fear in the heart of the do it yourself or is a lift on an independent front suspension?

Now, granted there's more work involved but the benefits as we'll show you are definitely worth it.

One of the biggest benefits being of course more ground clearance under the body.

We're also gonna up the clearance under the truck because we'll be able to put much bigger tires on it. Not to mention increased approach and departure angles due to the raised bumper height and let's face it. A six inch lift is definitely gonna give us the stance we want for project sinister Silverado.

Now we're gonna do this with super lifts, brand new six inch lift. Now, I know this looks like a lot of parts but don't panic. We're gonna show you where it all goes here in a minute.

Now, the kit comes with new shocks, cross members skid plates,

shock hoops, a whole bunch of drop brackets as well as a brand new front drive shaft.

The first thing we need to do to make room for all the new hardware is get the brake calipers off. Now, the good news about this is that you don't have to disconnect the brake hoses, which means you won't have to rebleed your system when you put it all back together.

It's also a good idea to use wire ties to keep the caliper up out of the way. Just make sure you aren't pinching or stretching the hoses. Also don't forget to disconnect the A BS wire.

Yeah.

Now, you may have noticed that our front suspension doesn't use coil springs. It's got torsion bars instead.

Now they run from the adjuster here in the back up to the lower control arm. Now, by turning this adjusting screw,

you change the amount of twist on the bar and that changes your torsional load on your front suspension. Now, for those of you that think that you can come back here and just crank up your torsion bar and get the kind of lift you want, forget it. That's not the way to do this properly.

Now, to put this kit on these torsion bars need to come out. So we're gonna mark them first,

then back out the adjusting screws

using this torsion bar tool, you can take out the adjustment stop

and then unload the bar,

slide the torsion bar forward

and pull the adjusting arm out of the cross member.

Finally unbolted cross member

get it out of the way.

In order to free up the differential, we have to unbolt the axles, disconnect the electrical

and vacuum tube

before you can undo the drive shaft.

Don't you have the rear cross member out of the way

you can roll a jack under the differential?

Oh,

right.

Unbolt it and roll it out.

Now, we can deal with this steering linkage. All we need to do here is knock off these tie rod ends.

Now remove the centrelink assembly from the Pittman arm

and the idler arm.

Now keep in mind you have to reuse these parts. So don't just toss them in the garbage or you'll be cussing yourself and us later on.

Now, the state has the center link and the sway bar undone. It's time to lose these controllers, but first I need to pop the shocks off

as well as these bump stops.

Then with the jack in place, I can undo the lower control arm bolts

followed

by the upper control arm bolts.

Now, these things aren't that heavy, but they are awkward. So an extra set of hands is always helpful here.

One of the neat things about this kid is you don't have to do any welding, however, you do have to do some cutting.

So using a plasma cutter or a torch cut off this lower differential mount here on the driver's side.

After that, cut out the cups for the bump stops

and grind them down.

You'll also need to do some grinding on the front and rear upper control arm brackets and a little on the tip of the pitman arm.

Finally chisel off the rivets that hold the old torsion bar cross member bracket. Now don't screw these up because you gotta use them again later on,

believe it or not, we can start putting this thing back together. First up is the sway bar which goes in the factory position with the ends inverted. So they step down instead of up,

then you can install the factory link to the super lift center link and hang everything from the pitman

and idler arms.

The differential drop brackets are next. Now these babies go right to the factory bolts.

Now we can wrestle the differential into place. Now, if I've calculated this right. Mel has the heavy end.

Now, we're gonna leave these bolts a little loose so we can adjust them later on

with the differential loosely bolted into a place we're ready for the control arm brackets. But first, we're gonna slide this hoop for the shocks into the frame mounts.

Then we can mount the upper control arm bracket

as well as the lower control arm bracket through the factory holes

with the center link mounted to the new front cross member.

I'm gonna bolt this cross member in between these two brackets we just put in,

then we'll connect the steering stabilizer up to the center link.

Now that space has the front cross member secure, we can work on the rear

with the lower control arm brackets already in place. It just bolts right up

after you hook up your electrical and vacuum lines, tighten everything down. We got to take a break. Trucks will be back after this

later on trucks. We'll show off a dodge pickup that could run with the fastest production vehicles of its time.

But first, we need to finish giving our Silverado its sinister stance.

Just can't get enough of trucks check us out online at trucks, tv.com.

Thanks for hanging with us everybody. We've already got the front and rear cross members in place on our six inch super lift. Now we're starting to mount the upper and lower control arms.

As you can see they go right up to a factory location.

The only difference is they're six inches lower

to keep our suspension from moving around on us. When we hit the trail. The kick comes with these kicker braces that run from the rear cross member back to the cross member for the tranny.

Now, the brakes,

tie rod ends

and axle shafts all go back to where they originally came from.

And what's different is this sway bar drop bracket.

It extends the end links to make up for the lift.

Now we're ready for the shocks. One of the cool things about this setup is it uses dual shocks for increased performance on road and off.

Now we can deal with the torsion bar cross member. Now, these factory brackets that you made sure not to screw up

bolt right into this lowering bracket that comes with the kit

after that remount the cross member and then the torsion bars using the marks you made earlier

while Stacey is hooking up our brand new D drive shaft, I can put the finishing touches on the front end which would be skid plates. Now, if you have to ask what these are for, you probably shouldn't be driving a truck off road.

Now that we've taken the fear factor out of lifting an independent front suspension, we can get started on the rear. Now, super lift's got a couple options on this. You can get the full lift out of brand new leaf springs

or you can use lift blocks like we're gonna do.

First thing we need to do is get a jack under the pumpkin for support.

Then you can undo the shocks

and pop off the U

bolts

before dropping the axle down to make room for the new super lift blocks that sit right on top of the factory block.

Now you do need to do some modifications to the rear brake lines and the emergency brake cable.

I took this stock bracket from the top of the frame rail,

re bent the hard line

and then remounted it to the bottom of the frame rail. This gives you plenty of slack in your hose for the emergency brake cables. Super lift supplies a drop bracket that bolts right to the factory holes. All we have left to do back here is jack up the rear end to see the blocks slide on the new U bolt and tighten them down.

Then we're ready for our shock upgrade.

Bottom line. The rear install is much easier than the front, whether you're going with blocks

or leaf springs.

Of course, now that we have our lift installed, it, uh, really won't do us any good without the right wheel and tire combination.

And since we don't want the tire popping off the rim, when we air down for the trail, we had champion wheels install this set of B lockers on these really cool center line billet thrust wheels.

Hm.

They cut off the outer rim

and then they weld on a new rim that the tire bead lays against,

then bolt on the outer ring.

Now, this sandwich is down on the rubber and there is no way that thing is gonna come off that rim.

Now, since we named our 99 Chevy Sinister Silverado, we couldn't run just any old tire. So we're gonna go with Mickey Thompson's brand new evil looking 35 13.5 Baha claws.

Well, there's no doubt our Chevy's got a whole new attitude now.

But keep in mind this is only chapter one of Project Sinister Silverado. For the rest of the story, you'll just have to keep watching trucks. Don't go away. We'll be right back

for more information about trucks. Check us out online at trucks, tv.com.

Thanks for hanging with us. Everybody.

You know, back in the late seventies, muscle cars had been reduced to mere memories. Government regulations that choked out the horsepower and high compression, big block engines were pretty much history.

However, light trucks for the most part were exempt to these rules. So in one last effort, Dodge decided to take advantage of this.

Now, it only lasted for a couple of years, 78 and 79 but

the little red Express will always be part of automotive history.

And the owner of this little slice of Americana is Larry Webb from Athens, Tennessee

Dodge only produced a little more than 7000 of these trucks in its two year run and this one here only has 47,000 original miles on it.

Now, the first thing that catches your eye on the little Red Express are the side stacks

and they're not only factory, but they're also functional.

They have a stainless cover to keep from burning your hands

and the mufflers are right under the doors and they run up to a set of headers that are bolted up to a 360 cubic inch small block.

Now that pumps out 225 horse at the rear wheel,

which made this rig the fastest production vehicle on the road in 78 and 79.

And yes, that does include the Trans Am as well as the vet.

Another thing that's impossible to miss on this ride is the badging on the door.

Let's just say there was no doubt that you were driving off the lot here.

The interior is pretty spartan by today's standards with a bench seat and no headliner,

but it did have everything you need, including full instrumentation as well as wood graining on the dash and doors.

The beds on the Express only came in a step side and

they were just begging to be stuffed with some big old fat tires.

It looks like we're gonna have to talk to our friend Larry about some upgrades back here,

although he probably won't want to lose these original wheels because that's about the hottest thing you could get back then.

Definitely wasn't afraid to hang a little wood on a little red truck and I do mean wood, no fake plastic stick ons. Here. They covered the outside of the bed in the back of the tailgate with half inch oak inserts.

And if that wasn't enough, they also laid down one inch planks in the bed.

This exterior package, the designers at Dodge wrapped around a hot 360 motor beefy transmission and the 350 gear in the rear

was just the beginning of what's become the sport truck movement. We know today,

bottom line, the little red Express understood that all work and no play wasn't good

even for a truck.

If you want more trucks, check us out online at trucks, tv.com.

Welcome back, everybody.

You know, nothing can ruin a trail ride quicker

than a motor that overheats

and let's face it. If you're running up a steep incline, two or three miles an hour, hot summer sun beating down on you a

lot of horsepower under the hood, overheating can be a problem, especially if you've got an inferior cooling system.

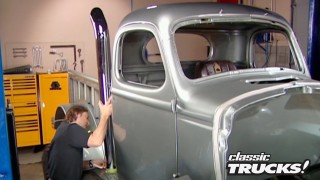
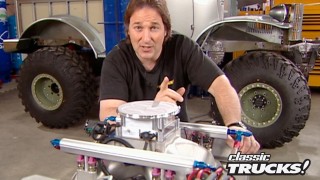
We're gonna avoid that disaster with wicked willies by using a complete system. We got from Evans cooling. Now you can change out a radiator or a thermostat, but don't kid yourself the best results always come from a complete system.

This one comes with the radiator

water pump,

thermostat. As well as Evans waterless coolant.

Now, don't worry, your ears are not playing tricks on you. This is in fact, a waterless system and that's got some definite benefits that we'll talk about later on.

Now, when a water based system, like our Mopar here, 30% of your coolant runs out of this bypass and right back into the hot motor, it never makes it to the radiator.

And with the Evans system,

this bypass is plugged.

So all the coolant runs right through the radiator.

Speaking of that radiator, we had Evans build us an all aluminum replacement for our stocker. And as you can see, it has all the stock measurements. Now, one of the biggest advantages to aluminum, as opposed to copper or brass,

you have much bigger tubes inside which gives you better flow.

Now, the thermostat is also uniquely designed, as you can see, it has a small little vent holes that allows the air to escape when you fill up the system.

Now, the new water pumps also been massaged a bit.

It's got a different sized impeller with his backing plate for greater flow.

They also add an air bleed screw so you can release trapped air inside the impeller cavity. Of course, this orange house of color paint is our own touch.

A common problem you run into when doing a motor swap is you don't always have enough room for a mechanical fan.

So we went to flex a light and picked up this electrical compact, dual fan that you can hook up to a thermostat or a manual switch in the c

this set up also bolts right up to the radiator.

But before we can install the fans, we need to deal with the problem of radiator hoses. Now, in any kind of a custom application, the only way to go is with these cool flex hoses that we got from total performance.

Now, they're made out of seamless copper tubing that's been chrome plated.

Now you just take a hacksaw and cut them to the length that you want

and then bend them to whatever shape they need to be.

Then you finish them off with these really cool end clamps. These are also available for heater hoses.

Now, once we have the system completely sealed, we can give wicked willies a drink of this waterless coolant.

This stuff has a boiling point of more than 350 degrees at zero pressure and in freezing temperatures, it shrinks which makes cracking a block impossible.

Oh,

if you work on trucks long enough, eventually you're gonna break off a bolt and there's nothing worse than feeling a bolt get looser when it's supposed to be getting tighter.

Now, keep in mind, most bolts are held in place by tension on the bolt head itself. Now, once that's broken off, there's little or no tension on the remaining threads.

So before you reach for an easy out in a drill, grab yourself a small punch and a hammer tap around the outside of the broken off piece. You should be able to back it up.

This can save you hours of needless frustration.

A burnout was actually designed to serve a purpose other than just pure crowd pleasure and smoky skies.

In the early days of drag racing drivers discovered getting heat in the rear tires actually made for a better launch, which meant better.

And now truck gear, parts, tools and equipment for pickups and sport utilities.

Now, depending on the lift you put on your truck, you'll need a place to mount up to a 44 inch spare. And since under the bed is not an option, a really cool look is in the bed itself, the spare tire mount from RJ R products with its all steel construction allows you to do just that

you can also lock your spare in place to prevent theft.

But if you need to put your truck to work

the mount's removable, the RGR spare tire mount runs about $220

when it comes to bed liner, you've got the plastic drop in kind and of course the spray in kind.

Well wise industries has their own approach to this with what they call the bed rug.

And this is made out of a polyester carpet that's bonded to a closed cell foam which is waterproof, so it withstands the elements.

Now, this liner fits the inside of your bed like a glove and installs in just a few minutes and pops out even quicker if you need to wash it. Take care of the business end of your truck or SUV, with a bed rug for about 400 bucks.

Spend any time with your vehicle off road and you're bound to need some trail side repairs. That's not gonna be a problem. If you have a Leatherman.

The super tool comes complete with pliers, Philips and standard head screwdrivers knives and just about anything else you might need to complete repairs that can put an end to a great day on the trail.

The Leatherman comes with a 25 year guarantee and

goes for about 80 bucks. That's gonna do it for truck gear. Here's a preview of next week's show.

It's the installation of a supercharger on a 98 S 10. We'll blow your mind by squeezing V eight horsepower out of a 4.3 V six. After that, we'll take you for a ride with off-road legend Walker Evans and the championship off road racing series before heading back to the shop to help you out with some vintage upgrades.

That's all next week on trucks.

That's gonna do it for this week's show. Thanks for being with us. We look forward to trucking with you again. Next week,

trucks is an RT M production
Show Full Transcript