

Truck Tech Builds


Want more content like this?
Join the PowerNation Email NewsletterParts Used In This Episode

Matco Tools
MATCO Tools are the Official Tool Supplier to PowerNation
The Industrial Depot
Tools, Hardware, Shop Supplies
Episode Transcript
(Jeremy)>> You're watching Powernation!
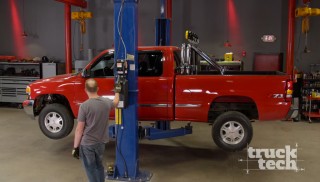
(LT)>> Today on Truck Tech we add a little bit of mid '90's flare to this early 2000's GMC. I might be crazy but I just think it might work. [ MUSIC ] [ engine revving ] [ tires squealing ] [ MUSIC ]
(LT)>> Yeah baby!
(Austin)>> Woo hoo! [ MUSIC ]
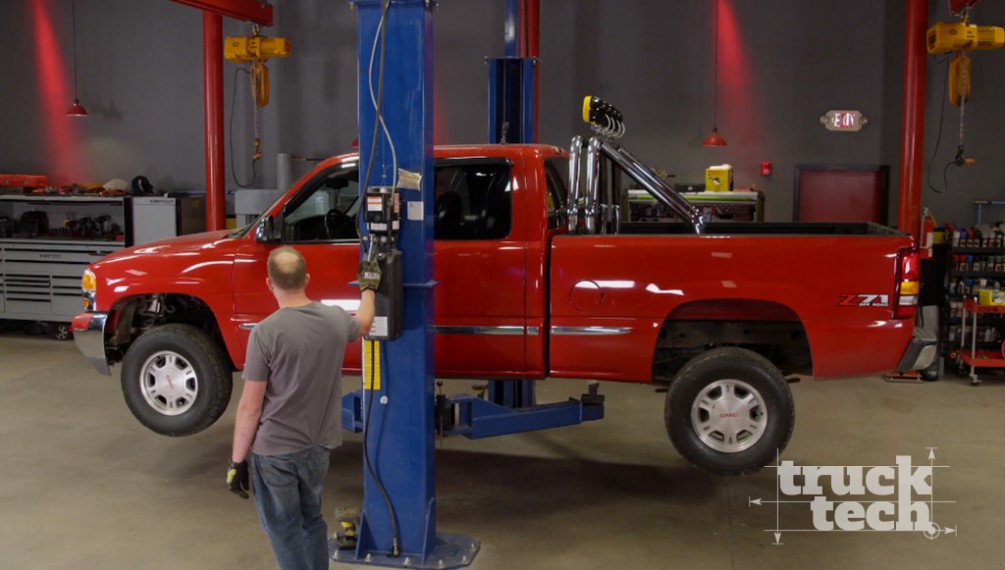
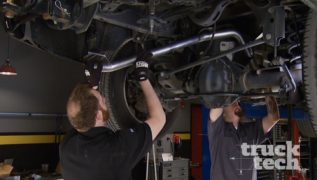
(LT)>> Let's talk about popular trends for a moment. Now I'm not talking about fashion, shoes, jeans, any of that. I mean obviously you guys have seen how I dress. I am not up on the most current fashion trends but let's talk about trucks. If you go to a popular truck show, maybe SEMA or something like today, you look around you're gonna see bigger badder. Everything is giant, wheels, 24, 26 inches. It's kinda almost the standard now days. You know lift kits, you've got 9 inches, 14 inches, sometimes on air ride. It's all about being big and being outlandish. Let's talk about old school trucks for a second. Let me take you back. This is kinda to when I was in middle school and high school in the mid '90's. If you had a big tire well guess what? You were rolling on 33 12-50 15's. You know I'm talking roll bar in the bed with the yellow lights on top. Those are some things that were way cool back in the day, but as trends do they come and then they go. So it's been a long time since I've seen a truck that's had a roll bar bolted in the back. Now I will note that it is becoming popular again because that's another thing that happens with trends. They're cyclical, they come and they go. In fact if you browse social media one thing I've noticed you see a lot of small wheels that are coming back into play. You know it's now all of a sudden cool again to be running a 16 by 12 old school wheel. It's time for a new project here at Truck Tech. In fact I'm sitting in it right now. So let me show you what I picked out. Now I suppose the logical choice for a mid '90's throwback build would be a mid '90's truck but we've seen that before. I wanted to see the mid '90's treatment on an early 2000's truck, and that's why I picked a 2002 GMC Sierra 1500. Now this is probably one of the most popular used trucks on the market to this day. They made literally millions of these things and ours has 250,000 miles on it but that's okay because it runs great. Now as far as the condition it's in this is about as original as they come. The three most popular modifications, wheels, exhaust, and intake, all bone stock. So this truck is basically a time capsule. The interior, considering its age, is in really great shape. So this is a perfect blank canvas to start our retro build. [ MUSIC ] Now as far as my initial impressions of this particular truck it's a classic GMC and it drives basically like a nearly 20 year old truck should drive. It's got a few clunks on the front and definitely a few loose parts here and there. So we'll address that along the way, but as far as power goes I mean these little 5-3's, they actually do really well. They're reliable. I mean they'll last forever, and it's pretty spunky for being a stock truck with 258,000 miles on the odometer. So we'll rebuild the front end. We'll tide things up there and get rid of some of the looseness, some of the play. That's fairly basic standard operating procedure when you drive a truck that's nearly 20 years old. Take care of some of the problems and we'll give this truck a new lease on life. So let's get back to the shop and let's get started. [ MUSIC ] When I originally came up with a scheme to put a roll bar in the bed of this pickup I wasn't actually sure if I could even find one new. I figured worst case scenario either I had to go to a junkyard, find an old one, and get it either re-plated or re-painted, or I would just build one out of stainless steel exhaust tubing but luckily they actually still make them. So we picked one up. Now we did get it from Summit Racing because they have such an extensive line of truck accessories, and this is a Go Rhino bed bar. Now they make this in black or chrome, which for me is the obvious choice if we're doing a mid-90's style of build, and it's a double-single. Basically what that means, there are two main bars and a pair of kickers that go down the back. Now this is designed to resemble an off road full roll cage, but it's just a stylistic upgrade. There's actually no collision or roll over protection that this will afford you, but it looks great and I can't wait to get it in. Later on we'll show you how to extract a broken bolt without damaging your cylinder head, but up next nothing says throwback like retro lighting.
(LT)>> We're adding a little mid '90's throwback styling to our extended cab GMC with this chrome bed bar, and it's very simple to assemble. The tubes are sleeved so they can slide together and a series of bolts hold it all in place. With the main double tubes connected with a spacer in between and everything tightened down, we get the whole thing into the bed of Sierra. Alright Jimmy so we're going for a bit of a retro vibe here. What do you think, did we nail it?
(Jimmy)>> Yes I think you did. It screams '90's.
(LT)>> Good, I was gonna say some people think a little bit '80's or even '70's with a roll bar. This is what I remember. You're on a little toe hook. There we go.
(Jimmy)>> I think you hit the nail on the head with this one.
(LT)>> I like it.
(Jimmy)>> Alright man well I'm gonna let you get back to it. I can't wait to see this thing done cause this is a pretty good start.
(LT)>> You know it's not everybody's cup of tea but I don't care. I like it!
(Jimmy)>> Cool man! [ MUSIC ]
(LT)>> Because this is a universal roll bar kit all we've got to do is get it centered in the bed and slid all the way forward, and then we can mark for placement of the holes. [ drill humming ]
(LT)>> Alright we're drilling holes through the bed. So you've got to pay attention to where stuff is. In this particular truck there's a gas tank that runs right along here. This is a really long drill bit. Now just be careful you shouldn't have any problems, but if you jam this thing all the way through you might smell gas that starts to leak. So just kinda take your time and you'll be all set. [ MUSIC ] Simply bolting this chrome roll bar into the bed of our GMC makes it look three or four years older than it really is, but we can do better than that and back date this truck all the way to the mid '90's with the proper choice of lighting. Now if you're gonna go get some off road lights for your vehicle today you're probably gonna grab an l-e-d light bar. They're fairly short, often wide, and they put out a ton of light but they're very expensive and just would not look at home on our build. There's really only one choice and that is a set of four KC Daylighters. Now you've seen these things before. Probably the most iconic vehicle they're on is BigFoot, but this is definitely a mid '90's statement. They're really bright. They come with these yellow plastic covers, which are intended to make them legal for driving on the street because in a lot of jurisdictions you actually can't have aftermarket lighting. So that's what the smiley face is for it makes me pretty happy too. So all we've got to do now is get this bolted to the light mounting bar and then we'll get everything bolted up to the roll bar. The light bracket is an optional extra but it comes with the mounting holes pre-drilled, which makes installation of the lights a breeze, and the whole assembly can be attached to the roll bar with two bolts. [ MUSIC ]
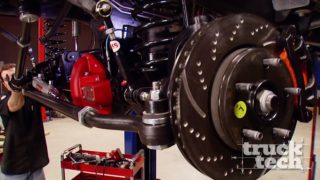
(LT)>> Well that is definitely Chuck Norris approved. [ MUSIC ] While cosmetic upgrades are fine it's time that we move on and install something that's actually gonna increase the performance of this truck because after all something that looks good but is slow doesn't do anybody any good. Now headers have been a popular modification for many years because they increase the performance of your engine by reducing the back pressure in the exhaust and increasing the scavenging effect, which essentially helps suck the exhaust out of the engine. Now Summit Racing sells many different styles of header from a direct bolt in shorty, to a mid-length, to this, a long tube header. Now these generally take a few more steps to install but the longer primaries will help increase the scavenging effect and a long tube usually has the greatest gains in horsepower out of any of the three styles that we listed. Now this is also a ceramic coated header, which means it's gonna look this good pretty much the lifetime of the truck, but also it's gonna help contain some of the heat inside the exhaust system rather than letting it radiate out to the engine bay. Now before I get these things installed first I have to remove the manifolds and the rest of the exhaust system. [ mechanical humming ]
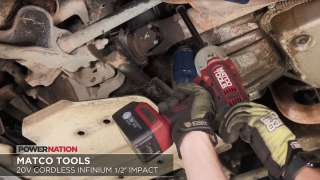
(LT)>> When it comes time to disconnect the exhaust system from the manifolds I usually shy away from using a breaker bar or a ratchet because in my experience the slow twisting motion that you get is much more likely to twist off the rusted bolts. Instead I prefer to use something with just a little bit more umph like the Matco Tools half inch Infinium cordless 20 volt impact. Now this has 1,600 pounds of breakaway torque from its brushless motor, but it also has a variable speed trigger, which works for the delicate jobs as well as the heavy duty stuff. It's got a nylon re-enforced composite handle, which means it's durable and lightweight, and it has a five amp hour battery with a built in charge indicator, which lets you know exactly how much juice you've got left. [ drill buzzing ] [ MUSIC ]
(LT)>> Got you! Next long tube headers will make our 5.3 breathe.
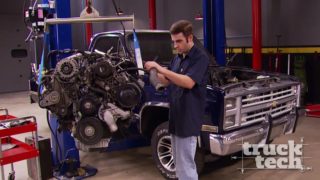
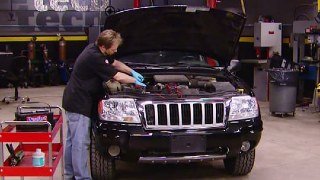
(LT)>> It's a fact of life that engines can wear out. However some are more prone to failure than others, like the 3.8 V-6 found in JK Wranglers between '07 and '11. Now if yours has bitten the dust you could take it apart and send it off to a machine shop to get it rebuilt but a quicker and usually more affordable option would be to pick up a remanufactured long block from Powertrain Products. It comes with graphite coated pistons, which will reduce cylinder bore wear, long lasting multi-layer steel head gaskets, Viton valve stem seals, which will reduce the oil consumption problem that these are known for, and it even comes with an updated oil pump. Standard you'll get a five year warranty but that can be extended all the way out to seven. So if you need a long block for your JK or pretty much any vehicle check out Powertrain Products. Today the name of the game is getting a set of long tubes installed on our '02 GMC, and I've already got the passenger's side exhaust manifold off. Now you can see these things certainly aren't the best looking and they are slightly restrictive, but here's a cool tech tip. If you guys are doing an LS swap or something with a turbo application these exhaust manifolds are actually made from cast steel and not cast iron, which is useful because you can cut off these three bolt flanges and weld on a v-band or weld on a different shaped outlet to this exhaust manifold for a turbo application or what have you. But anyway, we've got to get the driver's side exhaust manifold off of the engine, and I already just took a peak and there's a broken off bolt on the very front port. Now this is actually a little bit common on an LS application, especially in a pickup truck or a vehicle that's seen higher miles and a lot of heat cycles. Basically as that fastener expands and contracts as it gets warmer and cooler it can fatigue and just crack, and basically the heads will fall off. Like I said it's a fairly common problem and I'll show you how to deal with it but first we've got to get this manifold off the engine. [ MUSIC ] [ drill humming ] [ MUSIC ]
(LT)>> I've seen guys try to fix these bolts, drilling them out, tapping them with like an easy out type of situation. I've done that and it'll work but it's time consuming and this is a little bit easier. Our Forney mig welder is the ideal tool for the job since it can quickly build up material and get down into some hard to reach places. I'll throw on some vice grips and the broken bolt quickly backs out. Well all it took is one little glob welded on the end and we're able to back the bolt out. Now this works especially well on this situation, an aluminum cylinder head with an exhaust manifold bolt because the heat from welding actually helps soften up the thread locker that holds these in, and they're really not all that tight in the first place. You just need a way to grab on and to back them out. So it's just one more way you can use a welder around the shop. [ MUSIC ] Because the long tube headers are so much longer than the stock exhaust manifolds there's no way that they're gonna easily connect to the factory mid pipe. So I cut off the excess and basically left this "Y" transition to merge two pipes into one. In the future I do plan on running an aftermarket exhaust that bolts up to this flange right here. So for now I'm just gonna leave the stock exhaust out back and this will just serve as a mounting location to hold everything in place while I fab up the middle section. The collectors have a three inch outlet and the Y-pipe has a two and a half inch inlet, and there's really no need to run three inch exhaust on an engine of this power level. So I'm gonna reduce down to two and a half inches right off the headers, and on the driver's side just make a quick 90 degree bend and it should shoot straight into the Y-pipe. The passenger's side should be even simpler because it's more or less a straight shot. I might need to jog it over to the left just a little bit but should be pretty simple. So I'll get started over here and I need about 6 or 7 inches of pipe. My method for building a custom exhaust may seem a little bit unorthodox but it works out pretty well for me. This is basically a game of connect the dots and once the major components are mounted all you've got to do is fill in the gaps. I like to build small sub-assemblies at a time. Basically I'll hold up one, or two, or possibly three, bends at a time, mark for position, and then tach weld everything together over on the bench. Then I'll mig tack the big chunks together underneath the truck so I know it's all gonna fit perfectly and then remove the entire thing for finish welding over on the bench, and we'll take care of that next, and we'll demo a mig, tig, and stick welder combination perfect for the do it yourselfer.
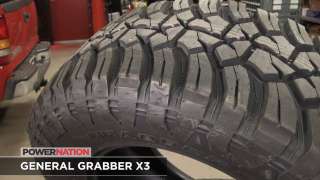
(LT)>> It can be a little bit difficult to find a tire that'll work excellent off road but one that's also quiet enough to be driven comfortably when you're on the road, but the Grabber X-3 from General Tire will do just that. It features a high void tread pattern with alternating should lugs and multiple gripping edges, which will give you great traction in all kinds of terrain. Sand, rocks, mud, or even just loose gravel, and the lugs on the side will provide extra protection and traction for when things get a little bit deep. The rubber compound will provide protection against cuts and gouges, and they're available in a wide range of sizes. Wheels between 15 to 22 inches and overall diameter goes up to 37. The Y-pipe that we're building for our GMC Sierra is made from stainless steel, as is the factory exhaust that we're connecting to. Now you can weld this together with a mig welder. In fact that's how I tacked these two joints with everything underneath the truck, but for finish welding really the only method I prefer with stainless steel is tig welding. Now if you have a small shop at your house or you have a professional fab, and you weld both regular steel and aluminum you're gonna need a tig machine that'll handle both a/c and d/c output, and the Forney 220 AC/DC tig is just the machine for you. Now as its name suggests it'll output up to 220 amps of power when it's plugged in to 240 volts. However this is an inverter base dual voltage machine, and you can also plug it into 120 volts for those smaller projects and if you just don't happen to have 240 volts of power at your shop. Now this will output a/c current with independent adjustment of both the balance and the frequency, and of course it'll weld in the d/c tig mode as well, which is what we're going to be using, but you can also use it as a stick machine. It's super versatile but for our project I need to set it up with a d/c tig mode at somewhere around 80 amps. [ MUSIC ] If you're unfamiliar with the tig welding process it might seem a little bit complicated compared to mig welding, and yes it does require a few more steps but it's really not all that bad. You want to start out by setting your machine to the amperage that you'll need, and the rule of thumb is roughly one amp per thousandths of inch of thickness of material. Now I'm running 80 amps for the stainless exhaust tube but that doesn't mean I'm using 80 amps all the time because the foot pedal, basically you can think of that like the throttle in your car. It controls how much power is being output. Now you don't want to just floorboard this thing and hold it down because you're gonna melt a big giant hole in your material. Then you've got more work to do to try and patch it back up. Instead you use the foot pedal just like a throttle. You're gonna modulate how much power the machine is outputting, and from there you're just gonna kinda go ahead and add a little dab of filler, move your torch, add a dab, and move your torch. Now let's say you want to tig weld kind of out of position. Maybe you need to do a roll cage or something where you're welding overhead or you can't get your foot in a comfortable spot on a pedal. Now Forney also sells this Amptrol package along with their 220 AC/DC tig, and it does away with the need for a foot pedal because it basically puts it on the torch here. You've got an on/off switch that turns the machine on and off, and then you've got a little rotary dial here that lets you ramp up and ramp down your current. So basically you've got a foot pedal in your hand. Now as far as our exhaust project goes well all I've got to do is patch up these last couple of seams and we can get them back underneath the truck. [ MUSIC ] Overall that header install actually went fairly smoothly. Yes we did have a few road blocks along the way, like having to extract a few bolts from the cylinder head and modify the Y-pipe, but honestly that's just par for the course when it comes to building trucks, especially if you start with an older one. Now my favorite part about this is the fact that it uses the factory flange back here. So if we want to run the stock exhaust for a nice quiet sleeper sound we can do that, or if we want to swap to an aftermarket dual exhaust for a little more rumble that'll be super simple as well. So now the only thing we've got left to do is get this truck on the ground, start it up, check for leaks, and hear how it sounds. [ MUSIC ] Well it's nice and quiet, which means there are no leaks. Now we're gonna fix that next time by adding an aftermarket exhaust and we're definitely gonna give this thing a little bit more rumble along with a few other upgrades that'll make this truck sit up in the air just a little bit and have a little more scoot when you put your right foot down. If you've got any questions about anything you've seen on the show today be sure to check us out at Powernation TV dot com.
Show Full Transcript
(LT)>> Today on Truck Tech we add a little bit of mid '90's flare to this early 2000's GMC. I might be crazy but I just think it might work. [ MUSIC ] [ engine revving ] [ tires squealing ] [ MUSIC ]
(LT)>> Yeah baby!
(Austin)>> Woo hoo! [ MUSIC ]
(LT)>> Let's talk about popular trends for a moment. Now I'm not talking about fashion, shoes, jeans, any of that. I mean obviously you guys have seen how I dress. I am not up on the most current fashion trends but let's talk about trucks. If you go to a popular truck show, maybe SEMA or something like today, you look around you're gonna see bigger badder. Everything is giant, wheels, 24, 26 inches. It's kinda almost the standard now days. You know lift kits, you've got 9 inches, 14 inches, sometimes on air ride. It's all about being big and being outlandish. Let's talk about old school trucks for a second. Let me take you back. This is kinda to when I was in middle school and high school in the mid '90's. If you had a big tire well guess what? You were rolling on 33 12-50 15's. You know I'm talking roll bar in the bed with the yellow lights on top. Those are some things that were way cool back in the day, but as trends do they come and then they go. So it's been a long time since I've seen a truck that's had a roll bar bolted in the back. Now I will note that it is becoming popular again because that's another thing that happens with trends. They're cyclical, they come and they go. In fact if you browse social media one thing I've noticed you see a lot of small wheels that are coming back into play. You know it's now all of a sudden cool again to be running a 16 by 12 old school wheel. It's time for a new project here at Truck Tech. In fact I'm sitting in it right now. So let me show you what I picked out. Now I suppose the logical choice for a mid '90's throwback build would be a mid '90's truck but we've seen that before. I wanted to see the mid '90's treatment on an early 2000's truck, and that's why I picked a 2002 GMC Sierra 1500. Now this is probably one of the most popular used trucks on the market to this day. They made literally millions of these things and ours has 250,000 miles on it but that's okay because it runs great. Now as far as the condition it's in this is about as original as they come. The three most popular modifications, wheels, exhaust, and intake, all bone stock. So this truck is basically a time capsule. The interior, considering its age, is in really great shape. So this is a perfect blank canvas to start our retro build. [ MUSIC ] Now as far as my initial impressions of this particular truck it's a classic GMC and it drives basically like a nearly 20 year old truck should drive. It's got a few clunks on the front and definitely a few loose parts here and there. So we'll address that along the way, but as far as power goes I mean these little 5-3's, they actually do really well. They're reliable. I mean they'll last forever, and it's pretty spunky for being a stock truck with 258,000 miles on the odometer. So we'll rebuild the front end. We'll tide things up there and get rid of some of the looseness, some of the play. That's fairly basic standard operating procedure when you drive a truck that's nearly 20 years old. Take care of some of the problems and we'll give this truck a new lease on life. So let's get back to the shop and let's get started. [ MUSIC ] When I originally came up with a scheme to put a roll bar in the bed of this pickup I wasn't actually sure if I could even find one new. I figured worst case scenario either I had to go to a junkyard, find an old one, and get it either re-plated or re-painted, or I would just build one out of stainless steel exhaust tubing but luckily they actually still make them. So we picked one up. Now we did get it from Summit Racing because they have such an extensive line of truck accessories, and this is a Go Rhino bed bar. Now they make this in black or chrome, which for me is the obvious choice if we're doing a mid-90's style of build, and it's a double-single. Basically what that means, there are two main bars and a pair of kickers that go down the back. Now this is designed to resemble an off road full roll cage, but it's just a stylistic upgrade. There's actually no collision or roll over protection that this will afford you, but it looks great and I can't wait to get it in. Later on we'll show you how to extract a broken bolt without damaging your cylinder head, but up next nothing says throwback like retro lighting.
(LT)>> We're adding a little mid '90's throwback styling to our extended cab GMC with this chrome bed bar, and it's very simple to assemble. The tubes are sleeved so they can slide together and a series of bolts hold it all in place. With the main double tubes connected with a spacer in between and everything tightened down, we get the whole thing into the bed of Sierra. Alright Jimmy so we're going for a bit of a retro vibe here. What do you think, did we nail it?
(Jimmy)>> Yes I think you did. It screams '90's.
(LT)>> Good, I was gonna say some people think a little bit '80's or even '70's with a roll bar. This is what I remember. You're on a little toe hook. There we go.
(Jimmy)>> I think you hit the nail on the head with this one.
(LT)>> I like it.
(Jimmy)>> Alright man well I'm gonna let you get back to it. I can't wait to see this thing done cause this is a pretty good start.
(LT)>> You know it's not everybody's cup of tea but I don't care. I like it!
(Jimmy)>> Cool man! [ MUSIC ]
(LT)>> Because this is a universal roll bar kit all we've got to do is get it centered in the bed and slid all the way forward, and then we can mark for placement of the holes. [ drill humming ]
(LT)>> Alright we're drilling holes through the bed. So you've got to pay attention to where stuff is. In this particular truck there's a gas tank that runs right along here. This is a really long drill bit. Now just be careful you shouldn't have any problems, but if you jam this thing all the way through you might smell gas that starts to leak. So just kinda take your time and you'll be all set. [ MUSIC ] Simply bolting this chrome roll bar into the bed of our GMC makes it look three or four years older than it really is, but we can do better than that and back date this truck all the way to the mid '90's with the proper choice of lighting. Now if you're gonna go get some off road lights for your vehicle today you're probably gonna grab an l-e-d light bar. They're fairly short, often wide, and they put out a ton of light but they're very expensive and just would not look at home on our build. There's really only one choice and that is a set of four KC Daylighters. Now you've seen these things before. Probably the most iconic vehicle they're on is BigFoot, but this is definitely a mid '90's statement. They're really bright. They come with these yellow plastic covers, which are intended to make them legal for driving on the street because in a lot of jurisdictions you actually can't have aftermarket lighting. So that's what the smiley face is for it makes me pretty happy too. So all we've got to do now is get this bolted to the light mounting bar and then we'll get everything bolted up to the roll bar. The light bracket is an optional extra but it comes with the mounting holes pre-drilled, which makes installation of the lights a breeze, and the whole assembly can be attached to the roll bar with two bolts. [ MUSIC ]
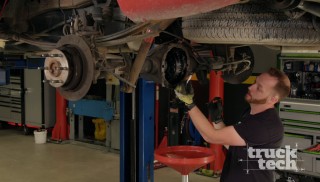
(LT)>> Well that is definitely Chuck Norris approved. [ MUSIC ] While cosmetic upgrades are fine it's time that we move on and install something that's actually gonna increase the performance of this truck because after all something that looks good but is slow doesn't do anybody any good. Now headers have been a popular modification for many years because they increase the performance of your engine by reducing the back pressure in the exhaust and increasing the scavenging effect, which essentially helps suck the exhaust out of the engine. Now Summit Racing sells many different styles of header from a direct bolt in shorty, to a mid-length, to this, a long tube header. Now these generally take a few more steps to install but the longer primaries will help increase the scavenging effect and a long tube usually has the greatest gains in horsepower out of any of the three styles that we listed. Now this is also a ceramic coated header, which means it's gonna look this good pretty much the lifetime of the truck, but also it's gonna help contain some of the heat inside the exhaust system rather than letting it radiate out to the engine bay. Now before I get these things installed first I have to remove the manifolds and the rest of the exhaust system. [ mechanical humming ]
(LT)>> When it comes time to disconnect the exhaust system from the manifolds I usually shy away from using a breaker bar or a ratchet because in my experience the slow twisting motion that you get is much more likely to twist off the rusted bolts. Instead I prefer to use something with just a little bit more umph like the Matco Tools half inch Infinium cordless 20 volt impact. Now this has 1,600 pounds of breakaway torque from its brushless motor, but it also has a variable speed trigger, which works for the delicate jobs as well as the heavy duty stuff. It's got a nylon re-enforced composite handle, which means it's durable and lightweight, and it has a five amp hour battery with a built in charge indicator, which lets you know exactly how much juice you've got left. [ drill buzzing ] [ MUSIC ]
(LT)>> Got you! Next long tube headers will make our 5.3 breathe.
(LT)>> It's a fact of life that engines can wear out. However some are more prone to failure than others, like the 3.8 V-6 found in JK Wranglers between '07 and '11. Now if yours has bitten the dust you could take it apart and send it off to a machine shop to get it rebuilt but a quicker and usually more affordable option would be to pick up a remanufactured long block from Powertrain Products. It comes with graphite coated pistons, which will reduce cylinder bore wear, long lasting multi-layer steel head gaskets, Viton valve stem seals, which will reduce the oil consumption problem that these are known for, and it even comes with an updated oil pump. Standard you'll get a five year warranty but that can be extended all the way out to seven. So if you need a long block for your JK or pretty much any vehicle check out Powertrain Products. Today the name of the game is getting a set of long tubes installed on our '02 GMC, and I've already got the passenger's side exhaust manifold off. Now you can see these things certainly aren't the best looking and they are slightly restrictive, but here's a cool tech tip. If you guys are doing an LS swap or something with a turbo application these exhaust manifolds are actually made from cast steel and not cast iron, which is useful because you can cut off these three bolt flanges and weld on a v-band or weld on a different shaped outlet to this exhaust manifold for a turbo application or what have you. But anyway, we've got to get the driver's side exhaust manifold off of the engine, and I already just took a peak and there's a broken off bolt on the very front port. Now this is actually a little bit common on an LS application, especially in a pickup truck or a vehicle that's seen higher miles and a lot of heat cycles. Basically as that fastener expands and contracts as it gets warmer and cooler it can fatigue and just crack, and basically the heads will fall off. Like I said it's a fairly common problem and I'll show you how to deal with it but first we've got to get this manifold off the engine. [ MUSIC ] [ drill humming ] [ MUSIC ]
(LT)>> I've seen guys try to fix these bolts, drilling them out, tapping them with like an easy out type of situation. I've done that and it'll work but it's time consuming and this is a little bit easier. Our Forney mig welder is the ideal tool for the job since it can quickly build up material and get down into some hard to reach places. I'll throw on some vice grips and the broken bolt quickly backs out. Well all it took is one little glob welded on the end and we're able to back the bolt out. Now this works especially well on this situation, an aluminum cylinder head with an exhaust manifold bolt because the heat from welding actually helps soften up the thread locker that holds these in, and they're really not all that tight in the first place. You just need a way to grab on and to back them out. So it's just one more way you can use a welder around the shop. [ MUSIC ] Because the long tube headers are so much longer than the stock exhaust manifolds there's no way that they're gonna easily connect to the factory mid pipe. So I cut off the excess and basically left this "Y" transition to merge two pipes into one. In the future I do plan on running an aftermarket exhaust that bolts up to this flange right here. So for now I'm just gonna leave the stock exhaust out back and this will just serve as a mounting location to hold everything in place while I fab up the middle section. The collectors have a three inch outlet and the Y-pipe has a two and a half inch inlet, and there's really no need to run three inch exhaust on an engine of this power level. So I'm gonna reduce down to two and a half inches right off the headers, and on the driver's side just make a quick 90 degree bend and it should shoot straight into the Y-pipe. The passenger's side should be even simpler because it's more or less a straight shot. I might need to jog it over to the left just a little bit but should be pretty simple. So I'll get started over here and I need about 6 or 7 inches of pipe. My method for building a custom exhaust may seem a little bit unorthodox but it works out pretty well for me. This is basically a game of connect the dots and once the major components are mounted all you've got to do is fill in the gaps. I like to build small sub-assemblies at a time. Basically I'll hold up one, or two, or possibly three, bends at a time, mark for position, and then tach weld everything together over on the bench. Then I'll mig tack the big chunks together underneath the truck so I know it's all gonna fit perfectly and then remove the entire thing for finish welding over on the bench, and we'll take care of that next, and we'll demo a mig, tig, and stick welder combination perfect for the do it yourselfer.
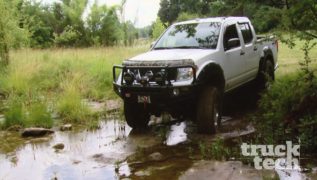
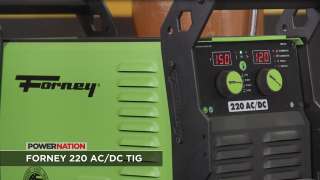
(LT)>> It can be a little bit difficult to find a tire that'll work excellent off road but one that's also quiet enough to be driven comfortably when you're on the road, but the Grabber X-3 from General Tire will do just that. It features a high void tread pattern with alternating should lugs and multiple gripping edges, which will give you great traction in all kinds of terrain. Sand, rocks, mud, or even just loose gravel, and the lugs on the side will provide extra protection and traction for when things get a little bit deep. The rubber compound will provide protection against cuts and gouges, and they're available in a wide range of sizes. Wheels between 15 to 22 inches and overall diameter goes up to 37. The Y-pipe that we're building for our GMC Sierra is made from stainless steel, as is the factory exhaust that we're connecting to. Now you can weld this together with a mig welder. In fact that's how I tacked these two joints with everything underneath the truck, but for finish welding really the only method I prefer with stainless steel is tig welding. Now if you have a small shop at your house or you have a professional fab, and you weld both regular steel and aluminum you're gonna need a tig machine that'll handle both a/c and d/c output, and the Forney 220 AC/DC tig is just the machine for you. Now as its name suggests it'll output up to 220 amps of power when it's plugged in to 240 volts. However this is an inverter base dual voltage machine, and you can also plug it into 120 volts for those smaller projects and if you just don't happen to have 240 volts of power at your shop. Now this will output a/c current with independent adjustment of both the balance and the frequency, and of course it'll weld in the d/c tig mode as well, which is what we're going to be using, but you can also use it as a stick machine. It's super versatile but for our project I need to set it up with a d/c tig mode at somewhere around 80 amps. [ MUSIC ] If you're unfamiliar with the tig welding process it might seem a little bit complicated compared to mig welding, and yes it does require a few more steps but it's really not all that bad. You want to start out by setting your machine to the amperage that you'll need, and the rule of thumb is roughly one amp per thousandths of inch of thickness of material. Now I'm running 80 amps for the stainless exhaust tube but that doesn't mean I'm using 80 amps all the time because the foot pedal, basically you can think of that like the throttle in your car. It controls how much power is being output. Now you don't want to just floorboard this thing and hold it down because you're gonna melt a big giant hole in your material. Then you've got more work to do to try and patch it back up. Instead you use the foot pedal just like a throttle. You're gonna modulate how much power the machine is outputting, and from there you're just gonna kinda go ahead and add a little dab of filler, move your torch, add a dab, and move your torch. Now let's say you want to tig weld kind of out of position. Maybe you need to do a roll cage or something where you're welding overhead or you can't get your foot in a comfortable spot on a pedal. Now Forney also sells this Amptrol package along with their 220 AC/DC tig, and it does away with the need for a foot pedal because it basically puts it on the torch here. You've got an on/off switch that turns the machine on and off, and then you've got a little rotary dial here that lets you ramp up and ramp down your current. So basically you've got a foot pedal in your hand. Now as far as our exhaust project goes well all I've got to do is patch up these last couple of seams and we can get them back underneath the truck. [ MUSIC ] Overall that header install actually went fairly smoothly. Yes we did have a few road blocks along the way, like having to extract a few bolts from the cylinder head and modify the Y-pipe, but honestly that's just par for the course when it comes to building trucks, especially if you start with an older one. Now my favorite part about this is the fact that it uses the factory flange back here. So if we want to run the stock exhaust for a nice quiet sleeper sound we can do that, or if we want to swap to an aftermarket dual exhaust for a little more rumble that'll be super simple as well. So now the only thing we've got left to do is get this truck on the ground, start it up, check for leaks, and hear how it sounds. [ MUSIC ] Well it's nice and quiet, which means there are no leaks. Now we're gonna fix that next time by adding an aftermarket exhaust and we're definitely gonna give this thing a little bit more rumble along with a few other upgrades that'll make this truck sit up in the air just a little bit and have a little more scoot when you put your right foot down. If you've got any questions about anything you've seen on the show today be sure to check us out at Powernation TV dot com.


