Truck Tech Builds


Want more content like this?
Join the PowerNation Email NewsletterParts Used In This Episode
Matco Tools
MATCO Tools are the Official Tool Supplier to PowerNation
PowerTrain Products
5.3L LM7 Engine
The Industrial Depot
Tools, Hardware, Shop Supplies
Episode Transcript
(Jimmy)>> You're watching Powernation!
(Austin)>> Today on Truck Tech we're starting a brand new project. So it's time to mix things up in a big way. [ MUSIC ] [ engine revving ] [ tires squealing ] [ MUSIC ]
(LT)>> Yeah baby!
(Austin)>> Woo hoo! [ MUSIC ]
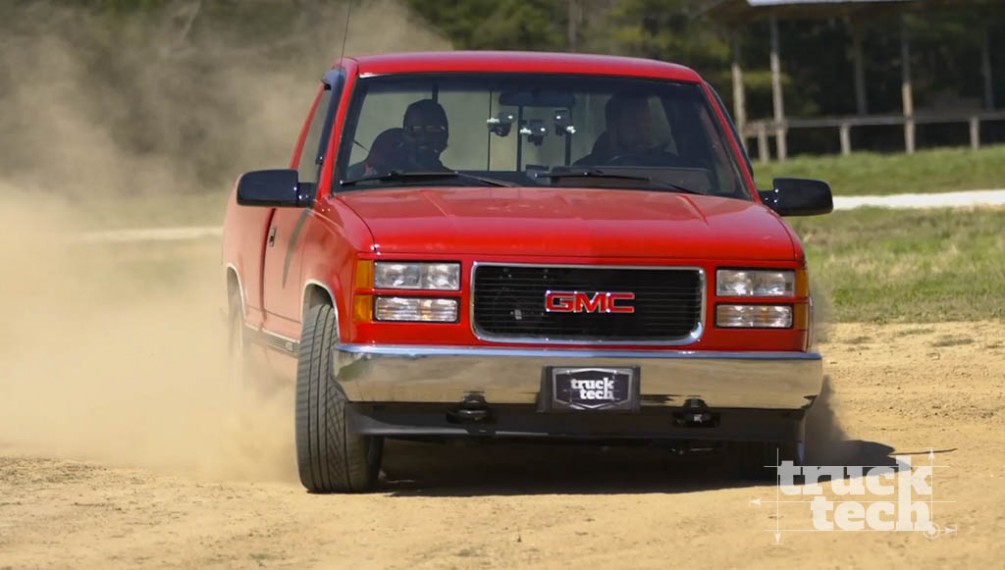
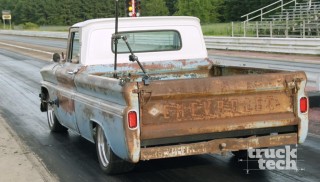
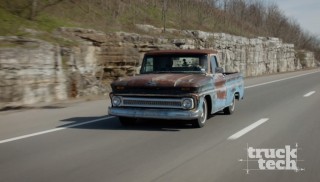
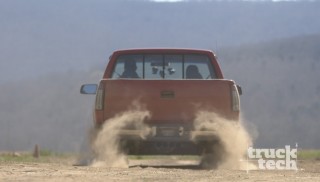
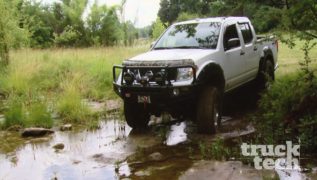
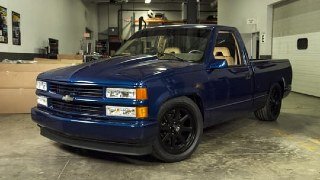
(LT)>> Today we're going to be kicking off a brand new project, this 1988 Chevy, and we're gonna nickname it "Project Redtide". It's a K-1,500, which means it's a half ton four wheel drive. I've always had a love affair with the single cab short box truck. They look great, they're agile, and they're just sporty. Now you'll notice this truck is a little bit dirty and that's because immediately after we bought it we took it out on the trail along side our K-5, which we just finished up. We really wanted to get a better idea of how this truck would handle the rough stuff, and it did pretty well for a mostly stock truck. The suspension soaked up the bumps and it had no problem tackling the mild mud holes that we pointed it at. All in it was a fun trail machine, but there's always room for improvement. So the question is what are we going to change first on the truck, and exactly what direction are we gonna take with this build as a whole? We could get the suspension up in the air and cut out all the i-f-s parts. Throw some solid axles underneath on leaf springs getting the truck another six to eight inches up in the air so we can run a massive 42 inch tall tire, making the K-1,500 the ultimate off roader. Our first modification to the suspension is gonna require that we remove the bed. [ drill humming ]
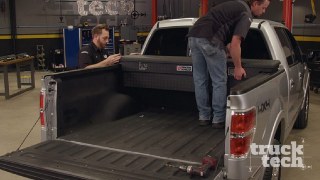
(LT)>> The bed is held to the frame with a couple of bolts, and an impact gun makes quick work of them. After that it's just a few wires for the taillights, the fuel filler neck, and the bed is loose. [ MUSIC ] We're going to move the truck outside and lift off the bed. If you don't happen to have a forklift sitting around a couple of buddies and a case of beer will do the job. Let's do some washing. It only takes a few minutes, and any time the bed comes off it's totally worth the extra effort to clean things up. [ MUSIC ] [ mechanical humming ]
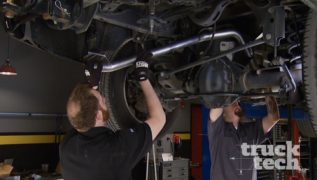
(LT)>> We're getting ready to lower the rear end of Red Tide, our '88 K-1,500, and the first step is to make some room for the axle. We have to get the bump stops out of the way first, and a cutoff wheel and air chisel make quick work of the rivet. Then it's just a matter of following the lines to slice the frame. This is plenty of clearance now but we can't leave it like this because it's just not strong enough so we will be installing this reinforcement plate over the frame. You'll notice that the notch isn't centered perfectly over the rear axles. That's because the saddles that the axle will sit in actually locate the axle just a little bit further towards the rear. This is because you won't have to change the length of your driveshaft. Because this quarter inch thick brace does take some power to burn into the frame I'm jumping around from side to side to control heat input. Alright we got the frame all tied back together and it's strong as ever. Now we don't always get to show you guys both sides of an operation like this, but I can't do the flip kit until both notches are in. So I've got a little bit more work to do but I have a feeling the other side will go just a little bit quicker. The truck frame is lowered down towards the axle and the leaf springs go right back into place, and the hardware gets snugged but we'll torque it later on with the truck on the ground. The axle saddles install over the spring center bolt with a hole towards the front. The truck is raised back up, and the axle slides right into its new home six inches lower than before. Because the truck is gonna sit so much lower the kit includes these shock extensions. They require the original large shock bolt, a five-sixteenths hole to be drilled, and two small bolts will keep it from twisting. Now the new shocks can be installed, which are optimized for a lowered street truck.
(Pat)>> There I got her.
(LT)>> I like how you don't mess around.
(Pat)>> You get where you need to be on that filler neck and you tell me when.
(LT)>> I'm around it, so you can come on down.
(Pat)>> I'm in the wrong business.
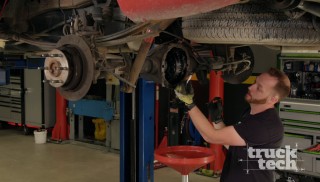
(LT)>> Looks perfect. We're nearly done dropping Red Tide, our '88 K-1,500, and we'll get started on the front by pulling off the original shocks. Then loosen the nut that holds the ball joint to the spindle, and loosen the taper with a hammer. Underneath the truck we'll use a special tool to loosen the tension on the torsion bar key. Then we can safely remove the stock adjustors and back off the tension on the tool. An air hammer knocks out the torsion bar and the lift keys are removed. Now the lifted upper control arms are removed from the truck, and we can replace them with a new stock set with the proper ball joint angle. Plus the new bushings will be an added bonus. Now we can tackle the front diff. We'll remove the passenger side drop bracket. Ooh man, look at that! Then replace it with a stock one we got from a junkyard. On the driver's side simply remove the aftermarket parts. Then the diff can be raised back up into its original home, lined up, and tightened back down. Now the dropped torsion bar keys can go into place. The bars are wiggled in and the adjustors are installed. Lastly the new shorter shocks can go in up front to finish lowering this four wheel drive sport truck.
(Austin)>> Up next it's time to swap the drivetrain and we're transferring for a world's first.
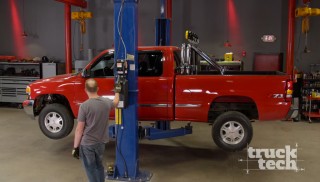
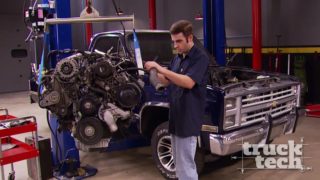
(LT)>> You've probably figured it out by now. We're actually going to be doing an engine swap, and yes it is part of the LS family. This is actually a 5.3 liter LM-7 we picked up from Powertrain Products, and it's not stock. It's actually a high performance crate engine designed for swaps like we're doing in Red Tide. [ MUSIC ] We're a little more than half way done pulling the drivetrain out of Red Tide, our '88 Chevy. I'll remove the converter cover, giving access to the bolts that hold the flex plate to the torque converter. Finally the main bolts that hold the transmission to the engine are threaded out and the trans is slowly lowered down and removed from the truck. All we have left to do is attach our lift sling to the exhaust manifold bolts and let our crane do the heavy lifting. Go that way just a hair. There we go.
(Mike)>> Doesn't get much easier than that.
(LT)>> Just because the engine and drivetrain are removed from the truck doesn't mean the job of tear down is complete. There are a few more things that we need to remove from the engine bay to clean up some of this mess and make preparation for the 5-3 LS that's going to be living in here in just a little bit. Our installation starts under the hood by bolting on some new stock replacement motor mounts since the old ones had seen better days. Then we'll bring in the 5.3 and slowly lower it into place. With the Hooker adapters it drops in just like the old one came out. With the truck raised up in the air we can install the s-f-i certified flex plate onto the back of the crank. The new transmission comes in and the pilot spacer goes onto the converter. Then the transmission gets raised up into place. The first step to converting Red Tide to all-wheel drive is getting the front differential mounted, and it's actually pretty remarkable how well this later model diff fits into this early year truck. In fact the only thing that we're gonna have to change is this mounting bracket on the passenger side because the boss is cast in just a little bit different position. So all we need to do is build a new passenger side bracket and we're in business. With the front differential in its new home the only thing we have left to do to convert this truck to all-wheel drive is install the transfer case. Now these NV 149's were only found behind 4-L-60's that had a 27 spline output shaft that keys in to the input of the transfer case. On most four wheel drive transfer cases that's not a big deal because there are some readily available factory parts like our 241, which came behind 4-L-80's in certain applications. The 149 though never came behind a 4-L-80. So there are no readily available factory parts we could use to make the switch. There is however a company up in Michigan that custom manufactures shafts, and they built us a 32 spline input shaft that goes inside of our NV 149. So all we've got to do is take this thing apart and make the switch. We're opening up a brand new transfer case for project Red Tide, and in the process building a truck that's unlike any we've ever seen, making what we think will be the world's first all-wheel drive GMT 400 Chevy truck. To accomplish that we need to install a different input shaft into this NV 149. The rear bearing C-clip is disengaged through an access hole, and using a pair of pry bars the glue sealing the two case halves together is cracked open, and the rear half of the case is removed. Now the rear planetary and main shaft slide out, followed by the sprocket and chain. Brand new chain. This guy right here, this is the viscous coupling. This is actually a non-serviceable item but this is the part that makes the all-wheel drive magic happen, and that is our input shaft. The last part holding the input shaft in is a c-clip, and once it's removed a few gentle taps of the plastic dead blow frees it from the case. Finally one more c-clip has to go, and the hammer helps remove the bearing. Now the process gets reversed with the bearing and c-clip going onto the 32 spline shaft. You ready? With a wooden block the shaft and bearing are driven into the front case half. Hear the sound change. That's how you know you're in. The c-clip goes back in followed by the viscous coupler. Then the chain and sprocket, and the main shaft and planetary slide back in. Then we'll clean any old sealant from the mating surface. A little r-t-v is applied to seal up the case, and the rear half slides on making sure to line up with the two internal shafts and the dowel pins. Now the final c-clip is opened up and the rear bearing is slid into place. Right on the money. [ drill buzzing ]
(LT)>> It's a big awkward but the case gets maneuvered up between the two cross members. The shafts line up and with a bit of wiggling the trans and transfer case are united. A few bolts hold the whole package together completing our all-wheel drive conversion.
(Austin)>> Coming up we'll fire up project Red Tide and fab up one cool exhaust.
(LT)>> Our all-wheel drive conversions is done on this old body style Chevy. Now I could spend some time out back and re-gear the 10 bolt to a 4.10 ratio. That would match the new front axle but we just installed, but instead I'm gonna spend some time on this engine and see if we can get it a little bit closer to firing up cause right now this 5.3 is just a bare long block. All the important parts that it needs to fire up and run haven't been installed yet. Recently I did some shopping, and the delivery guy just dropped off a whole bunch of parts. These are a Pace Setter header designed to fit a '99 to '07 four wheel drive Silverado but luckily they're a perfect fit for our LS swap truck. Back at the engine the manifold slides right into place and nuts and washers hold it down. The ignition coils go on and the plug wires are attached. The dip stick slides into the block and bolts to the head. Then the injector harness plugs in along with the coil harness. Finally the crank sensor goes in followed by the starter. Let's see if she fires. [ engine starting and idling ]
(LT)>> You just can't beat the sound of a V-8 with a nice healthy cam in it. [ engine revving ]
(LT)>> Next we want to clean up the interior of the truck a little bit. So we'll get to work by first unbolting and removing the seats. We gave you the hard job first day.
(Austin)>> Yeah let's yank them out.
(LT)>> The seatbelt anchors, kick panels, door seals, and a few other trim panels come out, and finally the nasty 30 year old carpet can get tossed in the dumpster.
(Austin)>> Since the transfer case swap this truck no long requires the use of a shifter assembly to access four wheel drive. Therefore we're gonna take it out, make a delete plate to block that off. [ drill buzzing ]
(LT)>> Alright man this ought to dress it up.
(Austin)>> This carpet's gonna lay down nice in here.
(LT)>> Bolt the seat brackets to the floor, re-install all the original trim, and finally bolt the new seats onto the sliders. The ring gear is going to be attached to this Detroit True Track helical gear style limited slip differential, which has a perfect split in power between the rear wheels, giving maximum traction on the street. Now in '88 there were several different options for spline counts on the 10 bolt rear end. We're gonna upgrade to the stronger 30 spline, which means we need a different axle shaft to attach to it. So we grabbed these Mosier 30 spline six lug axles that are a direct fit into our 10 bolt's housing. We also grabbed all the remaining parts that we'll need to complete the installation like a forged pinion yoke with a stronger 13-50 u-joint, an installation kit with all the shims, bearings, seals, and hardware that we'll need, and to strengthen the rear end just a little bit more we grabbed a Mosier differential cover with built in carrier cap supports. We'll get started by installing the ring gear onto the carrier. [ MUSIC ] One unique thing about the 10 bolt is the ring gear bolts are left hand thread. A small dab of thread locker will hold them in place. They are torqued to spec and the carrier bearings are pressed onto the carrier. Then the new bearing races are driven into the housing. There are a few critical steps to setting up the ring and pinion, and I always start with a stock pinion shim and a setup bearing to get a baseline. The rear end gets assembled temporarily so we can measure backlash and run a pattern check, both of which will tell us what needs to be adjusted. We're going to add ten thousandths of shim to the pinion, press on the bearing, permanently install the pinion into the housing, and tighten the nut until proper bearing pre-load is reached. Then the carrier goes in. We'll measure backlash and run a final pattern check. Now that the hard work is done the 30 spline axles slide into place and they're held there with the stock c-clips and the axle spacer. The retaining spacer and snap ring locks it all in place, and it gets sealed up with our new diff cover. The cap supports get pre-loaded finishing up the rear end.
(Austin)>> Up next we're out of the shop and ready to take you along for a dirty ride.
(LT)>> Our exhaust system is gonna start at the back of our long tube headers, which have a three inch v-band that's been welded on each side to make removing the exhaust system much simpler. Since the x-pipe has to sit between the trans and the frame I need to first build an offset bend. Once my cuts are made I'll fire up the tig and tack the two pieces to each other. Then fully weld them together using some 308 stainless filler. Then I'll attach the ring for the v-band clamp, attach the pipe to the header, and then slide on the crossover. There are a few obstacles we need to work around. Namely the passenger side shock and the rear axle. So I'll keep the pipes as high as possible and leave at least an inch of clearance between any part of the frame. My process is fairly simple. I'll just eyeball the correct angles, make a square cut on the chop saw, deburr the edges with a flap wheel and a die grinder, and when I'm happy with the fit I'll build the tailpipe section by tack welding on one bend at a time. So the last thing we have to do to finish up this exhaust is connect the over the axle pipe to the tip, add a few more hangers, and we're done. [ MUSIC ]
(Austin)>> When it comes to finding a place to take our project trucks when done we like to mix it up every now and then.
(LT)>> So we came out here where there's lots of loose gravel, wide open spaces, and some areas where we can get this truck to slide around a little bit. We're gonna try our hands at rally cross. [ MUSIC ] Low buck beaters to full custom tube chassis rally cross is a full on dirt racing series put on by the Sports Car Club of America. [ MUSIC ] Alright man let's see what she'll do.
(Austin)>> Let's check it out. [ engine revving ]
(Austin)>> Now remember them cones.
(LT)>> What side of the cone am I supposed to be on again?
(Austin)>> If it points left go left. If it points right go right. I'll tell you what she's handling pretty good.
(LT)>> Wasn't this supposed to be an easy lap? [ engine revving ]
(LT)>> Oh no, we slid around it! [ MUSIC ]
(LT)>> That was an easy lap. Hey look 71! Alright well that was supposed to be an easy lap and we didn't really take it super easy, but it looks like we did a 71.9.
(Austin)>> I don't even think you hit a cone, which I don't know how you didn't.
(LT)>> We'll have to double check that. I think we got one towards the end but I am hooked. Let's do it again!
(Austin)>> Ready amigo.
(LT)>> We're ready! [ engine revving ]
(LT)>> There we go! We couldn't be happier with how Red Tide handles the cones and curve. So we totally missed that one. Are you doing okay over there?
(Austin)>> I'm fine, don't worry about me buddy. Just hanging on here! We may have a little rubbing action, not really sure. You might want to...maybe stop. Let's check this out.
(LT)>> We might have broke something.
(Austin)>> Let's check it out. Something fixable I'm sure. We broke a front c/v shaft.
(LT)>> Really?
(Austin)>> It's completely ripped out. We could cut the shaft, tie it up, and just leave it bolted through. The wheel bearings are still operating.
(LT)>> Yeah that may F*^# up a diff though. Alright so second lap in. We were supposed to take it easy. We didn't take it super easy. We heard a loud clunk coming from the front end. These things happen. We pulled over half way through the lap. We took a look underneath the hood and it turns out one of the c/v axles that's on the passenger side of the truck actually kinda broke. So we're gonna look to see if maybe there's some way we can patch this thing together and keep having some fun, but sometimes you break, sometimes you have fun.
(Austin)>> Just a little clunkity clank here and there.
(LT)>> We had a blast today. I do wish Project Red Tide would have stood up just a little bit better but that's okay. It's a pretty minor fix, but we have to give a special thanks to the guys from Persad Parts in Athens, Alabama, for loaning us this '02 WRX that we beat on for the afternoon.
(Austin)>> Yeah they helped us out a bunch, and for more information on today's show visit Powernation TV dot com. And since you won maybe you can fix it.
(LT)>> I've got some wrenches.
Show Full Transcript
(Austin)>> Today on Truck Tech we're starting a brand new project. So it's time to mix things up in a big way. [ MUSIC ] [ engine revving ] [ tires squealing ] [ MUSIC ]
(LT)>> Yeah baby!
(Austin)>> Woo hoo! [ MUSIC ]
(LT)>> Today we're going to be kicking off a brand new project, this 1988 Chevy, and we're gonna nickname it "Project Redtide". It's a K-1,500, which means it's a half ton four wheel drive. I've always had a love affair with the single cab short box truck. They look great, they're agile, and they're just sporty. Now you'll notice this truck is a little bit dirty and that's because immediately after we bought it we took it out on the trail along side our K-5, which we just finished up. We really wanted to get a better idea of how this truck would handle the rough stuff, and it did pretty well for a mostly stock truck. The suspension soaked up the bumps and it had no problem tackling the mild mud holes that we pointed it at. All in it was a fun trail machine, but there's always room for improvement. So the question is what are we going to change first on the truck, and exactly what direction are we gonna take with this build as a whole? We could get the suspension up in the air and cut out all the i-f-s parts. Throw some solid axles underneath on leaf springs getting the truck another six to eight inches up in the air so we can run a massive 42 inch tall tire, making the K-1,500 the ultimate off roader. Our first modification to the suspension is gonna require that we remove the bed. [ drill humming ]
(LT)>> The bed is held to the frame with a couple of bolts, and an impact gun makes quick work of them. After that it's just a few wires for the taillights, the fuel filler neck, and the bed is loose. [ MUSIC ] We're going to move the truck outside and lift off the bed. If you don't happen to have a forklift sitting around a couple of buddies and a case of beer will do the job. Let's do some washing. It only takes a few minutes, and any time the bed comes off it's totally worth the extra effort to clean things up. [ MUSIC ] [ mechanical humming ]
(LT)>> We're getting ready to lower the rear end of Red Tide, our '88 K-1,500, and the first step is to make some room for the axle. We have to get the bump stops out of the way first, and a cutoff wheel and air chisel make quick work of the rivet. Then it's just a matter of following the lines to slice the frame. This is plenty of clearance now but we can't leave it like this because it's just not strong enough so we will be installing this reinforcement plate over the frame. You'll notice that the notch isn't centered perfectly over the rear axles. That's because the saddles that the axle will sit in actually locate the axle just a little bit further towards the rear. This is because you won't have to change the length of your driveshaft. Because this quarter inch thick brace does take some power to burn into the frame I'm jumping around from side to side to control heat input. Alright we got the frame all tied back together and it's strong as ever. Now we don't always get to show you guys both sides of an operation like this, but I can't do the flip kit until both notches are in. So I've got a little bit more work to do but I have a feeling the other side will go just a little bit quicker. The truck frame is lowered down towards the axle and the leaf springs go right back into place, and the hardware gets snugged but we'll torque it later on with the truck on the ground. The axle saddles install over the spring center bolt with a hole towards the front. The truck is raised back up, and the axle slides right into its new home six inches lower than before. Because the truck is gonna sit so much lower the kit includes these shock extensions. They require the original large shock bolt, a five-sixteenths hole to be drilled, and two small bolts will keep it from twisting. Now the new shocks can be installed, which are optimized for a lowered street truck.
(Pat)>> There I got her.
(LT)>> I like how you don't mess around.
(Pat)>> You get where you need to be on that filler neck and you tell me when.
(LT)>> I'm around it, so you can come on down.
(Pat)>> I'm in the wrong business.
(LT)>> Looks perfect. We're nearly done dropping Red Tide, our '88 K-1,500, and we'll get started on the front by pulling off the original shocks. Then loosen the nut that holds the ball joint to the spindle, and loosen the taper with a hammer. Underneath the truck we'll use a special tool to loosen the tension on the torsion bar key. Then we can safely remove the stock adjustors and back off the tension on the tool. An air hammer knocks out the torsion bar and the lift keys are removed. Now the lifted upper control arms are removed from the truck, and we can replace them with a new stock set with the proper ball joint angle. Plus the new bushings will be an added bonus. Now we can tackle the front diff. We'll remove the passenger side drop bracket. Ooh man, look at that! Then replace it with a stock one we got from a junkyard. On the driver's side simply remove the aftermarket parts. Then the diff can be raised back up into its original home, lined up, and tightened back down. Now the dropped torsion bar keys can go into place. The bars are wiggled in and the adjustors are installed. Lastly the new shorter shocks can go in up front to finish lowering this four wheel drive sport truck.
(Austin)>> Up next it's time to swap the drivetrain and we're transferring for a world's first.
(LT)>> You've probably figured it out by now. We're actually going to be doing an engine swap, and yes it is part of the LS family. This is actually a 5.3 liter LM-7 we picked up from Powertrain Products, and it's not stock. It's actually a high performance crate engine designed for swaps like we're doing in Red Tide. [ MUSIC ] We're a little more than half way done pulling the drivetrain out of Red Tide, our '88 Chevy. I'll remove the converter cover, giving access to the bolts that hold the flex plate to the torque converter. Finally the main bolts that hold the transmission to the engine are threaded out and the trans is slowly lowered down and removed from the truck. All we have left to do is attach our lift sling to the exhaust manifold bolts and let our crane do the heavy lifting. Go that way just a hair. There we go.
(Mike)>> Doesn't get much easier than that.
(LT)>> Just because the engine and drivetrain are removed from the truck doesn't mean the job of tear down is complete. There are a few more things that we need to remove from the engine bay to clean up some of this mess and make preparation for the 5-3 LS that's going to be living in here in just a little bit. Our installation starts under the hood by bolting on some new stock replacement motor mounts since the old ones had seen better days. Then we'll bring in the 5.3 and slowly lower it into place. With the Hooker adapters it drops in just like the old one came out. With the truck raised up in the air we can install the s-f-i certified flex plate onto the back of the crank. The new transmission comes in and the pilot spacer goes onto the converter. Then the transmission gets raised up into place. The first step to converting Red Tide to all-wheel drive is getting the front differential mounted, and it's actually pretty remarkable how well this later model diff fits into this early year truck. In fact the only thing that we're gonna have to change is this mounting bracket on the passenger side because the boss is cast in just a little bit different position. So all we need to do is build a new passenger side bracket and we're in business. With the front differential in its new home the only thing we have left to do to convert this truck to all-wheel drive is install the transfer case. Now these NV 149's were only found behind 4-L-60's that had a 27 spline output shaft that keys in to the input of the transfer case. On most four wheel drive transfer cases that's not a big deal because there are some readily available factory parts like our 241, which came behind 4-L-80's in certain applications. The 149 though never came behind a 4-L-80. So there are no readily available factory parts we could use to make the switch. There is however a company up in Michigan that custom manufactures shafts, and they built us a 32 spline input shaft that goes inside of our NV 149. So all we've got to do is take this thing apart and make the switch. We're opening up a brand new transfer case for project Red Tide, and in the process building a truck that's unlike any we've ever seen, making what we think will be the world's first all-wheel drive GMT 400 Chevy truck. To accomplish that we need to install a different input shaft into this NV 149. The rear bearing C-clip is disengaged through an access hole, and using a pair of pry bars the glue sealing the two case halves together is cracked open, and the rear half of the case is removed. Now the rear planetary and main shaft slide out, followed by the sprocket and chain. Brand new chain. This guy right here, this is the viscous coupling. This is actually a non-serviceable item but this is the part that makes the all-wheel drive magic happen, and that is our input shaft. The last part holding the input shaft in is a c-clip, and once it's removed a few gentle taps of the plastic dead blow frees it from the case. Finally one more c-clip has to go, and the hammer helps remove the bearing. Now the process gets reversed with the bearing and c-clip going onto the 32 spline shaft. You ready? With a wooden block the shaft and bearing are driven into the front case half. Hear the sound change. That's how you know you're in. The c-clip goes back in followed by the viscous coupler. Then the chain and sprocket, and the main shaft and planetary slide back in. Then we'll clean any old sealant from the mating surface. A little r-t-v is applied to seal up the case, and the rear half slides on making sure to line up with the two internal shafts and the dowel pins. Now the final c-clip is opened up and the rear bearing is slid into place. Right on the money. [ drill buzzing ]
(LT)>> It's a big awkward but the case gets maneuvered up between the two cross members. The shafts line up and with a bit of wiggling the trans and transfer case are united. A few bolts hold the whole package together completing our all-wheel drive conversion.
(Austin)>> Coming up we'll fire up project Red Tide and fab up one cool exhaust.
(LT)>> Our all-wheel drive conversions is done on this old body style Chevy. Now I could spend some time out back and re-gear the 10 bolt to a 4.10 ratio. That would match the new front axle but we just installed, but instead I'm gonna spend some time on this engine and see if we can get it a little bit closer to firing up cause right now this 5.3 is just a bare long block. All the important parts that it needs to fire up and run haven't been installed yet. Recently I did some shopping, and the delivery guy just dropped off a whole bunch of parts. These are a Pace Setter header designed to fit a '99 to '07 four wheel drive Silverado but luckily they're a perfect fit for our LS swap truck. Back at the engine the manifold slides right into place and nuts and washers hold it down. The ignition coils go on and the plug wires are attached. The dip stick slides into the block and bolts to the head. Then the injector harness plugs in along with the coil harness. Finally the crank sensor goes in followed by the starter. Let's see if she fires. [ engine starting and idling ]
(LT)>> You just can't beat the sound of a V-8 with a nice healthy cam in it. [ engine revving ]
(LT)>> Next we want to clean up the interior of the truck a little bit. So we'll get to work by first unbolting and removing the seats. We gave you the hard job first day.
(Austin)>> Yeah let's yank them out.
(LT)>> The seatbelt anchors, kick panels, door seals, and a few other trim panels come out, and finally the nasty 30 year old carpet can get tossed in the dumpster.
(Austin)>> Since the transfer case swap this truck no long requires the use of a shifter assembly to access four wheel drive. Therefore we're gonna take it out, make a delete plate to block that off. [ drill buzzing ]
(LT)>> Alright man this ought to dress it up.
(Austin)>> This carpet's gonna lay down nice in here.
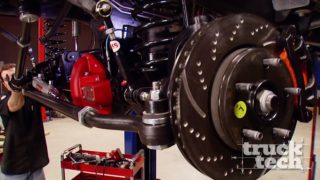
(LT)>> Bolt the seat brackets to the floor, re-install all the original trim, and finally bolt the new seats onto the sliders. The ring gear is going to be attached to this Detroit True Track helical gear style limited slip differential, which has a perfect split in power between the rear wheels, giving maximum traction on the street. Now in '88 there were several different options for spline counts on the 10 bolt rear end. We're gonna upgrade to the stronger 30 spline, which means we need a different axle shaft to attach to it. So we grabbed these Mosier 30 spline six lug axles that are a direct fit into our 10 bolt's housing. We also grabbed all the remaining parts that we'll need to complete the installation like a forged pinion yoke with a stronger 13-50 u-joint, an installation kit with all the shims, bearings, seals, and hardware that we'll need, and to strengthen the rear end just a little bit more we grabbed a Mosier differential cover with built in carrier cap supports. We'll get started by installing the ring gear onto the carrier. [ MUSIC ] One unique thing about the 10 bolt is the ring gear bolts are left hand thread. A small dab of thread locker will hold them in place. They are torqued to spec and the carrier bearings are pressed onto the carrier. Then the new bearing races are driven into the housing. There are a few critical steps to setting up the ring and pinion, and I always start with a stock pinion shim and a setup bearing to get a baseline. The rear end gets assembled temporarily so we can measure backlash and run a pattern check, both of which will tell us what needs to be adjusted. We're going to add ten thousandths of shim to the pinion, press on the bearing, permanently install the pinion into the housing, and tighten the nut until proper bearing pre-load is reached. Then the carrier goes in. We'll measure backlash and run a final pattern check. Now that the hard work is done the 30 spline axles slide into place and they're held there with the stock c-clips and the axle spacer. The retaining spacer and snap ring locks it all in place, and it gets sealed up with our new diff cover. The cap supports get pre-loaded finishing up the rear end.
(Austin)>> Up next we're out of the shop and ready to take you along for a dirty ride.
(LT)>> Our exhaust system is gonna start at the back of our long tube headers, which have a three inch v-band that's been welded on each side to make removing the exhaust system much simpler. Since the x-pipe has to sit between the trans and the frame I need to first build an offset bend. Once my cuts are made I'll fire up the tig and tack the two pieces to each other. Then fully weld them together using some 308 stainless filler. Then I'll attach the ring for the v-band clamp, attach the pipe to the header, and then slide on the crossover. There are a few obstacles we need to work around. Namely the passenger side shock and the rear axle. So I'll keep the pipes as high as possible and leave at least an inch of clearance between any part of the frame. My process is fairly simple. I'll just eyeball the correct angles, make a square cut on the chop saw, deburr the edges with a flap wheel and a die grinder, and when I'm happy with the fit I'll build the tailpipe section by tack welding on one bend at a time. So the last thing we have to do to finish up this exhaust is connect the over the axle pipe to the tip, add a few more hangers, and we're done. [ MUSIC ]
(Austin)>> When it comes to finding a place to take our project trucks when done we like to mix it up every now and then.
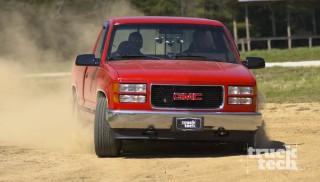
(LT)>> So we came out here where there's lots of loose gravel, wide open spaces, and some areas where we can get this truck to slide around a little bit. We're gonna try our hands at rally cross. [ MUSIC ] Low buck beaters to full custom tube chassis rally cross is a full on dirt racing series put on by the Sports Car Club of America. [ MUSIC ] Alright man let's see what she'll do.
(Austin)>> Let's check it out. [ engine revving ]
(Austin)>> Now remember them cones.
(LT)>> What side of the cone am I supposed to be on again?
(Austin)>> If it points left go left. If it points right go right. I'll tell you what she's handling pretty good.
(LT)>> Wasn't this supposed to be an easy lap? [ engine revving ]
(LT)>> Oh no, we slid around it! [ MUSIC ]
(LT)>> That was an easy lap. Hey look 71! Alright well that was supposed to be an easy lap and we didn't really take it super easy, but it looks like we did a 71.9.
(Austin)>> I don't even think you hit a cone, which I don't know how you didn't.
(LT)>> We'll have to double check that. I think we got one towards the end but I am hooked. Let's do it again!
(Austin)>> Ready amigo.
(LT)>> We're ready! [ engine revving ]
(LT)>> There we go! We couldn't be happier with how Red Tide handles the cones and curve. So we totally missed that one. Are you doing okay over there?
(Austin)>> I'm fine, don't worry about me buddy. Just hanging on here! We may have a little rubbing action, not really sure. You might want to...maybe stop. Let's check this out.
(LT)>> We might have broke something.
(Austin)>> Let's check it out. Something fixable I'm sure. We broke a front c/v shaft.
(LT)>> Really?
(Austin)>> It's completely ripped out. We could cut the shaft, tie it up, and just leave it bolted through. The wheel bearings are still operating.
(LT)>> Yeah that may F*^# up a diff though. Alright so second lap in. We were supposed to take it easy. We didn't take it super easy. We heard a loud clunk coming from the front end. These things happen. We pulled over half way through the lap. We took a look underneath the hood and it turns out one of the c/v axles that's on the passenger side of the truck actually kinda broke. So we're gonna look to see if maybe there's some way we can patch this thing together and keep having some fun, but sometimes you break, sometimes you have fun.
(Austin)>> Just a little clunkity clank here and there.
(LT)>> We had a blast today. I do wish Project Red Tide would have stood up just a little bit better but that's okay. It's a pretty minor fix, but we have to give a special thanks to the guys from Persad Parts in Athens, Alabama, for loaning us this '02 WRX that we beat on for the afternoon.
(Austin)>> Yeah they helped us out a bunch, and for more information on today's show visit Powernation TV dot com. And since you won maybe you can fix it.
(LT)>> I've got some wrenches.


