
More Fat Stack Episodes

Engine Power Featured Projects


Engine Power Builds


Want more content like this?
Join the PowerNation Email NewsletterParts Used In This Episode


The Industrial Depot
Tools, Hardware, Shop Supplies
Wegner Automotive Research
ATI Super Damper Harmonic Balancer
Wegner Automotive Research
Biller Valve Covers
Wegner Automotive Research
Front Drive Assembly
Whipple Superchargers
Whipple GEN5 3L Supercharger
Whipple Superchargers
Whipple Throttle Body
Episode Transcript
(Pat)>> You're watching Powernation.
(Frankie)>> Today on Engine Power the stroker LS-3 receives a slew of high performance parts, and we top it all off with a supercharger.
(Pat)>> Let's see what this thing can do in the dyno cell. [ Music ]
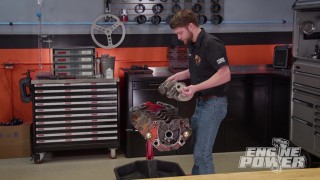
(Frankie)>> Welcome to Engine Power. Today we're gonna be finishing up our 419 cubic inch LS-3. We went with an LS-3 because this application definitely calls for some weight savings. We have a bunch of great parts going into this thing, and we've already got it to short block status. If you don't know how it got there here's a quick recap.
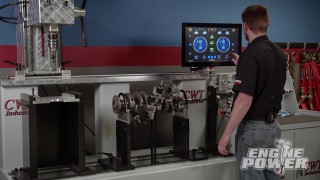
(Pat)>> The all-aluminum block has been bored and stroked to 419 cubic inches of displacement. Randy Neal of CWT Industries provided us with his Multi-Val 5,500 balancer, which allowed us to balance the Summit Pro LS 43-40 forged four inch crank to perfection.
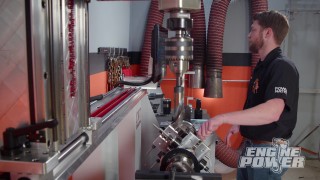
(Frankie)>> The rotating assembly included Eagle H-beam 43-40 forged rods connected to custom DSS Racing pistons. The Total Seal AP profile rings were gapped, and a Comp hydraulic roller camshaft was installed, along with their billet double roller timing set. The cam was degreed with the intake center line set at 109.75 degrees for great street manners. Finally, we installed the rest of the rotating assembly. On this build we're gonna be using Comp Cams' new Evolution cartridge style hydraulic roller lifters. These are really cool because they have an internal cartridge that houses the plunger and the hydraulic action of the lifter. This means the bleed down rates of the lifter are gonna be much more precise because they're not affected from distortion of the lifter body. This allows for quieter start-up and better performance at high r-p-m. As an added bonus they're easy to service because the cartridge can be removed and replaced. To prep our lifters for installation we've soaked them in break-in oil for a few hours. This ensures that the lifter is properly lubricated for initial start-up. They are retained by the stock lifter trays, which are bolted in place at 16 pound feet. The next thing we're gonna do on our LS build is determine the proper pushrod length because in this application we have a bolt down rocker that is non-adjustable. The pushrod length really isn't going to affect the geometry as much, but it is going to affect the amount of pre-load in the lifter, and that is very, very critical. So, it's something we're gonna want to measure. In today's Summit Tech Tip we're gonna show you how to do it. First, the cylinder head is temporarily installed with the head gasket we are using in the build. The adjustable length pushrod set to the stock length as a starting point drops in, followed by the stock rocker base and Comp's BSR shaft rocker system. We will zero a dial indicator on top of the pushrod cup. Then slowly and evenly tighten down the rocker shaft. The spring pressure will compress the lifter plunger, and the distance the indicator moves is our measured lifter pre-load. Comp recommends between 50 and 80 thousandths. Ours is well within spec at 58.5. The length needed may vary by application and components used, but ours looks great with a stock length pushrod. Seven inch, 400 long. This is the right way to measure for pushrod length in this application, but if you need the tools or help figuring out the right one for yours you can talk to the experts at Summit Racing Equipment.
(Pat)>> On our boosted application we are gonna make sure this engine is properly lubricated with this Melling high volume oil pump from Summit Racing Equipment. We'll use three two-thousandth feeler gauges to align the pump drive during installation. These spacers that came with our double roller timing set make sure that there is no interference between the timing chain and the pump. It is torqued in place with orange thread locker. Then the feeler gauges can be removed. [ Music ]
(Frankie)>> We did have to minorly clearance the oil pump and the timing cover itself just to make there was no interference between anything. [ Music ]
(Pat)>> Before installing the rear main seal cover it is crucial not to forget the oil passage dumbbell. We got this ICT billet piece from Summit Racing Equipment, and it is threaded for a four millimeter bolt for easy removal. A stock rear cover with an ARP stainless bolt kit seals up the back end. This oil pump pickup came with our Summit Pro-LS oil pan kit, and with some silicone on the block's mating surfacing the six quart cast aluminum pan seals up the bottom end. It is crucial that the back of the pan and the bell houses surfaces are flush to prevent misalignment when the transmission is bolted to the engine.
(Frankie)>> One more?
(Pat)>> Yep, a little more. This is also held down with an ARP 12-point stainless steel bolt kit. Up next, the stock LS-3 cylinder heads are really quite good, but they will definitely benefit from valvetrain improvements.
(Frankie)>> And later, we put it to the test.
(Pat)>> Now it's time to put some induction on our supercharged 419, and we will be using the LS-3 heads, and for good reason. These heads are outstanding from the factory. These are what the old guys back in the day wished they had from the factory with their small block Chevys. They have a 260cc intake port, a measured 69.4cc combustion chamber, which is a really nice, high efficiency design. They have a 2-165 intake valve, 1-590 exhaust. Now these heads flow up to 300 c-f-m right out of the box. So, they are a great cylinder head for what we're doing. We are replacing a lot of the hardware for it because we wanted some upgrades to make sure it lasts. The stock LS-3 spring has about 85 pounds of seat, which is great for stock applications, but for ours we wanted something a little bit more. Our new conical spring has 140 pounds of seat pressure and around 400 pounds of open with an install height of 1-830. We also got the complimenting tool retainers, new spring seats, machine locks, and new valve seals. Along with all of these goodies we picked up from Comp we also picked up Comp's Max Lift BSR LS-3 bushed shaft rocker system. These utilize a stock style rocker arm that is a 1.7 ratio but are on a common shaft that uses the stock rocker stand for better durability, rigidity, and valvetrain accuracy. We set up every valvetrain package specifically for its application. Our spring pressures may seem a little high for a hydraulic roller, but it is important to remember that in our boosted application intake manifold pressure is going to try and force the intake valve open.
(Frankie)>> Now that Pat has that cylinder head assembled, we can go ahead and get them bolted on, and to do that we're gonna be using an ARP head bolt kit. This one is for a 2004 and later LS, which basically means that the 11 millimeter bolts are all the same length. These are made from ARP 2,000, which has a tensile strength of 220,000 p-s-i, which is gonna be way stronger than a Grade-8 or even an o-e-m fastener. They also come with a washer that has a chamfer on one side that goes against the bolt head and serrations on the other that goes against the head. This prevents the washer from spinning, turning into a bearing like surface, and rendering improper clamp loads, which can damage the threads or the fastener itself. These are not a torque to yield fastener like the o-e-m ones. That means they have their own specific torque specs. They are specifically designed to be used with ARP's Ultra Torque lubricant, which was formulated for consistent and repeatable clamp loads. Again, this means that they can't use an o-e-m torque spec. The kit comes with specific instructions on the preparation, installation, and torquing of the fasteners, and it's very important that you follow these to make sure you don't get yourself in trouble. We're also gonna be using their rocker arm stud kit because this is gonna be a lot stronger than a stock fastener and should make it a little bit easier to install our shaft rocker systems. We'll get these bolts prepped, and then we can get our cylinder heads bolted on. These Cometic MLS 4-130 bore head gaskets with a 51 thousandths compressed thickness will give us a measured static compression ratio of 9.49 to one. Perfect for pump gas boost! The 11-millimeter bolts are torqued to a final value of 90-pound feet, and the 8-millimeter bolts are torqued to 25 pound feet. Next the ARP rocker studs are screwed in hand tight with orange thread locker. Make sure you clean up any excess so it does not go through the engine. We ordered our 7-400 long Comp pushrods with a 105 thousandths wall thickness from Summit Racing to get them here fast. [ Music ] When installing the rocker shafts it's important to make sure that all the pushrods are seated in their cups before slowly and evenly tightening them down. Up next, we give the LS-3 custom paint, a custom supercharger, and then it gets down to business.
(Pat)>> The last piece to go on before we paint our engine is this ICT billet valley cover from Summit Racing. This uses O-rings to seal off the displacement on demand oil ports so no tapping and plugging is needed to delete it.
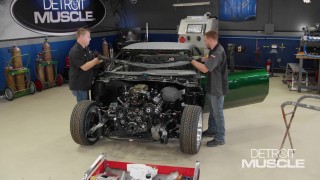
(Frankie)>> If your work area is like ours space is at a premium, and if you need a safe, clean area for spraying paint but want something that can be quickly and easily set up, broken down, and stored this is it.
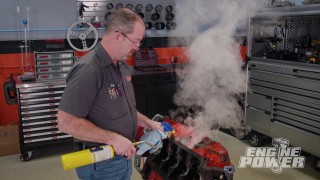
(Pat)>> You may be wondering what I am standing in right now. Well, this is an inflatable portable paint booth from Mobile Environmental Solutions. This gives you a contained environment to spray pretty much anything that you want to keep dirt, rain, or whatever out of it. It has flow through filtration system, 360 degrees of ambient light, and this thing gets plugged in set up in under 10 minutes. What are we gonna be painting? We're gonna be painting our engine. So, let's get to it.
(Frankie)>> Before we get started, we need to remove any residual oil, grease, or contaminants that could interfere with our paint job with POR-15's cleaner/degreaser. We'll also rough up the surface with a red scuff pad. To promote adhesion to any bare metal surfaces we'll brush on their metal prep as well. After the engine is rinsed and dry it can roll into the paint booth. To give our power plant a uniform base coat color we'll brush on POR-15's Rust Preventive Coating. This is normally used directly over rusty metal, but it will also help our engine have a durable finish and consistent color. This engine is getting a very cool supercharger with a very unique color, and we wanted to match that. So, we're gonna be using POR-15 Engine Enamel. POR-15 is well known for their permanent rust preventative coating, and we've already gonna ahead and applied that to the engine after we've prepped it with our cleaner/degreaser and metal prep. Their engine enamel is a really great product that can be brushed on or thinned out and sprayed on. It's good for temperatures up to 300 degrees Fahrenheit. So, it's gonna be durable and stay glossy in underhood temperatures. It has a really nice finish and comes out glossy and smooth. They have a bunch of factory color options available, and we're gonna take a few of those and mix them together to try and match our custom blower color. When mixing a custom color it's always a good idea to go slow and use a scale to record how much of each color is used. This makes it easy to make more if you run out or need to match it later on. To get the color that we are looking for we are using a mixture of Olds gold, black, and maroon. Thinning out the engine enamel and spraying it gives us a smooth, shinny finish but does require some extra p-p-e and makes us glad we are doing inside of our Mobile Environmental Solutions spray booth. [ spray gun hissing ]
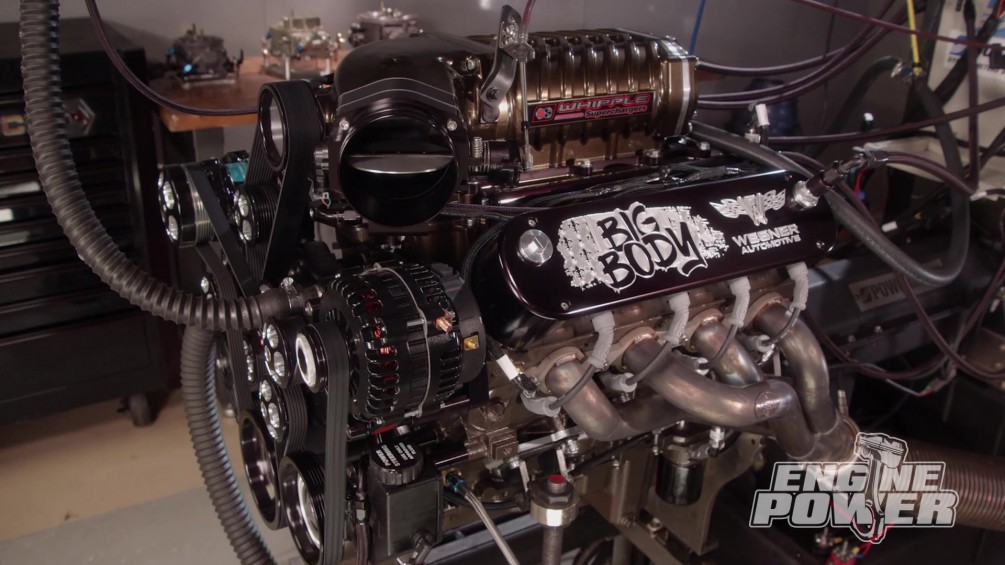
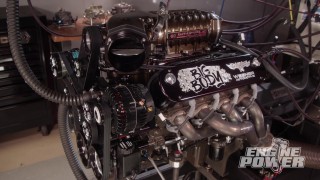
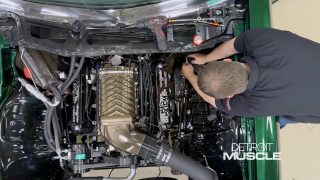
(Frankie)>> Now that our engine is fully painted you can see the color that we are trying to match. This engine's getting topped with a Whipple Gen-5 3-liter supercharger that's been custom powder coated for this application. It has a bunch of cool features, like a massive air to water intercooler that's gonna help keep inlet air temps down. It also has a bypass function that takes less than one horsepower to run the blower during cruising to help fuel economy. We're gonna top it off with one of their 109 millimeter throttle bodies, and this thing should look really good under the hood.
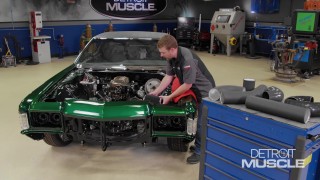
(Pat)>> Along with that we got an entire front drive assembly from Wegner Automotive. Now this not only will look great but keep things running smoothly. It comes with everything that we need. The water pump, the alternator, the power steering pump, a/c compressor, and all the associated bracketry. To take the coolness over the top we got a set of their custom billet valve covers that will not only hide our coil packs but give the engine a smooth outer appearance. They even did custom graphics on them just for us.
(Frankie)>> Let's get this stuff on!
(Pat)>> The Whipple's fuel rails are filled with Holley EFI Terminator-X 120 pound per hour flow match injectors. Using the supplied Allen head intake bolts, the blower is torqued down to 135 pound inches. [ Music ] Before installing our trick valve covers we copiously lubricate the valvetrain with Comp's Valvetrain Spray to prevent a dry startup. These Wegner valve covers are in two pieces. The lower seals the engine, and the upper holds and hides our MSD Street Fire coil packs. [ Music ] Even though we are using an aftermarket e-f-i system it still takes its data off of stock sensors, and because this is a fresh build we needed to get some new ones. So, we turned to RockAuto dot com. We were able to pick up some o-e quality sensors for both the crank and cam. This is a 58 tooth crank sensor that goes with our reluctor, and this is a four tooth cam sensor that goes in the front of the timing cover. It doesn't matter if you're working on a late model high performance application like we are or you just want to keep your daily driver going, RockAuto dot com can keep you on the road. [ Music ] [ ratchet clicking ] [ Music ]
(Frankie)>> Included in the Wegner kit was this ATI super damper with a six percent overdrive 10-rib supercharger pulley. The accessory drive is extremely well engineered, and came with everything we need, including the water pump, brackets, pulleys, idlers, and the accessories we chose. With a 3-700 supercharger pulley and our throttle body installed, this monstrous beauty is ready to hit the dyno.
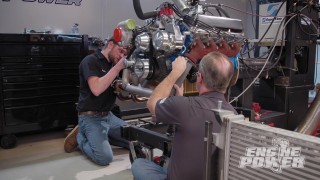
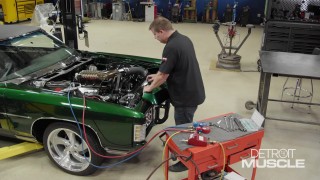
(Pat)>> Up next, things are really heating up in the dyno cell.
(Pat)>> Everything is very, very nice. Starts up, very good job on your pre-programming.
(Frankie)>> The Holley stuff makes it real easy cause we have the Holley Terminator-X. It's pretty much plug and play. These things always start right up, you get right into tuning them, and they're usually really, really close. This one so far is going really well. Love having that Pro Dash there. It's a great visual and it's great keeping track on everything.
(Pat)>> What we're gonna do is 2,000 to 4,500, 300 per second. Timing looks good. Everything looks good on fuel. We're gonna be very conservative on fuel, and we're gonna keep it safe.
(Frankie)>> We have an idea of how much boost it's gonna make, but also that's one of the variables here is we're not 100 percent sure. We told the guys at Wegner how much power we wanted to make and what we were doing it with. They scienced it out and sent us the pulleys that we need. It should be really close. [ Music ]
(Pat)>> Oh my! [ engine revving ]
(Pat)>> That's nice! 761.7 pound feet.
(Frankie)>> Below 4,500.
(Pat)>> 652 horsepower.
(Frankie)>> That was pretty close on targets and stuff.
(Pat)>> Air/fuel is nice. It's right at 12-0, or 12-1.
(Frankie)>> We're relatively safe on the fuel cause we're still on pump gas. This is a street engine on pump gas. So, we're not gonna get lean and mean with it.
(Pat)>> So it has 10 pounds of boost. What is that?
(Frankie)>> Nine and a half pounds of boost. It's probably gonna go up more as we get more r-p-m.
(Pat)>> We are not gonna tune this thing as far as we're not tuning a race engine. This is a street engine for a show car.
(Frankie)>> We always take pride in making things visually look good, but with the custom powder coated blower, and trying to get the color match on the paint, and all the really pretty parts and all. We spent a lot of time trying to make this look good under the hood.
(Pat)>> We're gonna go 2,500 to 6,500 at 300 per second and see what she cranks here. [ engine revving ]
(Pat)>> Woo! [ engine revving ]
(Pat)>> Wow! [ engine revving ]
(Pat)>> That was pretty mean right there.
(Frankie)>> Wow!
(Pat)>> 834, that's a lot of power.
(Frankie)>> I think that might be more than what they wanted.
(Pat)>> It's actually still going up. 764-pound feet of torque. That was a long pull, but air/fuels still safe, 11-8 to 12-1. That looks like it's probably 12 pounds of boost. I'm looking at manifold pressure.
(Frankie)>> 11.6 at the very top of the pulls.
(Pat)>> We'll take that. Aside from just looking at data we always pull the spark plug out to check the engine's tune. We are showing no signs of detonation. Everything looks very nice. I'm leaving alone. One thing I'd do is maybe take a little bit of fuel out of it.
(Frankie)>> The timing is really close! Right now we're targeting 11-8 where we're at in the map range. So, you want to do 12-0?
(Pat)>> Yeah, just fuzz it.
(Frankie)>> We don't want to get crazy with it.
(Pat)>> We have already exceeded expectations for this.
(Frankie)>> Once you get everything right on the fuel table with this software you can just change the air/fuels. Two clicks and you're done. We're now targeting 12-0 at our boost range.
(Pat)>> Alright! [ engine revving ]
(Pat)>> 838 horse, 763 pound feet. You know what that is? I'm not a math magician. That's two horse per cube.
(Frankie)>> We didn't see a huge change, but you don't want to see a huge change when you're making a small change. You want to see a small change that coincides with what you did.
(Pat)>> That was a tickle!
(Frankie)>> A little bit of tickle and we saw a little bit of return.
(Pat)>> For a pump gas street show car engine we're gonna stop right there.
(Frankie)>> The big thing about pump gas is you really have to be careful. We're being conservative here. We don't want to step on it. This is going in a car that needs to last, and with that combination it will. We put really good parts in it to be able to do this.
(Pat)>> We could rev it up more, and it'd probably make more power. We could lean it out some. I wouldn't touch the timing. Everything looks great. Everything about this engine is overkill. The Wegner drive, spectacular going on. The blower, the Whipple blower, awesome power!
(Frankie)>> Those not only look good, but they went right on, and they just make the engine.
(Pat)>> The important part about this is the tuneability with the Holley. So, we can peel the air/fuels back. We can put some timing in it. It'll run great at partial throttle, light load. It'll be efficient. This thing will get some mileage.
(Frankie)>> The bypass and the blower takes less than one horse to run. So, when you're cruising you can lean out the air/fuels and actually get decent mileage.
(Pat)>> But if you step on it, it makes the big power.
(Frankie)>> Good job! If you want to see more pump gas power plants like this one go check out Powernation!
Show Full Transcript
(Frankie)>> Today on Engine Power the stroker LS-3 receives a slew of high performance parts, and we top it all off with a supercharger.
(Pat)>> Let's see what this thing can do in the dyno cell. [ Music ]
(Frankie)>> Welcome to Engine Power. Today we're gonna be finishing up our 419 cubic inch LS-3. We went with an LS-3 because this application definitely calls for some weight savings. We have a bunch of great parts going into this thing, and we've already got it to short block status. If you don't know how it got there here's a quick recap.
(Pat)>> The all-aluminum block has been bored and stroked to 419 cubic inches of displacement. Randy Neal of CWT Industries provided us with his Multi-Val 5,500 balancer, which allowed us to balance the Summit Pro LS 43-40 forged four inch crank to perfection.
(Frankie)>> The rotating assembly included Eagle H-beam 43-40 forged rods connected to custom DSS Racing pistons. The Total Seal AP profile rings were gapped, and a Comp hydraulic roller camshaft was installed, along with their billet double roller timing set. The cam was degreed with the intake center line set at 109.75 degrees for great street manners. Finally, we installed the rest of the rotating assembly. On this build we're gonna be using Comp Cams' new Evolution cartridge style hydraulic roller lifters. These are really cool because they have an internal cartridge that houses the plunger and the hydraulic action of the lifter. This means the bleed down rates of the lifter are gonna be much more precise because they're not affected from distortion of the lifter body. This allows for quieter start-up and better performance at high r-p-m. As an added bonus they're easy to service because the cartridge can be removed and replaced. To prep our lifters for installation we've soaked them in break-in oil for a few hours. This ensures that the lifter is properly lubricated for initial start-up. They are retained by the stock lifter trays, which are bolted in place at 16 pound feet. The next thing we're gonna do on our LS build is determine the proper pushrod length because in this application we have a bolt down rocker that is non-adjustable. The pushrod length really isn't going to affect the geometry as much, but it is going to affect the amount of pre-load in the lifter, and that is very, very critical. So, it's something we're gonna want to measure. In today's Summit Tech Tip we're gonna show you how to do it. First, the cylinder head is temporarily installed with the head gasket we are using in the build. The adjustable length pushrod set to the stock length as a starting point drops in, followed by the stock rocker base and Comp's BSR shaft rocker system. We will zero a dial indicator on top of the pushrod cup. Then slowly and evenly tighten down the rocker shaft. The spring pressure will compress the lifter plunger, and the distance the indicator moves is our measured lifter pre-load. Comp recommends between 50 and 80 thousandths. Ours is well within spec at 58.5. The length needed may vary by application and components used, but ours looks great with a stock length pushrod. Seven inch, 400 long. This is the right way to measure for pushrod length in this application, but if you need the tools or help figuring out the right one for yours you can talk to the experts at Summit Racing Equipment.
(Pat)>> On our boosted application we are gonna make sure this engine is properly lubricated with this Melling high volume oil pump from Summit Racing Equipment. We'll use three two-thousandth feeler gauges to align the pump drive during installation. These spacers that came with our double roller timing set make sure that there is no interference between the timing chain and the pump. It is torqued in place with orange thread locker. Then the feeler gauges can be removed. [ Music ]
(Frankie)>> We did have to minorly clearance the oil pump and the timing cover itself just to make there was no interference between anything. [ Music ]
(Pat)>> Before installing the rear main seal cover it is crucial not to forget the oil passage dumbbell. We got this ICT billet piece from Summit Racing Equipment, and it is threaded for a four millimeter bolt for easy removal. A stock rear cover with an ARP stainless bolt kit seals up the back end. This oil pump pickup came with our Summit Pro-LS oil pan kit, and with some silicone on the block's mating surfacing the six quart cast aluminum pan seals up the bottom end. It is crucial that the back of the pan and the bell houses surfaces are flush to prevent misalignment when the transmission is bolted to the engine.
(Frankie)>> One more?
(Pat)>> Yep, a little more. This is also held down with an ARP 12-point stainless steel bolt kit. Up next, the stock LS-3 cylinder heads are really quite good, but they will definitely benefit from valvetrain improvements.
(Frankie)>> And later, we put it to the test.
(Pat)>> Now it's time to put some induction on our supercharged 419, and we will be using the LS-3 heads, and for good reason. These heads are outstanding from the factory. These are what the old guys back in the day wished they had from the factory with their small block Chevys. They have a 260cc intake port, a measured 69.4cc combustion chamber, which is a really nice, high efficiency design. They have a 2-165 intake valve, 1-590 exhaust. Now these heads flow up to 300 c-f-m right out of the box. So, they are a great cylinder head for what we're doing. We are replacing a lot of the hardware for it because we wanted some upgrades to make sure it lasts. The stock LS-3 spring has about 85 pounds of seat, which is great for stock applications, but for ours we wanted something a little bit more. Our new conical spring has 140 pounds of seat pressure and around 400 pounds of open with an install height of 1-830. We also got the complimenting tool retainers, new spring seats, machine locks, and new valve seals. Along with all of these goodies we picked up from Comp we also picked up Comp's Max Lift BSR LS-3 bushed shaft rocker system. These utilize a stock style rocker arm that is a 1.7 ratio but are on a common shaft that uses the stock rocker stand for better durability, rigidity, and valvetrain accuracy. We set up every valvetrain package specifically for its application. Our spring pressures may seem a little high for a hydraulic roller, but it is important to remember that in our boosted application intake manifold pressure is going to try and force the intake valve open.
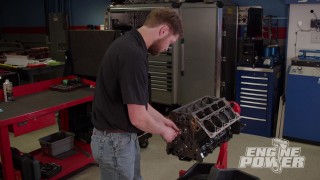
(Frankie)>> Now that Pat has that cylinder head assembled, we can go ahead and get them bolted on, and to do that we're gonna be using an ARP head bolt kit. This one is for a 2004 and later LS, which basically means that the 11 millimeter bolts are all the same length. These are made from ARP 2,000, which has a tensile strength of 220,000 p-s-i, which is gonna be way stronger than a Grade-8 or even an o-e-m fastener. They also come with a washer that has a chamfer on one side that goes against the bolt head and serrations on the other that goes against the head. This prevents the washer from spinning, turning into a bearing like surface, and rendering improper clamp loads, which can damage the threads or the fastener itself. These are not a torque to yield fastener like the o-e-m ones. That means they have their own specific torque specs. They are specifically designed to be used with ARP's Ultra Torque lubricant, which was formulated for consistent and repeatable clamp loads. Again, this means that they can't use an o-e-m torque spec. The kit comes with specific instructions on the preparation, installation, and torquing of the fasteners, and it's very important that you follow these to make sure you don't get yourself in trouble. We're also gonna be using their rocker arm stud kit because this is gonna be a lot stronger than a stock fastener and should make it a little bit easier to install our shaft rocker systems. We'll get these bolts prepped, and then we can get our cylinder heads bolted on. These Cometic MLS 4-130 bore head gaskets with a 51 thousandths compressed thickness will give us a measured static compression ratio of 9.49 to one. Perfect for pump gas boost! The 11-millimeter bolts are torqued to a final value of 90-pound feet, and the 8-millimeter bolts are torqued to 25 pound feet. Next the ARP rocker studs are screwed in hand tight with orange thread locker. Make sure you clean up any excess so it does not go through the engine. We ordered our 7-400 long Comp pushrods with a 105 thousandths wall thickness from Summit Racing to get them here fast. [ Music ] When installing the rocker shafts it's important to make sure that all the pushrods are seated in their cups before slowly and evenly tightening them down. Up next, we give the LS-3 custom paint, a custom supercharger, and then it gets down to business.
(Pat)>> The last piece to go on before we paint our engine is this ICT billet valley cover from Summit Racing. This uses O-rings to seal off the displacement on demand oil ports so no tapping and plugging is needed to delete it.
(Frankie)>> If your work area is like ours space is at a premium, and if you need a safe, clean area for spraying paint but want something that can be quickly and easily set up, broken down, and stored this is it.
(Pat)>> You may be wondering what I am standing in right now. Well, this is an inflatable portable paint booth from Mobile Environmental Solutions. This gives you a contained environment to spray pretty much anything that you want to keep dirt, rain, or whatever out of it. It has flow through filtration system, 360 degrees of ambient light, and this thing gets plugged in set up in under 10 minutes. What are we gonna be painting? We're gonna be painting our engine. So, let's get to it.
(Frankie)>> Before we get started, we need to remove any residual oil, grease, or contaminants that could interfere with our paint job with POR-15's cleaner/degreaser. We'll also rough up the surface with a red scuff pad. To promote adhesion to any bare metal surfaces we'll brush on their metal prep as well. After the engine is rinsed and dry it can roll into the paint booth. To give our power plant a uniform base coat color we'll brush on POR-15's Rust Preventive Coating. This is normally used directly over rusty metal, but it will also help our engine have a durable finish and consistent color. This engine is getting a very cool supercharger with a very unique color, and we wanted to match that. So, we're gonna be using POR-15 Engine Enamel. POR-15 is well known for their permanent rust preventative coating, and we've already gonna ahead and applied that to the engine after we've prepped it with our cleaner/degreaser and metal prep. Their engine enamel is a really great product that can be brushed on or thinned out and sprayed on. It's good for temperatures up to 300 degrees Fahrenheit. So, it's gonna be durable and stay glossy in underhood temperatures. It has a really nice finish and comes out glossy and smooth. They have a bunch of factory color options available, and we're gonna take a few of those and mix them together to try and match our custom blower color. When mixing a custom color it's always a good idea to go slow and use a scale to record how much of each color is used. This makes it easy to make more if you run out or need to match it later on. To get the color that we are looking for we are using a mixture of Olds gold, black, and maroon. Thinning out the engine enamel and spraying it gives us a smooth, shinny finish but does require some extra p-p-e and makes us glad we are doing inside of our Mobile Environmental Solutions spray booth. [ spray gun hissing ]
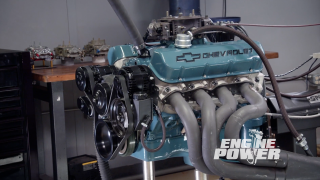
(Frankie)>> Now that our engine is fully painted you can see the color that we are trying to match. This engine's getting topped with a Whipple Gen-5 3-liter supercharger that's been custom powder coated for this application. It has a bunch of cool features, like a massive air to water intercooler that's gonna help keep inlet air temps down. It also has a bypass function that takes less than one horsepower to run the blower during cruising to help fuel economy. We're gonna top it off with one of their 109 millimeter throttle bodies, and this thing should look really good under the hood.
(Pat)>> Along with that we got an entire front drive assembly from Wegner Automotive. Now this not only will look great but keep things running smoothly. It comes with everything that we need. The water pump, the alternator, the power steering pump, a/c compressor, and all the associated bracketry. To take the coolness over the top we got a set of their custom billet valve covers that will not only hide our coil packs but give the engine a smooth outer appearance. They even did custom graphics on them just for us.
(Frankie)>> Let's get this stuff on!
(Pat)>> The Whipple's fuel rails are filled with Holley EFI Terminator-X 120 pound per hour flow match injectors. Using the supplied Allen head intake bolts, the blower is torqued down to 135 pound inches. [ Music ] Before installing our trick valve covers we copiously lubricate the valvetrain with Comp's Valvetrain Spray to prevent a dry startup. These Wegner valve covers are in two pieces. The lower seals the engine, and the upper holds and hides our MSD Street Fire coil packs. [ Music ] Even though we are using an aftermarket e-f-i system it still takes its data off of stock sensors, and because this is a fresh build we needed to get some new ones. So, we turned to RockAuto dot com. We were able to pick up some o-e quality sensors for both the crank and cam. This is a 58 tooth crank sensor that goes with our reluctor, and this is a four tooth cam sensor that goes in the front of the timing cover. It doesn't matter if you're working on a late model high performance application like we are or you just want to keep your daily driver going, RockAuto dot com can keep you on the road. [ Music ] [ ratchet clicking ] [ Music ]
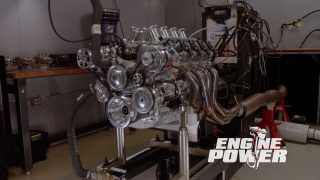
(Frankie)>> Included in the Wegner kit was this ATI super damper with a six percent overdrive 10-rib supercharger pulley. The accessory drive is extremely well engineered, and came with everything we need, including the water pump, brackets, pulleys, idlers, and the accessories we chose. With a 3-700 supercharger pulley and our throttle body installed, this monstrous beauty is ready to hit the dyno.
(Pat)>> Up next, things are really heating up in the dyno cell.
(Pat)>> Everything is very, very nice. Starts up, very good job on your pre-programming.
(Frankie)>> The Holley stuff makes it real easy cause we have the Holley Terminator-X. It's pretty much plug and play. These things always start right up, you get right into tuning them, and they're usually really, really close. This one so far is going really well. Love having that Pro Dash there. It's a great visual and it's great keeping track on everything.
(Pat)>> What we're gonna do is 2,000 to 4,500, 300 per second. Timing looks good. Everything looks good on fuel. We're gonna be very conservative on fuel, and we're gonna keep it safe.
(Frankie)>> We have an idea of how much boost it's gonna make, but also that's one of the variables here is we're not 100 percent sure. We told the guys at Wegner how much power we wanted to make and what we were doing it with. They scienced it out and sent us the pulleys that we need. It should be really close. [ Music ]
(Pat)>> Oh my! [ engine revving ]
(Pat)>> That's nice! 761.7 pound feet.
(Frankie)>> Below 4,500.
(Pat)>> 652 horsepower.
(Frankie)>> That was pretty close on targets and stuff.
(Pat)>> Air/fuel is nice. It's right at 12-0, or 12-1.
(Frankie)>> We're relatively safe on the fuel cause we're still on pump gas. This is a street engine on pump gas. So, we're not gonna get lean and mean with it.
(Pat)>> So it has 10 pounds of boost. What is that?
(Frankie)>> Nine and a half pounds of boost. It's probably gonna go up more as we get more r-p-m.
(Pat)>> We are not gonna tune this thing as far as we're not tuning a race engine. This is a street engine for a show car.
(Frankie)>> We always take pride in making things visually look good, but with the custom powder coated blower, and trying to get the color match on the paint, and all the really pretty parts and all. We spent a lot of time trying to make this look good under the hood.
(Pat)>> We're gonna go 2,500 to 6,500 at 300 per second and see what she cranks here. [ engine revving ]
(Pat)>> Woo! [ engine revving ]
(Pat)>> Wow! [ engine revving ]
(Pat)>> That was pretty mean right there.
(Frankie)>> Wow!
(Pat)>> 834, that's a lot of power.
(Frankie)>> I think that might be more than what they wanted.
(Pat)>> It's actually still going up. 764-pound feet of torque. That was a long pull, but air/fuels still safe, 11-8 to 12-1. That looks like it's probably 12 pounds of boost. I'm looking at manifold pressure.
(Frankie)>> 11.6 at the very top of the pulls.
(Pat)>> We'll take that. Aside from just looking at data we always pull the spark plug out to check the engine's tune. We are showing no signs of detonation. Everything looks very nice. I'm leaving alone. One thing I'd do is maybe take a little bit of fuel out of it.
(Frankie)>> The timing is really close! Right now we're targeting 11-8 where we're at in the map range. So, you want to do 12-0?
(Pat)>> Yeah, just fuzz it.
(Frankie)>> We don't want to get crazy with it.
(Pat)>> We have already exceeded expectations for this.
(Frankie)>> Once you get everything right on the fuel table with this software you can just change the air/fuels. Two clicks and you're done. We're now targeting 12-0 at our boost range.
(Pat)>> Alright! [ engine revving ]
(Pat)>> 838 horse, 763 pound feet. You know what that is? I'm not a math magician. That's two horse per cube.
(Frankie)>> We didn't see a huge change, but you don't want to see a huge change when you're making a small change. You want to see a small change that coincides with what you did.
(Pat)>> That was a tickle!
(Frankie)>> A little bit of tickle and we saw a little bit of return.
(Pat)>> For a pump gas street show car engine we're gonna stop right there.
(Frankie)>> The big thing about pump gas is you really have to be careful. We're being conservative here. We don't want to step on it. This is going in a car that needs to last, and with that combination it will. We put really good parts in it to be able to do this.
(Pat)>> We could rev it up more, and it'd probably make more power. We could lean it out some. I wouldn't touch the timing. Everything looks great. Everything about this engine is overkill. The Wegner drive, spectacular going on. The blower, the Whipple blower, awesome power!
(Frankie)>> Those not only look good, but they went right on, and they just make the engine.
(Pat)>> The important part about this is the tuneability with the Holley. So, we can peel the air/fuels back. We can put some timing in it. It'll run great at partial throttle, light load. It'll be efficient. This thing will get some mileage.
(Frankie)>> The bypass and the blower takes less than one horse to run. So, when you're cruising you can lean out the air/fuels and actually get decent mileage.
(Pat)>> But if you step on it, it makes the big power.
(Frankie)>> Good job! If you want to see more pump gas power plants like this one go check out Powernation!