

Engine Power Featured Projects


Engine Power Builds


Want more content like this?
Join the PowerNation Email NewsletterParts Used In This Episode

Eagle Specialty Products
Eagle 4340 Forged Crank
Matco Tools
MATCO Tools are the Official Tool Supplier to PowerNation
Shacklett Automotive Machine
Machining Services
The Industrial Depot
Tools, Hardware, Shop Supplies
Episode Transcript
(Mike)>> What's better than a stroked small block Chevy?
(Pat)>> How about one with a supercharger?
(Mike)>> Today on Engine Power the Chevy gets a big blower and major gains in the dyno cell.
(Pat)>> Plus our junkyard engine gives us a sense of accomplishment when it actually runs. Yes! [ Music ]
(Mike)>> Welcome to Engine Power. Today we have two cool projects to tackle. Now the first one has been around for quite some time. It was repurposed and slightly wounded at the same time. Now anything that gets wounded can almost always be fixed to a certain extent. Now the second one is an engine that has a lot of heritage. It's new to use but it's old, it's nasty, and that's exactly how we're gonna address it in a little bit.
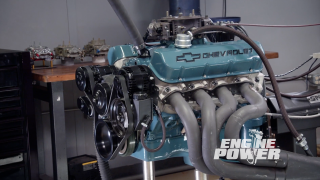
(Pat)>> Mike mentioned a familiar engine that has been repurposed but slightly wounded. It is our 383 small block Chevy we called Project Re-Rev 2.0. Now this has been our test mule and our tech engine for changing cylinder heads, cam shaft swaps, a plethora of intake manifolds, nitrous, and even a big blower. Now at some point we think we hurt it a little bit running it on nitrous, and that problem did not show up until we started making pulls with the blower installed. [ engine revving ]
(Pat)>> Stop, stop!
(Mike)>> What was that?
(Pat)>> Well that sucked.
(Mike)>> What happened there was the cause of a hurt piston along the actual ring land. The boost from the supercharged pressurized the crankcase, forcing oil out of the front crankshaft seal causing a big mess. Now the easiest solution here is just to refresh the engine.
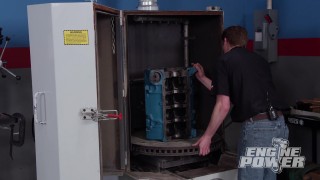
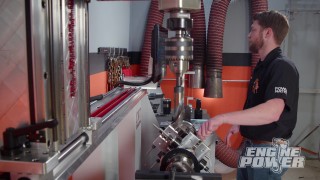
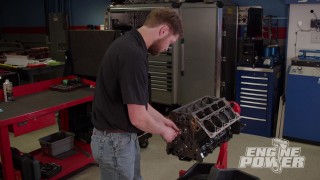
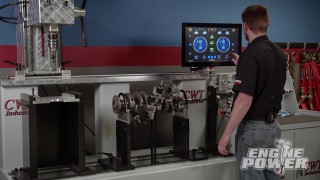
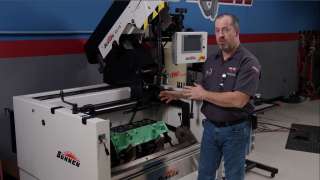
(Pat)>> With our block almost setup in our Sunnen SV-15 it's time to do some work. Now this is Sunnen's latest and greatest hone for doing engine blocks. It can handle cylinders as small as three quarters of an inch all the way up to 8 inches, and it will do cylinder lengths up to 11 inches with special tooling. With a three horsepower spindle rating and a spindle speed range from 90 to 350 r-p-m, this hone can hold tolerances within 10 thousandths of an inch in both concentricity and straightness. You may notice the shiny new ICT billet torque plate. It was easily sourced from Summit Racing. It's machined out of tough aerospace grade billet aluminum. You can order them for several different bore sizes, and this one is for small block Chevys, and it comes in at one inch 975 thousandths thick. It is needed to properly hone the cylinders. When torqued to the block's deck it simulates bore distortion, just like when a head is torqued down, giving the engine better ring seal, reduced oil consumption, and higher compression. Now keep in mind this is a touch up. We have new pistons and they will be a little bit larger on clearance than you would have if it were just a fresh bore and a fresh piston. The old adage in racing is if it's a little bit loose no one's gonna know. It's a little bit tight everyone's gonna know. So this bore might be a thou, thou and a half bigger than the minimum spec but it's gonna run just fine. [ Music ] The final bore size is 4.043. A 41 degree cross hatch was introduced to promote good ring break in.
(Mike)>> The crankshaft is a forged 43-40 unit from Eagle. We ordered new pistons that were 26 grams lighter. So the crankshaft had to be sent out and rebalanced. It went to our favorite little machine shop in Nashville, Tennessee, Shacklett's Auto Machine. They did a great job adjusting the weight and it shows their attention to detail.
(Pat)>> We're giving it a professional polish job using our Goodson crank polisher. A few rotations on each journal with a 600 grit belt will set the stage to finish it off with a cork line belt, which will micro polish it to a mirror like finish.
(Mike)>> We jumped ahead and got the short block together. Now it included the original crank and rods and new Mahle Power Pack pistons specifically for blower applications. Now they are 40-32 alloy with a 16cc dish and dual valve reliefs. They have a one millimeter, one millimeter, two millimeter ring pack for lower drag and better cylinder sealing.
(Pat)>> The valvetrain goes together next. Trent push rods, Summit 1.6 ratio roller rockers, and a stud girdle make it all up. Cold lash settings are .014 on the intake and .016 on the exhaust. When up to temperature the lash will increase to .020 on the intake and .022 on the hot side.
(Mike)>> Before we drop on the intake a quick look to make sure there are no gremlins inside the engine.
(Pat)>> No cloths, no screwdrivers, no anything in there but.
(Mike)>> Torque wrenches? Lashing tools? [ Music ] [ ratchet clicking ]
(Mike)>> So what I think needs to happen then is let's turn the blower. You grab whatever you can on the front and I'll grab the back, and then that way. You know what I mean? [ grunting ] [ Music ]
(Pat)>> Hell I don't need that thing. [ Music ] There we go.
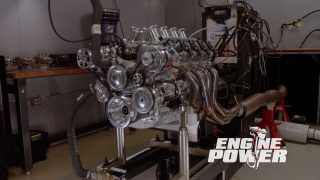
(Mike)>> Good hustle my man. When the blower pulley is bigger than the balancer and the blower up to the hat is bigger than the engine it's cool stuff. [ engine revving ]
(Pat)>> Up next the supercharged small block earns its stripes.
(Pat)>> How do you keep from having to reset the lash on your hydraulic roller valvetrain? The answer in today's tech tip.
(Steve)>> Setting lash on a hydraulic roller valvetrain is actually pretty easy. With the lifters in place, the push rod ends lubed and dropped in. Now we can place the rocker arms for cylinder number one on the studs. Now rotate the engine until the exhaust rocker starts to move up as if it were opening the valve. Tighten the intake rocker's adjusting nut as you rotate the push rod in your finders. When all the vertical slack between the push rod and the rocker arm is taken out you are at zero lash. Now tighten the nut one half turn past the zero lash setting. This will give you between .03 and .06 of an inch of pre-load to a typical hydraulic lifter. For the exhaust valve rotate the engine until the intake valve starts to close. Repeat the same procedures as earlier and you've completed lash for cylinder number one. Only seven more to go. [ Music ]
(Mike)>> We are ready for round two here in the dyno room with our 383 blower engine. Now the only thing that really changed on this thing is the compression ratio, and just so you know we're running distilled race gas that's 104 octane.
(Pat)>> And the compression ratio has changed because we changed the piston. It's down to 9.26 to one, and that's a couple of points down from our naturally aspirated compression ratio. Now we've ran the engine, broke in the rings, and there are no drips or leaks. So it's time to see what this thing will make take two. [ Music ]
(Jimmy)>> What's up boys? We heard you making noise.
(Pat)>> We are just about ready to make a test hit here. Now we've done a couple of things to it. We've knocked a bunch of boost out of it, knocked a bunch of timing out of it, and we're just gonna see now where we're at. We're getting back to square one basically.
(Jeremy)>> This is exciting right now. [ engine revving ]
(Pat)>> Wow!
(Jeremy)>> Wow!
(Pat)>> That is 585 horse at 6,500, and again torque is going to be a little on the low side, 507 at 5,400.
(Mike)>> That was with six pounds.
(Pat)>> That's with six pounds of boost.
(Jimmy)>> It's not bad for a mudslinging big truck.
(Mike)>> Here's the thing. I think we keep our ceiling on r-p-m at 6,500. Let's go ahead and start dumping some timing into it and I don't think we need to look for a level off. I think let's set a goal at 610, 615?
(Pat)>> Like this man said before, if it starts with a 6 they're happy. So I'm gonna go sneak a couple of degrees in it. [ engine idling ]
(Pat)>> We've advanced the timing from 22 degrees to 24 degrees. [ engine revving ]
(Pat)>> That's a two degree jump in timing and look what it did for torque. Jumped 20 pounds of torque. Okay we're at 606 horse now at 6,500.
(Jeremy)>> Little adjustments make all the difference.
(Mike)>> Same boost, 6.1 pounds.
(Pat)>> The only thing we could probably do is start the pull a little higher and turn the engine a tiny bit higher.
(Mike)>> 4,500 to 6,800?
(Jeremy)>> Well we hit the six mark right?
(Mike)>> We're in there like swim wear.
(Jeremy)>> I think it gets more and more exciting every time you guys change just little things around. The numbers just go up and up.
(Jimmy)>> It's like you guys know what you're doing.
(Pat)>> Let's not get too presumptuous.
(Mike)>> Wait until we're done with the dyno session.
(Jimmy)>> And there's not parts all over the floor.
(Pat)>> It can stick a rod in a wall on this one.
(Jeremy)>> All the faith man, all the faith. [ engine revving ]
(Mike)>> The number looked pretty good.
(Pat)>> Okay this made a 24 for torque and it made 626 but it's still going up. How tough are you feeling? You want to turn it?
(Mike)>> 6,500 to 8,500, no I'm joking.
(Pat)>> Well you know I don't see any problem turning 7,000, 7,200, yeah. It's your call. You want to go for the glory run or what?
(Jimmy)>> Why not.
(Pat)>> See that's why I like you guys.
(Jeremy)>> I've got faith man.
(Pat)>> That's the old no guys no glory.
(Mike)>> Alright dad, what are we gonna do?
(Pat)>> 7,200. [ engine revving ]
(Mike)>> What's the rev limiter set at?
(Pat)>> The rev limiter's at 7,000.
(Mike)>> 630 at 6,900 and then torque hit a 32 at 5,400.
(Pat)>> But at this boost level you guys are in there.
(Jeremy)>> Dude I can't wait to get it in the truck and in the mud, and here's my grand vision. You pull into the center of the mud pit and you stop and just have everybody looking at you, and when you hammer on that the roots, just straight up air, and it's just all r-p-m and just wheels spinning like get out of the way. And then the last question is do you want it back when we're done? Sentimental value here isn't it?
(Pat)>> No.
(Jeremy)>> Don't want it?
(Pat)>> I think we said no at the same time. This is like Wheel of Fortune. Once you buy a prize it's yours to keep.
(Jeremy)>> Alright I think we'll do it justice.
(Jimmy)>> Yeah we'll put it to good use.
(Pat)>> Up next, under all that grease and grime there's a pretty neat engine somewhere.
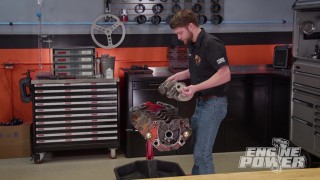
(Mike)>> We're almost back to the shop from a quick trip southbound into Alabama. Now the reason we went is to pick up an old, dirty, grimy diamond in the rough. Now it's an engine that has a lot of history and a huge following with the blue oval crowd. Now this one happened to find its home between the frame rails of an old dump truck. So you know it was a work horse.
(Pat)>> And we retrieved this engine for a reason. A lot of you viewers wrote in and we actually listened. The request was to find a historic engine of unknown shape in a junkyard and to see if we could get it running. I think we can.
(Mike)>> I think we can do it. [ engine running ]
(Mike)>> So what could it be? How about an old FE, but what one Pat?
(Pat)>> This is a 390 inch. Now the FE was also Ford's quintessential industrial engine, which came in sizes from 330 inch all the way up to 428. Now this 390 was in a dump truck right. So just like it is we are gonna see what it takes to actually get it running on the dyno. [ Music ] [ metal clanging ]
(Pat)>> Let's see if we can get a grab on her here. [ Music ] [ loud squeak ]
(Mike)>> Whoa!
(Pat)>> The only I'm really nervous about is if something has inadvertently been dropped down a cylinder because obviously this thing's been sitting like this for years. Only one way to find out. [ air ratchet buzzing ] [ Music ]
(Pat)>> The first thing we're gonna do before we even get started is knock a few of the heavy chunks off this thing. It has been sitting for a very long time and has had the valve covers off, and a bunch of critters have lived and died on this engine. Now we're not going to get crazy. We're not going to Pebble Beach with this thing we're just trying to get it running. So I'm gonna scrape around with a screwdriver and knock some of this stuff loose, and then we're gonna vacuum it up with the shop vac. Thank you sir. [ vacuum humming ]
(Pat)>> Getting stuff running like this reminds me of my youth. It was always a challenge to get one running that hadn't been running before. Half of those were froze up though. So you had to break'em loose. This one's actually in okay shape, I believe. [ vacuum humming ]
(Pat)>> Got a clogged drain back, look at this. Oh boy! [ vacuum humming ]
(Pat)>> Oh yeah, look at that. A big ole chunk. We hadn't made it any worse that's for sure. That's about as good as that thing's gonna get. We're gonna have to get in there and scrape a little bit more, and pull some of this out.
(Mike)>> I'm surprised that didn't break off.
(Pat)>> Yeah, well it's sat inside, it's sat outside. This'll tell you right here. One obviously the engine is stuck. Two, if the timing chain's broke. Three, if we have any stuck valves. So just kinda look around.
(Mike)>> Go ahead.
(Pat)>> It actually turns over relatively nice. I've got valves going up and down.
(Mike)>> I've got compression coming out over here.
(Pat)>> That turns over. Look at that! Turning the engine over and looking at the valve heights we noticed that the exhaust valve on the number two cylinder when it's at top dead center is lower than the others. This means the valve is a little sticky in the guide. These valves should be at the same height at this point. So what we're gonna do is see if we can make it come back up by tapping it with a hammer, specifically a dead blow mallet. [ tapping metal ]
(Pat)>> Voila, unstuck! Hopefully when the engine runs and the valve stem is lubricated by oil it will loosen up and work as it should.
(Mike)>> Obviously we have to run exhaust on this engine when it goes on the dyno, but there's a little problem. There's a bunch of broken off studs in the exhaust flange. So I'm gonna go ahead and show you a little procedure I like to use to get them out. Most of the time it works, but when it doesn't you will have to drill them and put in a heli-coil. Let's see how it goes. [ grinder buzzing ] [ Music ]
(Mike)>> It's not red and it's not blue. Green is the color we choose. Forney welders have tons of features, use high quality parts, and are tested to the most extreme conditions period. It's a whole lot of machine at a sweet price point. [ welder crackling ]
(Mike)>> We're spraying some of Seafoam's Deep Creep penetrating oil onto the stud to see if we can get some of it to wick down into the threads. When this method works it saves a lot of time. Unfortunately the studs in this 390 did not want to be bothered. [ Music ] Since we're not reusing the heads we're going to drill them out and use nuts and bolts to secure the headers.
(Pat)>> With a pilot hole drilled, Matco's hyper-stepped drill bits enlarge the hole in no time. They have a stepped end similar to a uni-bit. They make their own pilot and cut like a dream. [ drill buzzing ]
(Pat)>> There's t-d-c right there. A piece of scotchbrite exposes the timing marks after all these years. [ Music ] Goodson carbide scrapers are a must for any tool box. If the surface is flat they will remove anything in their way. Look at that. I'll be you that hasn't been off there for 35, 40 years. [ Music ] With enough cleaning and scraping the original Ford blue has resurfaced. At some point this engine actually was blue. [ Music ] We all want more power when it comes to our performance engines but what about our tools, like when you're using an impact and it just won't remove that stubborn bolt or you, you need more power and one of these will give it to you hands down. It's Matco Tools 20 volt Infinium half inch impact, and it has high performance in its genes. It uses brushless motor technology to produce 1,600 pound feet of breakaway torque. It has four integrated l-e-d's to light up your work space, a variable speed trigger that allows you to control power output, and is available in several different colors. Check them out and all the other cool stuff at Matco Tools dot com.
(Mike)>> Up next it smokes but at least it fires.
(Pat)>> We're finally to a point where we can start putting parts on this, and they may look a little too shinny for this application but here's what we're doing.
(Mike)>> They're all for the next phase of this build and exactly what we need to get this piece of junk running right now. So let's get started.
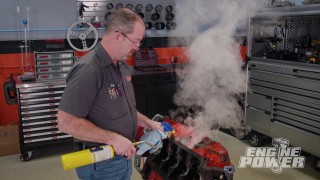
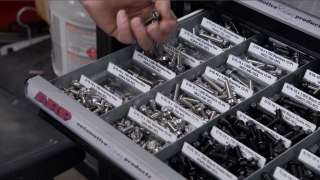
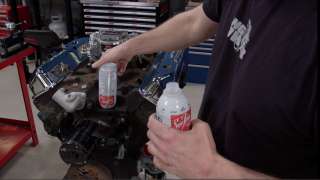
(Pat)>> First of all we have to replace a bunch of fasteners that are missing from this engine. A quick trip to our ARP cabinet gives us a wide variety of high quality stainless fasteners to help get this rig going again. [ Music ] We had to make a slight adjustment to this gasket. [ Music ] Extreme cases call for extreme measures. So what we're gonna do is we're gonna run Seafoam through the engine, and we're not doing it in a conventional way. We are not diluting it with any oil. We're gonna put a bunch in and then prime the engine while we're turning it over and see what comes out of the oil drain. That's why we're preparing for the apocalypse here.
(Mike)>> One of Seafoam's benefits is its ability to clean deposits from the inside of an engine. That's exactly why we are using it. You can pour it directly into the crank case or in your fuel system. It's job is the same. To clean deposits so your engine runs better.
(Pat)>> Alright $200 dollar engine, $60 bucks of Seafoam in it. Let's see what it does here. [ drill buzzing ]
(Mike)>> This leak is unwanted but it does let us know the oil pump is doing its job by pumping the Seafoam through the engine. [ Music ]
(Pat)>> Yeah! Did Seafoam do its job? It certainly did! It went in clear and came out black after just a couple minutes of priming. We'll flush the engine again using conventional oil and priming it the same way. [ Music ] Fuel?
(Mike)>> Here comes fuel. Ignition.
(Pat)>> No leaks?
(Mike)>> No leaks.
(Pat)>> Oh my god I'm excited. [ engine fire up & idling ]
(Pat)>> Yes! [ engine revving ]
(Pat)>> Hit the fan. Our goal was to get it running and we succeeded. [ engine revving ]
(Pat)>> It runs!
(Mike)>> It runs! [ engine idling ]
(Pat)>> We have a huge mess to clean up.
(Mike)>> For more information on anything you've seen on Engine Power today log on to Powernation TV dot com.
Show Full Transcript
(Pat)>> How about one with a supercharger?
(Mike)>> Today on Engine Power the Chevy gets a big blower and major gains in the dyno cell.
(Pat)>> Plus our junkyard engine gives us a sense of accomplishment when it actually runs. Yes! [ Music ]
(Mike)>> Welcome to Engine Power. Today we have two cool projects to tackle. Now the first one has been around for quite some time. It was repurposed and slightly wounded at the same time. Now anything that gets wounded can almost always be fixed to a certain extent. Now the second one is an engine that has a lot of heritage. It's new to use but it's old, it's nasty, and that's exactly how we're gonna address it in a little bit.
(Pat)>> Mike mentioned a familiar engine that has been repurposed but slightly wounded. It is our 383 small block Chevy we called Project Re-Rev 2.0. Now this has been our test mule and our tech engine for changing cylinder heads, cam shaft swaps, a plethora of intake manifolds, nitrous, and even a big blower. Now at some point we think we hurt it a little bit running it on nitrous, and that problem did not show up until we started making pulls with the blower installed. [ engine revving ]
(Pat)>> Stop, stop!
(Mike)>> What was that?
(Pat)>> Well that sucked.
(Mike)>> What happened there was the cause of a hurt piston along the actual ring land. The boost from the supercharged pressurized the crankcase, forcing oil out of the front crankshaft seal causing a big mess. Now the easiest solution here is just to refresh the engine.
(Pat)>> With our block almost setup in our Sunnen SV-15 it's time to do some work. Now this is Sunnen's latest and greatest hone for doing engine blocks. It can handle cylinders as small as three quarters of an inch all the way up to 8 inches, and it will do cylinder lengths up to 11 inches with special tooling. With a three horsepower spindle rating and a spindle speed range from 90 to 350 r-p-m, this hone can hold tolerances within 10 thousandths of an inch in both concentricity and straightness. You may notice the shiny new ICT billet torque plate. It was easily sourced from Summit Racing. It's machined out of tough aerospace grade billet aluminum. You can order them for several different bore sizes, and this one is for small block Chevys, and it comes in at one inch 975 thousandths thick. It is needed to properly hone the cylinders. When torqued to the block's deck it simulates bore distortion, just like when a head is torqued down, giving the engine better ring seal, reduced oil consumption, and higher compression. Now keep in mind this is a touch up. We have new pistons and they will be a little bit larger on clearance than you would have if it were just a fresh bore and a fresh piston. The old adage in racing is if it's a little bit loose no one's gonna know. It's a little bit tight everyone's gonna know. So this bore might be a thou, thou and a half bigger than the minimum spec but it's gonna run just fine. [ Music ] The final bore size is 4.043. A 41 degree cross hatch was introduced to promote good ring break in.
(Mike)>> The crankshaft is a forged 43-40 unit from Eagle. We ordered new pistons that were 26 grams lighter. So the crankshaft had to be sent out and rebalanced. It went to our favorite little machine shop in Nashville, Tennessee, Shacklett's Auto Machine. They did a great job adjusting the weight and it shows their attention to detail.
(Pat)>> We're giving it a professional polish job using our Goodson crank polisher. A few rotations on each journal with a 600 grit belt will set the stage to finish it off with a cork line belt, which will micro polish it to a mirror like finish.
(Mike)>> We jumped ahead and got the short block together. Now it included the original crank and rods and new Mahle Power Pack pistons specifically for blower applications. Now they are 40-32 alloy with a 16cc dish and dual valve reliefs. They have a one millimeter, one millimeter, two millimeter ring pack for lower drag and better cylinder sealing.
(Pat)>> The valvetrain goes together next. Trent push rods, Summit 1.6 ratio roller rockers, and a stud girdle make it all up. Cold lash settings are .014 on the intake and .016 on the exhaust. When up to temperature the lash will increase to .020 on the intake and .022 on the hot side.
(Mike)>> Before we drop on the intake a quick look to make sure there are no gremlins inside the engine.
(Pat)>> No cloths, no screwdrivers, no anything in there but.
(Mike)>> Torque wrenches? Lashing tools? [ Music ] [ ratchet clicking ]
(Mike)>> So what I think needs to happen then is let's turn the blower. You grab whatever you can on the front and I'll grab the back, and then that way. You know what I mean? [ grunting ] [ Music ]
(Pat)>> Hell I don't need that thing. [ Music ] There we go.
(Mike)>> Good hustle my man. When the blower pulley is bigger than the balancer and the blower up to the hat is bigger than the engine it's cool stuff. [ engine revving ]
(Pat)>> Up next the supercharged small block earns its stripes.
(Pat)>> How do you keep from having to reset the lash on your hydraulic roller valvetrain? The answer in today's tech tip.
(Steve)>> Setting lash on a hydraulic roller valvetrain is actually pretty easy. With the lifters in place, the push rod ends lubed and dropped in. Now we can place the rocker arms for cylinder number one on the studs. Now rotate the engine until the exhaust rocker starts to move up as if it were opening the valve. Tighten the intake rocker's adjusting nut as you rotate the push rod in your finders. When all the vertical slack between the push rod and the rocker arm is taken out you are at zero lash. Now tighten the nut one half turn past the zero lash setting. This will give you between .03 and .06 of an inch of pre-load to a typical hydraulic lifter. For the exhaust valve rotate the engine until the intake valve starts to close. Repeat the same procedures as earlier and you've completed lash for cylinder number one. Only seven more to go. [ Music ]
(Mike)>> We are ready for round two here in the dyno room with our 383 blower engine. Now the only thing that really changed on this thing is the compression ratio, and just so you know we're running distilled race gas that's 104 octane.
(Pat)>> And the compression ratio has changed because we changed the piston. It's down to 9.26 to one, and that's a couple of points down from our naturally aspirated compression ratio. Now we've ran the engine, broke in the rings, and there are no drips or leaks. So it's time to see what this thing will make take two. [ Music ]
(Jimmy)>> What's up boys? We heard you making noise.
(Pat)>> We are just about ready to make a test hit here. Now we've done a couple of things to it. We've knocked a bunch of boost out of it, knocked a bunch of timing out of it, and we're just gonna see now where we're at. We're getting back to square one basically.
(Jeremy)>> This is exciting right now. [ engine revving ]
(Pat)>> Wow!
(Jeremy)>> Wow!
(Pat)>> That is 585 horse at 6,500, and again torque is going to be a little on the low side, 507 at 5,400.
(Mike)>> That was with six pounds.
(Pat)>> That's with six pounds of boost.
(Jimmy)>> It's not bad for a mudslinging big truck.
(Mike)>> Here's the thing. I think we keep our ceiling on r-p-m at 6,500. Let's go ahead and start dumping some timing into it and I don't think we need to look for a level off. I think let's set a goal at 610, 615?
(Pat)>> Like this man said before, if it starts with a 6 they're happy. So I'm gonna go sneak a couple of degrees in it. [ engine idling ]
(Pat)>> We've advanced the timing from 22 degrees to 24 degrees. [ engine revving ]
(Pat)>> That's a two degree jump in timing and look what it did for torque. Jumped 20 pounds of torque. Okay we're at 606 horse now at 6,500.
(Jeremy)>> Little adjustments make all the difference.
(Mike)>> Same boost, 6.1 pounds.
(Pat)>> The only thing we could probably do is start the pull a little higher and turn the engine a tiny bit higher.
(Mike)>> 4,500 to 6,800?
(Jeremy)>> Well we hit the six mark right?
(Mike)>> We're in there like swim wear.
(Jeremy)>> I think it gets more and more exciting every time you guys change just little things around. The numbers just go up and up.
(Jimmy)>> It's like you guys know what you're doing.
(Pat)>> Let's not get too presumptuous.
(Mike)>> Wait until we're done with the dyno session.
(Jimmy)>> And there's not parts all over the floor.
(Pat)>> It can stick a rod in a wall on this one.
(Jeremy)>> All the faith man, all the faith. [ engine revving ]
(Mike)>> The number looked pretty good.
(Pat)>> Okay this made a 24 for torque and it made 626 but it's still going up. How tough are you feeling? You want to turn it?
(Mike)>> 6,500 to 8,500, no I'm joking.
(Pat)>> Well you know I don't see any problem turning 7,000, 7,200, yeah. It's your call. You want to go for the glory run or what?
(Jimmy)>> Why not.
(Pat)>> See that's why I like you guys.
(Jeremy)>> I've got faith man.
(Pat)>> That's the old no guys no glory.
(Mike)>> Alright dad, what are we gonna do?
(Pat)>> 7,200. [ engine revving ]
(Mike)>> What's the rev limiter set at?
(Pat)>> The rev limiter's at 7,000.
(Mike)>> 630 at 6,900 and then torque hit a 32 at 5,400.
(Pat)>> But at this boost level you guys are in there.
(Jeremy)>> Dude I can't wait to get it in the truck and in the mud, and here's my grand vision. You pull into the center of the mud pit and you stop and just have everybody looking at you, and when you hammer on that the roots, just straight up air, and it's just all r-p-m and just wheels spinning like get out of the way. And then the last question is do you want it back when we're done? Sentimental value here isn't it?
(Pat)>> No.
(Jeremy)>> Don't want it?
(Pat)>> I think we said no at the same time. This is like Wheel of Fortune. Once you buy a prize it's yours to keep.
(Jeremy)>> Alright I think we'll do it justice.
(Jimmy)>> Yeah we'll put it to good use.
(Pat)>> Up next, under all that grease and grime there's a pretty neat engine somewhere.
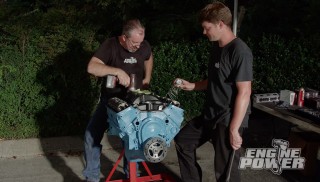
(Mike)>> We're almost back to the shop from a quick trip southbound into Alabama. Now the reason we went is to pick up an old, dirty, grimy diamond in the rough. Now it's an engine that has a lot of history and a huge following with the blue oval crowd. Now this one happened to find its home between the frame rails of an old dump truck. So you know it was a work horse.
(Pat)>> And we retrieved this engine for a reason. A lot of you viewers wrote in and we actually listened. The request was to find a historic engine of unknown shape in a junkyard and to see if we could get it running. I think we can.
(Mike)>> I think we can do it. [ engine running ]
(Mike)>> So what could it be? How about an old FE, but what one Pat?
(Pat)>> This is a 390 inch. Now the FE was also Ford's quintessential industrial engine, which came in sizes from 330 inch all the way up to 428. Now this 390 was in a dump truck right. So just like it is we are gonna see what it takes to actually get it running on the dyno. [ Music ] [ metal clanging ]
(Pat)>> Let's see if we can get a grab on her here. [ Music ] [ loud squeak ]
(Mike)>> Whoa!
(Pat)>> The only I'm really nervous about is if something has inadvertently been dropped down a cylinder because obviously this thing's been sitting like this for years. Only one way to find out. [ air ratchet buzzing ] [ Music ]
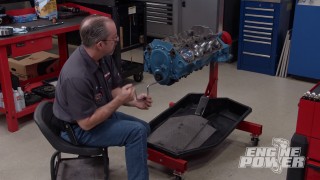
(Pat)>> The first thing we're gonna do before we even get started is knock a few of the heavy chunks off this thing. It has been sitting for a very long time and has had the valve covers off, and a bunch of critters have lived and died on this engine. Now we're not going to get crazy. We're not going to Pebble Beach with this thing we're just trying to get it running. So I'm gonna scrape around with a screwdriver and knock some of this stuff loose, and then we're gonna vacuum it up with the shop vac. Thank you sir. [ vacuum humming ]
(Pat)>> Getting stuff running like this reminds me of my youth. It was always a challenge to get one running that hadn't been running before. Half of those were froze up though. So you had to break'em loose. This one's actually in okay shape, I believe. [ vacuum humming ]
(Pat)>> Got a clogged drain back, look at this. Oh boy! [ vacuum humming ]
(Pat)>> Oh yeah, look at that. A big ole chunk. We hadn't made it any worse that's for sure. That's about as good as that thing's gonna get. We're gonna have to get in there and scrape a little bit more, and pull some of this out.
(Mike)>> I'm surprised that didn't break off.
(Pat)>> Yeah, well it's sat inside, it's sat outside. This'll tell you right here. One obviously the engine is stuck. Two, if the timing chain's broke. Three, if we have any stuck valves. So just kinda look around.
(Mike)>> Go ahead.
(Pat)>> It actually turns over relatively nice. I've got valves going up and down.
(Mike)>> I've got compression coming out over here.
(Pat)>> That turns over. Look at that! Turning the engine over and looking at the valve heights we noticed that the exhaust valve on the number two cylinder when it's at top dead center is lower than the others. This means the valve is a little sticky in the guide. These valves should be at the same height at this point. So what we're gonna do is see if we can make it come back up by tapping it with a hammer, specifically a dead blow mallet. [ tapping metal ]
(Pat)>> Voila, unstuck! Hopefully when the engine runs and the valve stem is lubricated by oil it will loosen up and work as it should.
(Mike)>> Obviously we have to run exhaust on this engine when it goes on the dyno, but there's a little problem. There's a bunch of broken off studs in the exhaust flange. So I'm gonna go ahead and show you a little procedure I like to use to get them out. Most of the time it works, but when it doesn't you will have to drill them and put in a heli-coil. Let's see how it goes. [ grinder buzzing ] [ Music ]
(Mike)>> It's not red and it's not blue. Green is the color we choose. Forney welders have tons of features, use high quality parts, and are tested to the most extreme conditions period. It's a whole lot of machine at a sweet price point. [ welder crackling ]
(Mike)>> We're spraying some of Seafoam's Deep Creep penetrating oil onto the stud to see if we can get some of it to wick down into the threads. When this method works it saves a lot of time. Unfortunately the studs in this 390 did not want to be bothered. [ Music ] Since we're not reusing the heads we're going to drill them out and use nuts and bolts to secure the headers.
(Pat)>> With a pilot hole drilled, Matco's hyper-stepped drill bits enlarge the hole in no time. They have a stepped end similar to a uni-bit. They make their own pilot and cut like a dream. [ drill buzzing ]
(Pat)>> There's t-d-c right there. A piece of scotchbrite exposes the timing marks after all these years. [ Music ] Goodson carbide scrapers are a must for any tool box. If the surface is flat they will remove anything in their way. Look at that. I'll be you that hasn't been off there for 35, 40 years. [ Music ] With enough cleaning and scraping the original Ford blue has resurfaced. At some point this engine actually was blue. [ Music ] We all want more power when it comes to our performance engines but what about our tools, like when you're using an impact and it just won't remove that stubborn bolt or you, you need more power and one of these will give it to you hands down. It's Matco Tools 20 volt Infinium half inch impact, and it has high performance in its genes. It uses brushless motor technology to produce 1,600 pound feet of breakaway torque. It has four integrated l-e-d's to light up your work space, a variable speed trigger that allows you to control power output, and is available in several different colors. Check them out and all the other cool stuff at Matco Tools dot com.
(Mike)>> Up next it smokes but at least it fires.
(Pat)>> We're finally to a point where we can start putting parts on this, and they may look a little too shinny for this application but here's what we're doing.
(Mike)>> They're all for the next phase of this build and exactly what we need to get this piece of junk running right now. So let's get started.
(Pat)>> First of all we have to replace a bunch of fasteners that are missing from this engine. A quick trip to our ARP cabinet gives us a wide variety of high quality stainless fasteners to help get this rig going again. [ Music ] We had to make a slight adjustment to this gasket. [ Music ] Extreme cases call for extreme measures. So what we're gonna do is we're gonna run Seafoam through the engine, and we're not doing it in a conventional way. We are not diluting it with any oil. We're gonna put a bunch in and then prime the engine while we're turning it over and see what comes out of the oil drain. That's why we're preparing for the apocalypse here.
(Mike)>> One of Seafoam's benefits is its ability to clean deposits from the inside of an engine. That's exactly why we are using it. You can pour it directly into the crank case or in your fuel system. It's job is the same. To clean deposits so your engine runs better.
(Pat)>> Alright $200 dollar engine, $60 bucks of Seafoam in it. Let's see what it does here. [ drill buzzing ]
(Mike)>> This leak is unwanted but it does let us know the oil pump is doing its job by pumping the Seafoam through the engine. [ Music ]
(Pat)>> Yeah! Did Seafoam do its job? It certainly did! It went in clear and came out black after just a couple minutes of priming. We'll flush the engine again using conventional oil and priming it the same way. [ Music ] Fuel?
(Mike)>> Here comes fuel. Ignition.
(Pat)>> No leaks?
(Mike)>> No leaks.
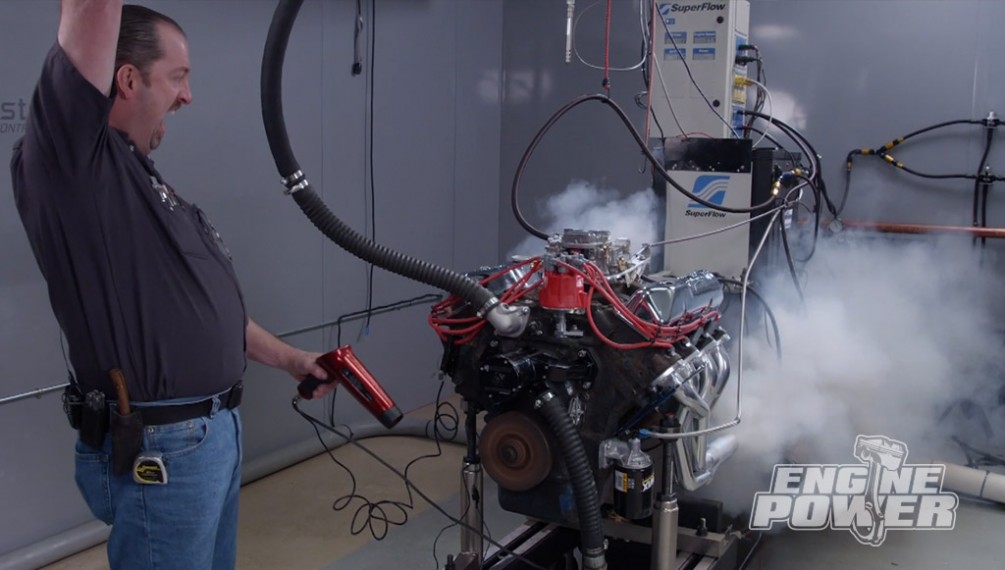
(Pat)>> Oh my god I'm excited. [ engine fire up & idling ]
(Pat)>> Yes! [ engine revving ]
(Pat)>> Hit the fan. Our goal was to get it running and we succeeded. [ engine revving ]
(Pat)>> It runs!
(Mike)>> It runs! [ engine idling ]
(Pat)>> We have a huge mess to clean up.
(Mike)>> For more information on anything you've seen on Engine Power today log on to Powernation TV dot com.