Detroit Muscle Featured Projects


Detroit Muscle Builds


Want more content like this?
Join the PowerNation Email NewsletterParts Used In This Episode

Gearstar Performance Transmissions
Gearstar A904 Transmission
Matco Tools
MATCO Tools are the Official Tool Supplier to PowerNation
The Industrial Depot
Tools, Hardware, Shop Supplies
Episode Transcript
(Tommy)>> You're watching Powernation!
(Tommy)>> Today on Detroit Muscle we pump a few more ponies under the hood of our retro Javelin while keeping it true to the AMC fan.
(Daniel)>> Speaking of pumping we install an easy e-f-i conversion kit that will make you wonder why you would do it any other way. [ MUSIC ] [ engines revving ] [ MUSIC ]
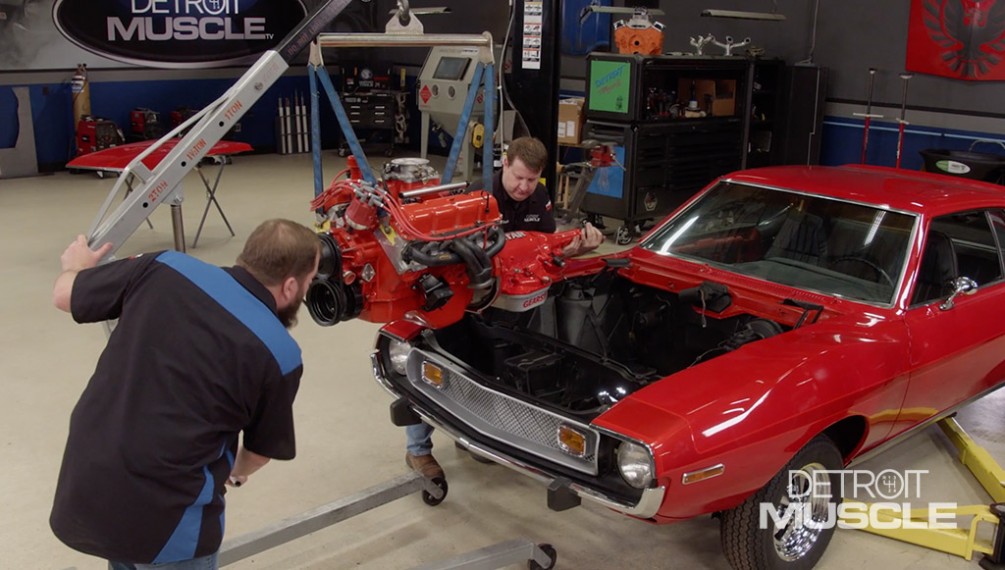
(Tommy)>> Hey guys, welcome to Detroit Muscle. Today we're gonna be dropping in the power plant to our AMC. Here on the exterior we kinda went down the retro path, and up under the hood we've kinda taken a left turn in the direction of a bit more modern.
(Daniel)>> What we have here is our newly improved baby V-8, and I bet Tom's statement had you AMC guys a bit worried thinking this old Javelin was gonna get LS'ested. So calm down, it's still traditional AMC.
(Tommy)>> We pulled this old greasy thing out, sent it down to the guys in Engine Power. We thought it was bad on the outside.
(Frankie)>> Look at this, nasty!
(Tommy)>> But the inside was even worse.
(Pat)>> We've been getting some doosies.
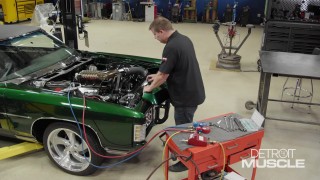
(Tommy)>> Pat and Frankie stayed after it and then started working their magic. This AMC mill got the works with plenty of machine work and some goodies. They punched it out, installed a bigger bump stick, some aluminum heads, and e-f-i. Then it was time to put their hard work to the test, strap it to the dyno. [ engine revving ]
(Tommy)>> This little thing started out from the factory at 150 horse. With their mods they have more than doubled its power output making 337. Now with this install of our engine is pretty much self-explanatory and straight forward because that's the exact engine that we removed from our AMC. It's a really good idea to make sure that you save all of your old components cause you never know what you'll end up reusing, whether it be a piece of hardware, shim, washer, or even a bracket. Now with that we went ahead and saved our old motor mounts but with the plan of replacing them with some that we got from RockAuto, and the reason for that is because these things can kind of age out. Yeah whenever we pulled the engine out it was all happy and wasn't broken or nothing like that but if you'll look closer at these things you can see the damage that they have. If you'll notice that the plate is starting to break away from the cushion, or delaminate. So to reuse something like this you're just postponing a problem. To swap these engine mounts out right now it only takes a couple of minutes. Where to put them in the car and then have to come back and change them later down the road is gonna cost you a couple of hours. [ MUSIC ] Some people prefer using solid mounts, especially in performance applications, but in our situation a standard replacement from RockAuto is the way to go. It bolts right into place and has the added benefits of a rubber mount, which reduces vibrations that's transferred from the engine. [ MUSIC ] You ready to get that on?
(Daniel)>> I'm ready to put it on. You got the bolts?
(Tommy)>> Let me get you started. [ MUSIC ]
(Daniel)>> On our AMC the flex plate is pretty simple. It has an irregular bolt pattern which is handy, meaning that it can only really go on one way. [ MUSIC ] Now that our flex plate is in place and our bolts are started it's time to torque them to spec. Now it's important to remember that each manufacturer has a different specification, and this depends on several factors like bolt diameter, thread pitch, or material of components. So it's always important to do your homework and have the right information for whatever you're working on.
If you were to torque these to a setting that was too low it could possible cause detrimental problems like vibrations, knocking, or even the flywheel to crack or even possibly shatter. Well I got my part, you ready?
(Tommy)>> Just about, I've been busy. You know that.
(Daniel)>> Oh yeah I can see.
(Tommy)>> Can you handle that pump handle?
(Daniel)>> Alright.
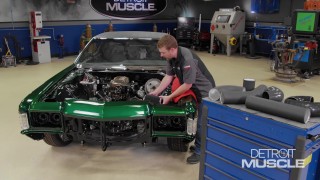
(Tommy)>> Gearstar took care of us on this one. Our little A-904 is built to the hills for trouble free service. They modified the drums, increase the capacity of clutch packs, and added a custom billet converter. Every trans they produce is dyno tested, and with 20 years of experience gives durability for thousands of miles. [ MUSIC ] You want it to go up if you can. Installing an engine like this it's always good to have a couple of people working on it. Can you come down with the jack a little? And it takes a little bit of some finesse. Let's go back toward the car. [ MUSIC ] Slow down, slow down! It's also a good idea to not get in a hurry. Once you wiggle and jiggle it just right it just falls into place. That's her.
(Daniel)>> In there like flint.
(Tommy)>> Shoot I can't wait to get this red rocket out on the road.
(Daniel)>> Up next, converting that old school setup for a modern e-f-i system the easy way, next on Detroit Muscle.
(Tommy)>> Hey guys, welcome back to the shop. Well we're well on our way reinstalling some of the hard parts back into our AMC so that we can get this thing to finally breathe some fire, and by the looks of things over here you may be field dressing a radiator.
(Daniel)>> No, I'm just pulling these old fittings out because we're probably gonna have to reuse them, but what we're not gonna be reusing is this old radiator. The reason we're not using this radiator is due to the broken solder joint between the neck and the tank right here, and this is a pretty common thing on an old radiator. And another common problem is this green corrosion right here, which is the result of a leaky core.
(Tommy)>> So it doesn't really make sense to redo that one does it?
(Daniel)>> No not at all.
(Tommy)>> Well I'm gonna go grab a few extra parts and I'll let you get after it.
(Daniel)>> Alright, now our new radiator comes to us from Frostbite. It's a direct to fit application, which is great because it has fully tig welded brackets that also have the factory bolt pattern pre-drilled into them. That keeps you from having to make anything crazy or do any kind of modifications to get it to fit in the car. The second thing I like about it is the fact it has an integrated trans cooler, and all we have to do is screw in our original fittings and then our factory transmission lines will hook to them. When making more power oftentimes you need more cooling. Aluminum radiators have more than one benefit. Aluminum dissipates heat more efficiently. [ drill buzzing ]
(Daniel)>> Plus they are lighter than the old style made of copper and brass, and when all polished up they look pretty snazzy. [ MUSIC ]
(Tommy)>> We're running electronic fuel injection on that hopped up AMC power plant that Engine Power built for us, and for it to run and operate properly it requires a much greater fuel pressure. Normally what you have to do is modify your fuel tank and mount a fuel pump, internal or external. You've got to figure out where you've got to mount a regulator. Then you've got to run some new lines, and feed from the front to the back, and then a return heading back toward the tank. Now we've done this in the past but this isn't your only option.
This Edelbrock kit that we got from Summit Racing is pretty trick. It's a fuel pump, regulator, and reservoir all in one. How it works is your stock carbureted fuel system feeds this thing, and then it supplies your engine with that higher fuel pressure that that e-f-i's looking for. [ MUSIC ] When mounting this you want to keep it away from anything that gets hot. [ drill humming ] [ MUSIC ]
(Tommy)>> Mounting ours on the inner fender keeps it safe and tucks it out of the way. [ drill humming ]
(Tommy)>> From the factory our AMC had a steel line running from that mechanical pump up to the carburetor. Now we're not gonna be reusing that. We've got some rubber hose here that's gonna get the job done. We're also gonna be installing a couple of fuel filters. We have one that runs from the mechanical pump up to the sump, and then we've got this one that came in the kit that goes from the sump up to the fuel rail. Now just because you've got a couple of fuel filters doesn't mean that they're created equal. This one has a much greater p-s-i rating for e-f-i. So make sure you have the right one for the application. [ MUSIC ] When routing lines I like to make things look like they belong. Taking time to run them under, behind, or around items can really go a long way on the appearance of the install. [ MUSIC ] Final thing that we need to take care of is the wiring, and since we're running that Pro Flow 4 it's basically a snap. Push on the pigtail. Then connect the wire from the harness. [ MUSIC ]
(Daniel)>> The next thing we're gonna do is jump into the electrical system, or more particularly the starter. As you can tell our old one here has seen better days. It was dragging real bad and had an engaging problem. Now this gear right here is the Bendix, and as you can tell it's starting to get chipped up pretty bad. Now if you'll look at our old flex plate here you'll notice it's in pretty bad shape too. When these two gears get worn over time and don't mesh well together any more they end up failing, and if you look right here at the ring gear you'll see these two weren't getting along, and that's the result of the screeching sound you heard when you turn the key. This is why we had to replace it when we put in our new transmission. Now we could replace the Bendix in this old starter but that would require digging into it, and considering the age of this old thing that might be opening up a can of worms. Plus I don't think this ugly thing's gonna look right on our freshly rebuilt 304. Our new one here is a Duralast remanufactured unit from AutoZone. It has all the latest updates that meet or exceed the o-e-m unit, and the install is really easy. A couple of factory bolts to line everything up. [ MUSIC ] Plus this Duralast starter has a lifetime warranty. [ MUSIC ]
(Tommy)>> Coming up, how to cure your shaking and shimmying with a little brake 101 next on Detroit Muscle.
(Tommy)>> Often times on late '60's and early '70's muscle cars you'll have two different brake systems on the same ride. You'll have discs on the front, drums out back. Now drum brakes were the standard up until this point, and yeah they did get the job done. So manufacturers came up with a much better design, disc brakes, and they've got a lot going for them. One is they handle the heat a whole lot better, which equals greater stopping power. Plus they're easier to service. [ drill humming ]
(Tommy)>> When we drove this jewel the brakes would stop the car but when you laid your foot on the brake pedal it had what some would call a small hop to it. The pedal would pulsate just a little bit, and the car had a small shake. These round things on both sides, the rotors, is what's causing our issue. They must be warped. This can be fixed and you pretty much have two options. One you can replace the rotor, or two, have it turned. We were already planning to swap the pads out with some EBC Yellow Stuff. So all the brakes was gonna have to come apart. Now we can fix our problem and do an upgrade all at the same go. On our ride with the tire out of the way the next thing to go is the caliper. I like to collapse the piston just a bit using a pry bar to make removal easier. [ MUSIC ] Then with this spindle design of this old AMC the grease cap, cotter pin, and nut has to come off to remove the rotor. On later model stuff the rotor normally slides right off and you don't get nearly as greasy. Shoo, that stuff stinks! Turning a set of rotors can be a cheaper way to go instead of replacing the part. However you can only do this a few times. Each time it gets resurfaced the rotor gets thinner. A rotor also has to dissipate heat as the brakes are being used. If it's too thin the contact surface becomes too hot too fast, which can lead to brake fade and even cracking. This process is to smooth out the brake pad contact surface. If your rotors aren't warped but do have the grooves from the pads this is still a wise decision. As a rule of thumb the rotors should be re-machined every other time the pads are replaced. This will maximize brake pad life and optimize the smoothness of the brake system. Man that looks nice! With everything all shaped up we're just about ready to re-install our rotor. Whenever they were cutting this thing there was metal shavings going every which way and one thing that you don't want those is to get into here. I cleaned all the old grease out before we sent it out to the shop, and now with a quick blast of some air we should be pretty much ready to move on. [ compressed air hissing ]
(Tommy)>> We're gonna clean up our bearings to see what kind of condition they're in. You don't have to have a parts washer to do this. A rag and some cleaner will get the job done as well. Everything on our bearings checked out. We just had to repack them, and remember if you're working on a disc brake application you need to use some high temp grease. [ MUSIC ] On a spindle nut you only need to snug it up. Don't get all He-Man on it, and don't forget your cotter pin. These Yellow Stuff brake pads from EBC are a great way to upgrade your braking system with a simple component swap. They go in the factory locations and use factory hardware. Easy as pie! Well that repair and upgrade wasn't too difficult at all. We're pretty much done here. We'll still have to bed in the brakes but we'll do that once we're out driving. I'm wondering where ole Daniel's at. You guys know how he is. He's like a blister, shows up after all the work's done. Surprise, brake parts pop quiz. Do you have the right answers? How to measure and determine the right parts for your job next on Detroit Muscle.
(Tommy)>> We buy a lot of project vehicles here at Powernation and to find the right one can be a drawn out process. Now there's also a bunch of different sites out there, and to check them all out it can be a bit exhausting. You care about what you're purchasing. You're ready to do it. You want to find the right one, and you want a good deal on it. Fortunately Auto Tempest searches all the top car listing sites nationwide, saving you the time and the hassle of finding your next vehicle. It's easy to use and it allows you to scour the internet from one simple website. This free online tool can save you time and money. So go to Auto Tempest dot com to see how easy it is for you to find your next ride. [ MUSIC ]
(Daniel)>> At some point no matter what you're driving, whether it be late model muscle, an old school hot rod, or even your trailer pulling house payment you're eventually gonna have to repair your brakes.
(Tommy)>> Doing brakes is really just considered doing maintenance because they're a wear item, and it comes along with owning and operating a vehicle.
(Daniel)>> If you're planning on doing the repair yourself you can save a little bit of money but there's a few things you need to take into consideration before getting elbows deep in a job like this, like what are you gonna do with your vehicle? Is it something that you drive every day? Is it your pretty day cruiser that sometimes sees a trip to the track, or is it your truck that you're gonna be pulling your hot rod with?
(Tommy)>> Your answer will affect the choices you need to make when selecting the correct components, like brake pads. Pads for everyday use, driving back and forth to work, hauling the kiddos around, and so on aren't the same pads that you'd put on a race car because they're operating in totally different conditions. Organic brake pads like EBC's Green Stuff are normally used on lightweight vehicles and are perfect for everyday driving. If you want to upgrade from that ceramic is the way to go, and there's a lot of pros to the move. They last longer and do not produce the dust or dirty wheels often times associated with organic pads. EBC Red Stuff has those benefits with improved braking. If your vehicle has a bit more size to it or maybe it's got some performance attitude with the occasional trip to the track there's an even better choice. Yellow Stuff has great stopping power. They'll handle the abuse from stopping heavy loads and has the benefits of a performance pad with no brake fade, good pedal feel, street manners, and track grip. [ drill humming ] [ MUSIC ]
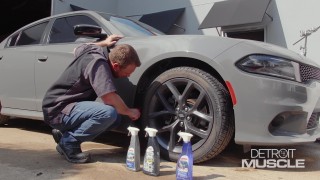
(Tommy)>> And then there are rotors. They make them in different styles and designs. We've all heard the term bigger brakes. That usually refers to a larger diameter rotor. Depending on your vehicle's options it could have different sized rotors. Kinda like this Charger we're working on. There are four different sizes for the front and three in the rear. If you don't know the exact size you're just playing a guessing game, which can cost you your time and the aggravation of having to return your parts for the correct stuff. Rotor diameter, caliper position, hub and spindle design all have to work together. So it's important that you get this right because normally brake parts aren't interchangeable amongst brake systems. So I like to measure the rotor before I get too far and it's not all that difficult. Often times there's two measurements that you'll run into, diameter and thickness. To determine the diameter you simply measure across from one side to the other. Specs can be in inches or millimeters. So it's handy to have a tape measure with both, and then there's thickness. This needs to be measured precisely and a simple slide caliper will do the trick. One thing to keep in mind. If the rotor's ever been turned that will affect your measurement. There can also be different design like solid and vented. At quick glance you can see how they get their name. There is an opening in between the two braking surfaces. Well it's a vented rotor. That hole helps to reduce heat. If it's solid it's as the word implies. Rust and debris between the rotor and hub can prevent it from seating properly and keep it from running true. A quick scrub down with a wire brush cleans things up. We also upgraded to EBC's black coated sport slotted rotors. Combined with their Red Stuff pads these will drastically improve the performance of our brakes. Parts go back together in the reverse order they came off. There are torque specs to some of these components. So be sure to follow the manufacturer's recommendations. [ MUSIC ] Well that pretty much does it for this side but I still have that other side to go. I just can't wait to get started back on this old thing, and I say we've got a couple more things to do and one of them is gonna be plenty loud.
Show Full Transcript
(Tommy)>> Today on Detroit Muscle we pump a few more ponies under the hood of our retro Javelin while keeping it true to the AMC fan.
(Daniel)>> Speaking of pumping we install an easy e-f-i conversion kit that will make you wonder why you would do it any other way. [ MUSIC ] [ engines revving ] [ MUSIC ]
(Tommy)>> Hey guys, welcome to Detroit Muscle. Today we're gonna be dropping in the power plant to our AMC. Here on the exterior we kinda went down the retro path, and up under the hood we've kinda taken a left turn in the direction of a bit more modern.
(Daniel)>> What we have here is our newly improved baby V-8, and I bet Tom's statement had you AMC guys a bit worried thinking this old Javelin was gonna get LS'ested. So calm down, it's still traditional AMC.
(Tommy)>> We pulled this old greasy thing out, sent it down to the guys in Engine Power. We thought it was bad on the outside.
(Frankie)>> Look at this, nasty!
(Tommy)>> But the inside was even worse.
(Pat)>> We've been getting some doosies.
(Tommy)>> Pat and Frankie stayed after it and then started working their magic. This AMC mill got the works with plenty of machine work and some goodies. They punched it out, installed a bigger bump stick, some aluminum heads, and e-f-i. Then it was time to put their hard work to the test, strap it to the dyno. [ engine revving ]
(Tommy)>> This little thing started out from the factory at 150 horse. With their mods they have more than doubled its power output making 337. Now with this install of our engine is pretty much self-explanatory and straight forward because that's the exact engine that we removed from our AMC. It's a really good idea to make sure that you save all of your old components cause you never know what you'll end up reusing, whether it be a piece of hardware, shim, washer, or even a bracket. Now with that we went ahead and saved our old motor mounts but with the plan of replacing them with some that we got from RockAuto, and the reason for that is because these things can kind of age out. Yeah whenever we pulled the engine out it was all happy and wasn't broken or nothing like that but if you'll look closer at these things you can see the damage that they have. If you'll notice that the plate is starting to break away from the cushion, or delaminate. So to reuse something like this you're just postponing a problem. To swap these engine mounts out right now it only takes a couple of minutes. Where to put them in the car and then have to come back and change them later down the road is gonna cost you a couple of hours. [ MUSIC ] Some people prefer using solid mounts, especially in performance applications, but in our situation a standard replacement from RockAuto is the way to go. It bolts right into place and has the added benefits of a rubber mount, which reduces vibrations that's transferred from the engine. [ MUSIC ] You ready to get that on?
(Daniel)>> I'm ready to put it on. You got the bolts?
(Tommy)>> Let me get you started. [ MUSIC ]
(Daniel)>> On our AMC the flex plate is pretty simple. It has an irregular bolt pattern which is handy, meaning that it can only really go on one way. [ MUSIC ] Now that our flex plate is in place and our bolts are started it's time to torque them to spec. Now it's important to remember that each manufacturer has a different specification, and this depends on several factors like bolt diameter, thread pitch, or material of components. So it's always important to do your homework and have the right information for whatever you're working on.
If you were to torque these to a setting that was too low it could possible cause detrimental problems like vibrations, knocking, or even the flywheel to crack or even possibly shatter. Well I got my part, you ready?
(Tommy)>> Just about, I've been busy. You know that.
(Daniel)>> Oh yeah I can see.
(Tommy)>> Can you handle that pump handle?
(Daniel)>> Alright.
(Tommy)>> Gearstar took care of us on this one. Our little A-904 is built to the hills for trouble free service. They modified the drums, increase the capacity of clutch packs, and added a custom billet converter. Every trans they produce is dyno tested, and with 20 years of experience gives durability for thousands of miles. [ MUSIC ] You want it to go up if you can. Installing an engine like this it's always good to have a couple of people working on it. Can you come down with the jack a little? And it takes a little bit of some finesse. Let's go back toward the car. [ MUSIC ] Slow down, slow down! It's also a good idea to not get in a hurry. Once you wiggle and jiggle it just right it just falls into place. That's her.
(Daniel)>> In there like flint.
(Tommy)>> Shoot I can't wait to get this red rocket out on the road.
(Daniel)>> Up next, converting that old school setup for a modern e-f-i system the easy way, next on Detroit Muscle.
(Tommy)>> Hey guys, welcome back to the shop. Well we're well on our way reinstalling some of the hard parts back into our AMC so that we can get this thing to finally breathe some fire, and by the looks of things over here you may be field dressing a radiator.
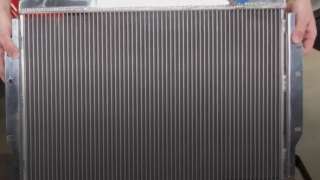
(Daniel)>> No, I'm just pulling these old fittings out because we're probably gonna have to reuse them, but what we're not gonna be reusing is this old radiator. The reason we're not using this radiator is due to the broken solder joint between the neck and the tank right here, and this is a pretty common thing on an old radiator. And another common problem is this green corrosion right here, which is the result of a leaky core.
(Tommy)>> So it doesn't really make sense to redo that one does it?
(Daniel)>> No not at all.
(Tommy)>> Well I'm gonna go grab a few extra parts and I'll let you get after it.
(Daniel)>> Alright, now our new radiator comes to us from Frostbite. It's a direct to fit application, which is great because it has fully tig welded brackets that also have the factory bolt pattern pre-drilled into them. That keeps you from having to make anything crazy or do any kind of modifications to get it to fit in the car. The second thing I like about it is the fact it has an integrated trans cooler, and all we have to do is screw in our original fittings and then our factory transmission lines will hook to them. When making more power oftentimes you need more cooling. Aluminum radiators have more than one benefit. Aluminum dissipates heat more efficiently. [ drill buzzing ]
(Daniel)>> Plus they are lighter than the old style made of copper and brass, and when all polished up they look pretty snazzy. [ MUSIC ]
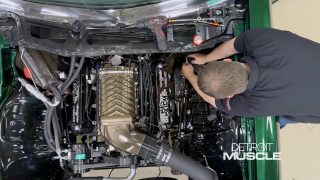
(Tommy)>> We're running electronic fuel injection on that hopped up AMC power plant that Engine Power built for us, and for it to run and operate properly it requires a much greater fuel pressure. Normally what you have to do is modify your fuel tank and mount a fuel pump, internal or external. You've got to figure out where you've got to mount a regulator. Then you've got to run some new lines, and feed from the front to the back, and then a return heading back toward the tank. Now we've done this in the past but this isn't your only option.
This Edelbrock kit that we got from Summit Racing is pretty trick. It's a fuel pump, regulator, and reservoir all in one. How it works is your stock carbureted fuel system feeds this thing, and then it supplies your engine with that higher fuel pressure that that e-f-i's looking for. [ MUSIC ] When mounting this you want to keep it away from anything that gets hot. [ drill humming ] [ MUSIC ]
(Tommy)>> Mounting ours on the inner fender keeps it safe and tucks it out of the way. [ drill humming ]
(Tommy)>> From the factory our AMC had a steel line running from that mechanical pump up to the carburetor. Now we're not gonna be reusing that. We've got some rubber hose here that's gonna get the job done. We're also gonna be installing a couple of fuel filters. We have one that runs from the mechanical pump up to the sump, and then we've got this one that came in the kit that goes from the sump up to the fuel rail. Now just because you've got a couple of fuel filters doesn't mean that they're created equal. This one has a much greater p-s-i rating for e-f-i. So make sure you have the right one for the application. [ MUSIC ] When routing lines I like to make things look like they belong. Taking time to run them under, behind, or around items can really go a long way on the appearance of the install. [ MUSIC ] Final thing that we need to take care of is the wiring, and since we're running that Pro Flow 4 it's basically a snap. Push on the pigtail. Then connect the wire from the harness. [ MUSIC ]
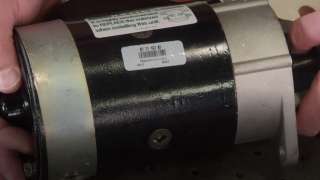
(Daniel)>> The next thing we're gonna do is jump into the electrical system, or more particularly the starter. As you can tell our old one here has seen better days. It was dragging real bad and had an engaging problem. Now this gear right here is the Bendix, and as you can tell it's starting to get chipped up pretty bad. Now if you'll look at our old flex plate here you'll notice it's in pretty bad shape too. When these two gears get worn over time and don't mesh well together any more they end up failing, and if you look right here at the ring gear you'll see these two weren't getting along, and that's the result of the screeching sound you heard when you turn the key. This is why we had to replace it when we put in our new transmission. Now we could replace the Bendix in this old starter but that would require digging into it, and considering the age of this old thing that might be opening up a can of worms. Plus I don't think this ugly thing's gonna look right on our freshly rebuilt 304. Our new one here is a Duralast remanufactured unit from AutoZone. It has all the latest updates that meet or exceed the o-e-m unit, and the install is really easy. A couple of factory bolts to line everything up. [ MUSIC ] Plus this Duralast starter has a lifetime warranty. [ MUSIC ]
(Tommy)>> Coming up, how to cure your shaking and shimmying with a little brake 101 next on Detroit Muscle.
(Tommy)>> Often times on late '60's and early '70's muscle cars you'll have two different brake systems on the same ride. You'll have discs on the front, drums out back. Now drum brakes were the standard up until this point, and yeah they did get the job done. So manufacturers came up with a much better design, disc brakes, and they've got a lot going for them. One is they handle the heat a whole lot better, which equals greater stopping power. Plus they're easier to service. [ drill humming ]
(Tommy)>> When we drove this jewel the brakes would stop the car but when you laid your foot on the brake pedal it had what some would call a small hop to it. The pedal would pulsate just a little bit, and the car had a small shake. These round things on both sides, the rotors, is what's causing our issue. They must be warped. This can be fixed and you pretty much have two options. One you can replace the rotor, or two, have it turned. We were already planning to swap the pads out with some EBC Yellow Stuff. So all the brakes was gonna have to come apart. Now we can fix our problem and do an upgrade all at the same go. On our ride with the tire out of the way the next thing to go is the caliper. I like to collapse the piston just a bit using a pry bar to make removal easier. [ MUSIC ] Then with this spindle design of this old AMC the grease cap, cotter pin, and nut has to come off to remove the rotor. On later model stuff the rotor normally slides right off and you don't get nearly as greasy. Shoo, that stuff stinks! Turning a set of rotors can be a cheaper way to go instead of replacing the part. However you can only do this a few times. Each time it gets resurfaced the rotor gets thinner. A rotor also has to dissipate heat as the brakes are being used. If it's too thin the contact surface becomes too hot too fast, which can lead to brake fade and even cracking. This process is to smooth out the brake pad contact surface. If your rotors aren't warped but do have the grooves from the pads this is still a wise decision. As a rule of thumb the rotors should be re-machined every other time the pads are replaced. This will maximize brake pad life and optimize the smoothness of the brake system. Man that looks nice! With everything all shaped up we're just about ready to re-install our rotor. Whenever they were cutting this thing there was metal shavings going every which way and one thing that you don't want those is to get into here. I cleaned all the old grease out before we sent it out to the shop, and now with a quick blast of some air we should be pretty much ready to move on. [ compressed air hissing ]
(Tommy)>> We're gonna clean up our bearings to see what kind of condition they're in. You don't have to have a parts washer to do this. A rag and some cleaner will get the job done as well. Everything on our bearings checked out. We just had to repack them, and remember if you're working on a disc brake application you need to use some high temp grease. [ MUSIC ] On a spindle nut you only need to snug it up. Don't get all He-Man on it, and don't forget your cotter pin. These Yellow Stuff brake pads from EBC are a great way to upgrade your braking system with a simple component swap. They go in the factory locations and use factory hardware. Easy as pie! Well that repair and upgrade wasn't too difficult at all. We're pretty much done here. We'll still have to bed in the brakes but we'll do that once we're out driving. I'm wondering where ole Daniel's at. You guys know how he is. He's like a blister, shows up after all the work's done. Surprise, brake parts pop quiz. Do you have the right answers? How to measure and determine the right parts for your job next on Detroit Muscle.
(Tommy)>> We buy a lot of project vehicles here at Powernation and to find the right one can be a drawn out process. Now there's also a bunch of different sites out there, and to check them all out it can be a bit exhausting. You care about what you're purchasing. You're ready to do it. You want to find the right one, and you want a good deal on it. Fortunately Auto Tempest searches all the top car listing sites nationwide, saving you the time and the hassle of finding your next vehicle. It's easy to use and it allows you to scour the internet from one simple website. This free online tool can save you time and money. So go to Auto Tempest dot com to see how easy it is for you to find your next ride. [ MUSIC ]
(Daniel)>> At some point no matter what you're driving, whether it be late model muscle, an old school hot rod, or even your trailer pulling house payment you're eventually gonna have to repair your brakes.
(Tommy)>> Doing brakes is really just considered doing maintenance because they're a wear item, and it comes along with owning and operating a vehicle.
(Daniel)>> If you're planning on doing the repair yourself you can save a little bit of money but there's a few things you need to take into consideration before getting elbows deep in a job like this, like what are you gonna do with your vehicle? Is it something that you drive every day? Is it your pretty day cruiser that sometimes sees a trip to the track, or is it your truck that you're gonna be pulling your hot rod with?
(Tommy)>> Your answer will affect the choices you need to make when selecting the correct components, like brake pads. Pads for everyday use, driving back and forth to work, hauling the kiddos around, and so on aren't the same pads that you'd put on a race car because they're operating in totally different conditions. Organic brake pads like EBC's Green Stuff are normally used on lightweight vehicles and are perfect for everyday driving. If you want to upgrade from that ceramic is the way to go, and there's a lot of pros to the move. They last longer and do not produce the dust or dirty wheels often times associated with organic pads. EBC Red Stuff has those benefits with improved braking. If your vehicle has a bit more size to it or maybe it's got some performance attitude with the occasional trip to the track there's an even better choice. Yellow Stuff has great stopping power. They'll handle the abuse from stopping heavy loads and has the benefits of a performance pad with no brake fade, good pedal feel, street manners, and track grip. [ drill humming ] [ MUSIC ]
(Tommy)>> And then there are rotors. They make them in different styles and designs. We've all heard the term bigger brakes. That usually refers to a larger diameter rotor. Depending on your vehicle's options it could have different sized rotors. Kinda like this Charger we're working on. There are four different sizes for the front and three in the rear. If you don't know the exact size you're just playing a guessing game, which can cost you your time and the aggravation of having to return your parts for the correct stuff. Rotor diameter, caliper position, hub and spindle design all have to work together. So it's important that you get this right because normally brake parts aren't interchangeable amongst brake systems. So I like to measure the rotor before I get too far and it's not all that difficult. Often times there's two measurements that you'll run into, diameter and thickness. To determine the diameter you simply measure across from one side to the other. Specs can be in inches or millimeters. So it's handy to have a tape measure with both, and then there's thickness. This needs to be measured precisely and a simple slide caliper will do the trick. One thing to keep in mind. If the rotor's ever been turned that will affect your measurement. There can also be different design like solid and vented. At quick glance you can see how they get their name. There is an opening in between the two braking surfaces. Well it's a vented rotor. That hole helps to reduce heat. If it's solid it's as the word implies. Rust and debris between the rotor and hub can prevent it from seating properly and keep it from running true. A quick scrub down with a wire brush cleans things up. We also upgraded to EBC's black coated sport slotted rotors. Combined with their Red Stuff pads these will drastically improve the performance of our brakes. Parts go back together in the reverse order they came off. There are torque specs to some of these components. So be sure to follow the manufacturer's recommendations. [ MUSIC ] Well that pretty much does it for this side but I still have that other side to go. I just can't wait to get started back on this old thing, and I say we've got a couple more things to do and one of them is gonna be plenty loud.


