
Carcass Featured Projects


Carcass Builds


Want more content like this?
Join the PowerNation Email NewsletterParts Used In This Episode
AutoZone
Shock Mounts
Continental Tire
Extreme Contact Sport Tires
Matco Tools
MATCO Tools are the Official Tool Supplier to PowerNation
The Industrial Depot
Tools, Hardware, Shop Supplies
Episode Transcript
(Jeremy)>> You're watching Powernation!
(Jimmy)>> Today on Carcass we swap out our old tired suspension for a more adjustable system.
(Jeremy)>> Plus we give our Camaro some sporty new shoes and the fenders to match.
(Narrator)>> When you want to build something different you turn to Carcass. They transform cars and trucks into one of a kind builds. From street to mud if you dream it they can build it. This is Carcass, a non-traditional speed shop.
(Jeremy)>> Let's get you caught up on the progress we've made on our auto cross Camaro.
(Jimmy)>> It started as a 1992 25th anniversary third gen Camaro, and it may not look like we've changed much but everything we did was in the engine bay and underneath this '90's muscle car.
(Jeremy)>> That's right, we removed the low power 305 and dropped in a 5.3 liter LS, taking it from 190 horse all the way up to 406.
(Jimmy)>> To back that up we installed a turbo 400 transmission along with a new shift that will work with the manual valve body.
(Jeremy)>> With headers, a new fuel system, and a carb sitting on top we were able to fire this guy up and check all the vitals of our LS on our stock gauges. [ engine revving ]
(Jimmy)>> And today we're gonna see a much bigger transformation on the outside of our Camaro. This car's gonna really have to grip the ground going around the track, and it's gonna have to handle a lot better than it did last time.
(Jeremy)>> And to help this thing grip the ground we're gonna be adding a much wider set of wheels and tires. Plus we're gonna be throwing on a set of fender flares because we want to stick with this auto cross theme, and we want this thing to handle. So we're gonna be completely overhauling the entire suspension.
(Jimmy)>> But before we do that we've got some interior work to do.
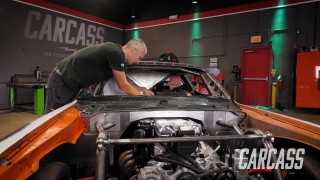
(Jeremy)>> That's a tall order but let's get at it. We're gonna do our best to keep as much of the interior intact as possible. We're leaving the dash along and we're definitely gonna be keeping the center console, but what we're gonna get rid of are these two worn out front seats. The first thing we're gonna do on the interior of our Camaro is install a roll bar kit that we got from Summit Racing. Now this is a perfect kit for you guys that don't have access to a tubing bender because it has pre-bent angles and the tubes are even notched. Now we don't necessarily need a roll bar in the auto cross Camaro for the safety aspect but what this is gonna do is help stiffen the chassis and it's gonna make this car handle better. So the first thing we've got to do to get this installed is take a measurement inside the cab. That way we know where to trim our main hoop. [ MUSIC ] So the inside was 35-ish. Looks like we've to cut off about two and a quarter inches. [ saw buzzing ] [ MUSIC ]
(Jeremy)>> See how it fits. [ MUSIC ]
(Jimmy)>> Snug fit. Now that we have the hoop in place we can get to work on installing base plates, and what these are for is in the event of a wreck it'll spread the load over the floor instead of the tube punch a hole through the floor. To install our base plate we'll prep the area with the grinder, and with our base plate trimmed down to fit the space we'll give it a few tacks to hold it in place. [ welder crackling ] [ MUSIC ]
(Jimmy)>> Now that we have our main hoop in we can move on to the down bars, get a measurement, get them fit up, and get them tacked in.
(Jeremy)>> With our measurement up about 30 inches we'll measure from the notched end of the down bar. Then we'll take it over to the chop saw where we'll cut it at a 55 degree angle.
(Jimmy)>> Back inside the Camaro we need to tack in the base plates for the down bars, and then we can test fit to see if everything lines up.
(Jeremy)>> Those fit pretty good.
(Jimmy)>> Mine fits good.
(Jeremy)>> Let's just weld the plates in and weld the bars in. We'll need to take some care when we're welding in these base plates. First we don't want to burn a hole through the floor of the Camaro, and second we don't want to warp any of the sheet metal that makes up the floor. To prevent this we're gonna be using a mig so we can turn on and off the heat quickly, and we'll be moving around so we don't put too much heat into one place.
(Jimmy)>> With the hoop and down bars we'll be taking a different approach. For one thing we're gonna be using the tig. The welds look a little bit nicer and the metal is thick enough. So we're not afraid of piling in too much heat.
(Jeremy)>> We'll tackle the point where the down bars meet the hoop first. This way we can just tack it in, slide the whole assembly out of the Camaro, and weld it on the bench. That way we don't mess up our nice headliner.
(Jimmy)>> With those welded solid we can slide the cage onto our base plates and burn those in with a tig, leaving only the crossbar to be installed. [ MUSIC ]
(Jeremy)>> The last thing we're gonna be installing on our interior is a set of seats and seat brackets we got from Summit Racing. Now the best thing about these seat brackets is they bolt right in the stock location. [ drill humming ] [ MUSIC ]
(Jimmy)>> Coming up, we tear out our old suspension.
(Jeremy)>> And make room for a slew of new parts next on Carcass!
[ MUSIC ]
(Jeremy)>> With the interior of our Camaro all buttoned up it's time to move our thoughts underneath the car.
(Jimmy)>> So we got all these parts to throw on our Camaro, like adjustable castor and camber plates to give our car a better alignment for track purposes, and we also got stiffer springs and sway bars to keep the handling tight when we're on course.
(Jeremy)>> And in the rear we're gonna ditch the stock coil spring and shock setup and move up to a coil over shock setup. Plus we're gonna get rid of the tires old rear end that's got 190,000 miles on it and replace it with a remanufactured one that's got 3.73 gears and a limited slip differential.
(Jimmy)>> But before we can put all these parts on our car we've got to take the old ones out. [ MUSIC ] [ mechanical humming ]
(Jeremy)>> To kick start the suspension tear out we'll remove all four wheels and tires. We have plans to add a wider set that's more suitable for auto cross later.
(Jimmy)>> With those out of the way we can disconnect the tie rod end from the spindle. The cotter pin is removed along with the castle nut before giving it a few hefty taps with a hammer to knock it loose.
(Jeremy)>> Next we'll remove the sway bar, first by unbolting the sway bar links, and then we'll finally remove the mounts and the bushings. Got it?
(Jimmy)>> We'll remove the calipers because this is all getting updated later. We'll be putting in new rotors, pads, hoses, and calipers. They will help control the Camaro as we enter the tight corners on the auto cross course.
(Jeremy)>> Now to keep our shop floor clean we're gonna do some fluid management before we disconnect the calipers. We've already drained the master cylinder up in the engine bay but there's still plenty of brake fluid in the lines that can drip all over the floor. So to help us we're gonna use a vacuum bleeder to keep the shop floor nice and clean.
(Jimmy)>> This does a good job at getting most of the brake fluid out but there's always some stubborn drops that you'll have to clean with a shop towel. With our brake hose disconnected we can remove the calipers, and scrap the center link which we'll also be replacing.
(Jeremy)>> We'll work on removing the spindle next. The most dangerous part about this portion is the coil spring, and you can tackle this in a number of different ways. The way we chose to do this is by loosening the lower ball joint nut using the spring tension to help us knock it loose. Now it's important that we don't take the nut completely off. Otherwise the spring tension could cause some serious damage.
(Jimmy)>> With some six ton jack stands we'll support the lower control arm on the cradle and this is where we can safely remove the castle nut. At the top of the strut tower we can remove the nuts that hold on the castor/camber plates and the one holding the strut.
(Jeremy)>> This releases the entire assembly, allowing us to remove the strut, spindle, and rotor assembly all in one piece. [ mechanical humming ]
(Jeremy)>> Then we'll raise the car off the jack stands and carefully pry the coil spring loose with the long pry bar. [ drill humming ]
(Jeremy)>> All there's left to do is remove the lower control arm. [ MUSIC ] With the front all apart it's time to move on to the rear.
(Jimmy)>> We'll begin with the panhard bar. The teardown out back isn't nearly as complicated as the front. You still have a spring that is under tension that you should be careful with. On our vehicle these are so worn out they can be removed without a problem.
(Jeremy)>> The lower control arm needs to be unbolted next. This is under a little bit of load, but with the help of a pry bar that allows us to free up the bolts. [ drill humming ]
(Jeremy)>> At this point the rear axle is only being held in by the shocks. The last thing to be disconnected is the e-brake cable. A pair of pliers help release it from the bracket, allowing us to lower the axle and support it on a set of jack stands.
(Jimmy)>> In the cab we pulled back the carpet so we could unbolt the top of the shock. This is pretty easy, especially since we had already cut back the carpeting for the roll cage.
(Jeremy)>> Jimmy you want to raise the car up and I'll watch the axle come out. [ MUSIC ]
(Jimmy)>> You ready?
(Jeremy)>> Yeah go for it. [ mechanical humming ]
(Jeremy)>> Up next, the upgrades that will help our Camaro hug the pavement.
(Jimmy)>> You're watching Carcass.
[ MUSIC ]
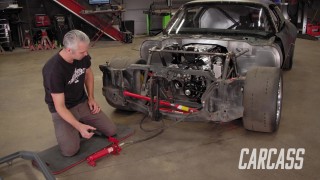
(Jeremy)>> It's time to get started installing the suspension on the Camaro but before we get started on the rear suspension of the Camaro we're gonna go over a little trick on how to find your rear gear axle ratio without popping the diff cover. Now there's two ways of doing this. One is with the r-p-o tag that you can find inside the car. What you can do is look up the tag number for your axle and that'll tell you what gear ratio you have, but what if you don't have that tag or what if it's missing? Well there's another way to do that. On the front side of the passenger axle tube is your axle identification number. Well we take that first number, plug that into Google, that'll also tell us our gear ratio. Well by looking that up this says we have 2.73 gears and that's just not gonna work for auto cross. So that's why we ordered our remanufactured axle with 3.73 gears cause that's just gonna give us better off the line acceleration.
(Jimmy)>> The first part of our rear suspension install is gonna be these coil overs, but they install a little bit differently than the stock shocks. As you can see the stock shock uses a stud with a nut to hold it in place. On our coil over we have rod end type end with a special bracket that goes on top, and then this stud goes in the original shock location. [ MUSIC ] [ drill humming ]
(Jimmy)>> The coil overs we're using are a single adjustable unit that we got from Summit Racing dot com. The great advantage to using these is just by twisting this dial you can make the shock stiffer or softer. The reason why you might want to do that is because you can actually affect the rate of weight transfer. To illustrate that point if I set these shocks to the softest setting I can push these in and out with relatively little effort. If I turn the shocks to the stiffest setting I can barely push these in by myself. So this is gonna be huge improvement and it's exactly why we're gonna put these on our Camaro.
(Jeremy)>> To put one of these together we'll start with a locking collar, and then the lower spring perch running them all the way down. Then we'll add some Permatex anti-seize and we'll add a shim before adding the coil spring. Then the upper spring perch can go on allowing us to snug up the whole assembly.
(Jimmy)>> With our shocks in place we can install the rest of the suspension kit we picked up from Summit Racing. The lower control arms get bolted in. Then we need to add some shock mounts to our remanufactured axle we got through Autozone.
(Jeremy)>> We'll need to drill out a hole in the stock shock mount to accommodate for our new bracket. So we'll tighten up one bolt and use the other hole as a drill guide. With it drilled out we can finish up the installation. [ drill humming ] [ MUSIC ]
(Jimmy)>> With the axle in position we can lower the Camaro down to it. This allows us to line up the lower control arm with the mount on the axle. Then we'll tap the bolt all the way in.
(Jeremy)>> Next we'll line up the coil over with the new mount we installed on the axle. This gets bolted in as well.
(Jimmy)>> The panhard bar goes in next. This is probably the easiest suspension piece to install but it's super important. It locates the axle laterally with the car, preventing it from moving left and right.
(Jeremy)>> With the lateral movement taken care of we need to add the torque arm. It attaches to the differential housing and prevents the axle from rotating under load.
(Jimmy)>> The last part of this kit for the rear is the sway bar. The new one is thicker than the original and will help reduce body roll, especially when we transition from one turn to another.
(Jeremy)>> That takes care of the rear. Now let's move on to the front. We'll start with the control arms. The kit we got from Summit Racing works with our 1992 Camaro with all the holes lining up in the stock mounts. With the car lowered so we can access the engine bay we can start installing the coil overs.
(Jimmy)>> The new castor/camber plates include a back plate that uses the o-e slots in the shock tower. All we have to do is add the remaining plates and get them bolted in. We're making sure not to drive these home knowing that we'll have to make adjustments later.
(Jeremy)>> Before we can go any further we need to marry the spindle to the coil over. This will just make assembly easier going forward. With it all in one piece we'll slide it through the castor/camber plate and add a nut, leaving it loose for now.
(Jimmy)>> Down below we'll raise the control arm and connect it to the spindle. We'll add the castle nut, firmly tightening it down. Then we'll just add a cotter pin for safety.
(Jeremy)>> With everything installed we'll go back to the engine bay and tighten the nut on the top of our coil over.
(Jimmy)>> To finish up our front suspension install we'll throw in the front sway bar. This is a simple bolt in using the stiffening plates provided in the kit. We'll use the factory bolts and stock mounting locations for the middle sections, and then the provided bolts and bushings for the ends that connect to the control arms. [ drill humming ]
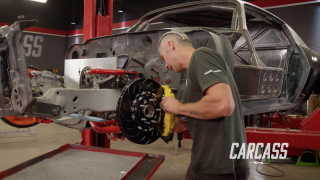
(Jeremy)>> Any time you add more horsepower to your vehicle you're gonna make it harder to stop. So to help with that we picked up this brake upgrade kit from Rock Auto dot com. Now it's designed to help with faster speeds and the high heat that goes along with those faster speeds, and there's a lot of R&D involved in putting a kit together like this, like carbon fiber infused ceramic pads that are thermal scorched for fast break-in times, precision drilled rotors to help with cooling, and they're slotted to help wipe away any gases or debris. Finding a kit like this on Rock Auto dot com is easy. Sorting by year, make, and model, we are able to find what worked for our Camaro and our auto cross application.
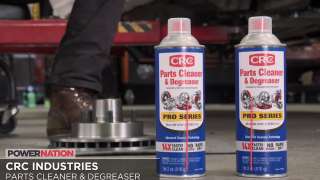
(Jimmy)>> Before you install new rotors you should always remove any oils from the manufacturing process. This is where CRC's parts cleaner and degreaser comes in handy. This spray can destroy tough dirt, grease, and grime that builds up on parts over the years, and CRC has been proven side by side to clean 14 times faster than other products on the market, and it dries very fast not leaving a residue behind, which is important for any brake application.
(Jeremy)>> Coming up, we slice and dice so we can make our Camaro look like this.
(Jimmy)>> You're watching Carcass.
[ MUSIC ] [ drill humming ] [ MUSIC ]
(Jimmy)>> It definitely sticks out but we did do this by design.
(Jeremy)>> It looks a little odd from the first set down but I really like it. That's the easiest way we could get the wide wheels and tires on it and give us that wide track width. So the look is right.
(Jimmy)>> The Weld wheels we got from Summit Racing look great with the Continental tires wrapped around them, but the stance of our Camaro looks a little bit funky.
(Jeremy)>> Jimmy ordered these wheels specifically with this back spacing cause that gives us that wide track width, and that's gonna help decrease lateral load transfer, which can help in auto cross and in road racing.
(Jimmy)>> So to fix our stance we ordered these really big fender flares to give it an aggressive cool look. [ MUSIC ]
(Jeremy)>> Oh that does look good doesn't it? Holy cats, that changes the whole look of the car.
(Jimmy)>> I think it's actually gonna fit pretty well on the body too.
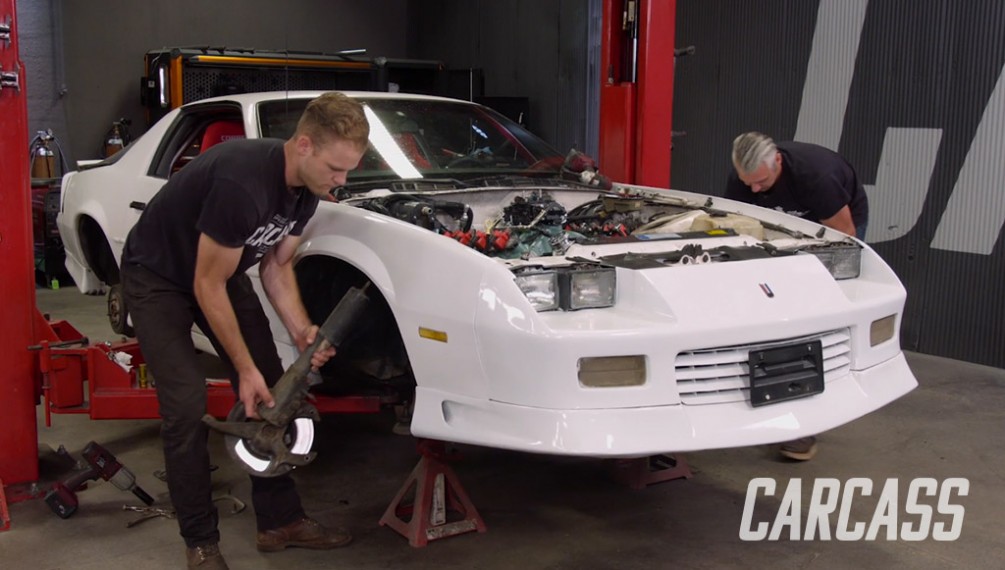
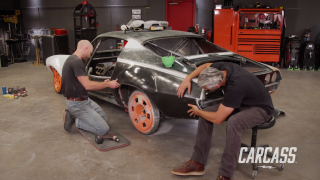
(Jeremy)>> Get them installed. These are universal fender flares we picked up from Summit Racing. With them being universal they're not gonna fit right out of the box, and right off the bat we know we need to do a little trimming to the bottom lip.
(Jimmy)>> There are a couple of ways you can do this but we're gonna use a cutoff wheel to make our cut. [ saw buzzing ]
(Jimmy)>> We'll follow that up with a file to clean up the edges.
(Jeremy)>> With our cuts all cleaned up we can now prep the fender to go on the Camaro. We'll start by drilling out the holes for our fastener. Then at the Camaro we'll set the fender exactly where we want it and mark out each hole on the body.
(Jimmy)>> All there's left to do is carefully drill out each hole location with a nineteen-sixty-fourths drill bit. It's a rinse and repeat process drilling all 10 holes. [ drill humming ]
(Jimmy)>> A rivet nut goes in next. This is one of those tools that you may not use often but you're glad to have it when you need it.
(Jeremy)>> With all our rivet nuts in place we'll slap on the included rubber seal and bring in our fender flare adding all the supplied hardware. This is a repetitive process and there's really no kind of technique to this. Just get it good and tight.
(Jimmy)>> Clean install.
(Jeremy)>> Well there rear's gonna be the easy part. The front's gonna be a little more challenging because of the turning radius here. Yeah it's already. We're gonna have to do some major trimming on the front side of this one at least.
(Jimmy)>> Yeah same on the back side of the fender too.
(Jeremy)>> Well the upside to that is the fender flare covers up everything. So we don't have to get too precise on the cut. We can just cut it until it reaches turn. We're gonna outline our cut with some tape and use a cutoff wheel to make a smooth transition to the outside of our tapeline. Now this didn't do the whole job. We'll need to use a reciprocating saw to finish off the rest. [ saw buzzing ]
(Jeremy)>> That's full lock and we still touch up front.
(Jimmy)>> And as the wheel goes through its travel we might risk cutting a tire. So I think we should just cut it farther out here and more up top.
(Jeremy)>> I think the flare will cover all of that. So I'll just grab the cutoff wheel and we'll just cut a bunch out.
(Jimmy)>> This is the kind of thing you can run into when doing mods like this. We wanted to make sure we weren't going to cut too much and leave us without enough material to work with, but like anything it makes for a slower process.
(Jeremy)>> And this is a perfect example. We trimmed less than we needed in the beginning because we didn't know where this fender was gonna land, but the second go around we got it close, and even after we screwed it into place we trimmed a little bit more off before cleaning it up with a sanding disc.
(Jimmy)>> This thing's really looking like something now.
(Jeremy)>> I can honestly say I've never seen a third gen look like this, beefy!
(Jimmy)>> I think though the parts that we're gonna add to it later are really gonna round off the look.
(Jeremy)>> That's right, we have big plans for an aero package to go right along with these fenders.
(Jimmy)>> Next time on Carcass we're adding a splitter to the front end of our 1992 Camaro that should help us grip the pavement.
(Jeremy)>> And out back we're fabbing up a spoiler that will help finish off our auto cross look.
Show Full Transcript
(Jimmy)>> Today on Carcass we swap out our old tired suspension for a more adjustable system.
(Jeremy)>> Plus we give our Camaro some sporty new shoes and the fenders to match.
(Narrator)>> When you want to build something different you turn to Carcass. They transform cars and trucks into one of a kind builds. From street to mud if you dream it they can build it. This is Carcass, a non-traditional speed shop.
(Jeremy)>> Let's get you caught up on the progress we've made on our auto cross Camaro.
(Jimmy)>> It started as a 1992 25th anniversary third gen Camaro, and it may not look like we've changed much but everything we did was in the engine bay and underneath this '90's muscle car.
(Jeremy)>> That's right, we removed the low power 305 and dropped in a 5.3 liter LS, taking it from 190 horse all the way up to 406.
(Jimmy)>> To back that up we installed a turbo 400 transmission along with a new shift that will work with the manual valve body.
(Jeremy)>> With headers, a new fuel system, and a carb sitting on top we were able to fire this guy up and check all the vitals of our LS on our stock gauges. [ engine revving ]
(Jimmy)>> And today we're gonna see a much bigger transformation on the outside of our Camaro. This car's gonna really have to grip the ground going around the track, and it's gonna have to handle a lot better than it did last time.
(Jeremy)>> And to help this thing grip the ground we're gonna be adding a much wider set of wheels and tires. Plus we're gonna be throwing on a set of fender flares because we want to stick with this auto cross theme, and we want this thing to handle. So we're gonna be completely overhauling the entire suspension.
(Jimmy)>> But before we do that we've got some interior work to do.
(Jeremy)>> That's a tall order but let's get at it. We're gonna do our best to keep as much of the interior intact as possible. We're leaving the dash along and we're definitely gonna be keeping the center console, but what we're gonna get rid of are these two worn out front seats. The first thing we're gonna do on the interior of our Camaro is install a roll bar kit that we got from Summit Racing. Now this is a perfect kit for you guys that don't have access to a tubing bender because it has pre-bent angles and the tubes are even notched. Now we don't necessarily need a roll bar in the auto cross Camaro for the safety aspect but what this is gonna do is help stiffen the chassis and it's gonna make this car handle better. So the first thing we've got to do to get this installed is take a measurement inside the cab. That way we know where to trim our main hoop. [ MUSIC ] So the inside was 35-ish. Looks like we've to cut off about two and a quarter inches. [ saw buzzing ] [ MUSIC ]
(Jeremy)>> See how it fits. [ MUSIC ]
(Jimmy)>> Snug fit. Now that we have the hoop in place we can get to work on installing base plates, and what these are for is in the event of a wreck it'll spread the load over the floor instead of the tube punch a hole through the floor. To install our base plate we'll prep the area with the grinder, and with our base plate trimmed down to fit the space we'll give it a few tacks to hold it in place. [ welder crackling ] [ MUSIC ]
(Jimmy)>> Now that we have our main hoop in we can move on to the down bars, get a measurement, get them fit up, and get them tacked in.
(Jeremy)>> With our measurement up about 30 inches we'll measure from the notched end of the down bar. Then we'll take it over to the chop saw where we'll cut it at a 55 degree angle.
(Jimmy)>> Back inside the Camaro we need to tack in the base plates for the down bars, and then we can test fit to see if everything lines up.
(Jeremy)>> Those fit pretty good.
(Jimmy)>> Mine fits good.
(Jeremy)>> Let's just weld the plates in and weld the bars in. We'll need to take some care when we're welding in these base plates. First we don't want to burn a hole through the floor of the Camaro, and second we don't want to warp any of the sheet metal that makes up the floor. To prevent this we're gonna be using a mig so we can turn on and off the heat quickly, and we'll be moving around so we don't put too much heat into one place.
(Jimmy)>> With the hoop and down bars we'll be taking a different approach. For one thing we're gonna be using the tig. The welds look a little bit nicer and the metal is thick enough. So we're not afraid of piling in too much heat.
(Jeremy)>> We'll tackle the point where the down bars meet the hoop first. This way we can just tack it in, slide the whole assembly out of the Camaro, and weld it on the bench. That way we don't mess up our nice headliner.
(Jimmy)>> With those welded solid we can slide the cage onto our base plates and burn those in with a tig, leaving only the crossbar to be installed. [ MUSIC ]
(Jeremy)>> The last thing we're gonna be installing on our interior is a set of seats and seat brackets we got from Summit Racing. Now the best thing about these seat brackets is they bolt right in the stock location. [ drill humming ] [ MUSIC ]
(Jimmy)>> Coming up, we tear out our old suspension.
(Jeremy)>> And make room for a slew of new parts next on Carcass!
[ MUSIC ]
(Jeremy)>> With the interior of our Camaro all buttoned up it's time to move our thoughts underneath the car.
(Jimmy)>> So we got all these parts to throw on our Camaro, like adjustable castor and camber plates to give our car a better alignment for track purposes, and we also got stiffer springs and sway bars to keep the handling tight when we're on course.
(Jeremy)>> And in the rear we're gonna ditch the stock coil spring and shock setup and move up to a coil over shock setup. Plus we're gonna get rid of the tires old rear end that's got 190,000 miles on it and replace it with a remanufactured one that's got 3.73 gears and a limited slip differential.
(Jimmy)>> But before we can put all these parts on our car we've got to take the old ones out. [ MUSIC ] [ mechanical humming ]
(Jeremy)>> To kick start the suspension tear out we'll remove all four wheels and tires. We have plans to add a wider set that's more suitable for auto cross later.
(Jimmy)>> With those out of the way we can disconnect the tie rod end from the spindle. The cotter pin is removed along with the castle nut before giving it a few hefty taps with a hammer to knock it loose.
(Jeremy)>> Next we'll remove the sway bar, first by unbolting the sway bar links, and then we'll finally remove the mounts and the bushings. Got it?
(Jimmy)>> We'll remove the calipers because this is all getting updated later. We'll be putting in new rotors, pads, hoses, and calipers. They will help control the Camaro as we enter the tight corners on the auto cross course.
(Jeremy)>> Now to keep our shop floor clean we're gonna do some fluid management before we disconnect the calipers. We've already drained the master cylinder up in the engine bay but there's still plenty of brake fluid in the lines that can drip all over the floor. So to help us we're gonna use a vacuum bleeder to keep the shop floor nice and clean.
(Jimmy)>> This does a good job at getting most of the brake fluid out but there's always some stubborn drops that you'll have to clean with a shop towel. With our brake hose disconnected we can remove the calipers, and scrap the center link which we'll also be replacing.
(Jeremy)>> We'll work on removing the spindle next. The most dangerous part about this portion is the coil spring, and you can tackle this in a number of different ways. The way we chose to do this is by loosening the lower ball joint nut using the spring tension to help us knock it loose. Now it's important that we don't take the nut completely off. Otherwise the spring tension could cause some serious damage.
(Jimmy)>> With some six ton jack stands we'll support the lower control arm on the cradle and this is where we can safely remove the castle nut. At the top of the strut tower we can remove the nuts that hold on the castor/camber plates and the one holding the strut.
(Jeremy)>> This releases the entire assembly, allowing us to remove the strut, spindle, and rotor assembly all in one piece. [ mechanical humming ]
(Jeremy)>> Then we'll raise the car off the jack stands and carefully pry the coil spring loose with the long pry bar. [ drill humming ]
(Jeremy)>> All there's left to do is remove the lower control arm. [ MUSIC ] With the front all apart it's time to move on to the rear.
(Jimmy)>> We'll begin with the panhard bar. The teardown out back isn't nearly as complicated as the front. You still have a spring that is under tension that you should be careful with. On our vehicle these are so worn out they can be removed without a problem.
(Jeremy)>> The lower control arm needs to be unbolted next. This is under a little bit of load, but with the help of a pry bar that allows us to free up the bolts. [ drill humming ]
(Jeremy)>> At this point the rear axle is only being held in by the shocks. The last thing to be disconnected is the e-brake cable. A pair of pliers help release it from the bracket, allowing us to lower the axle and support it on a set of jack stands.
(Jimmy)>> In the cab we pulled back the carpet so we could unbolt the top of the shock. This is pretty easy, especially since we had already cut back the carpeting for the roll cage.
(Jeremy)>> Jimmy you want to raise the car up and I'll watch the axle come out. [ MUSIC ]
(Jimmy)>> You ready?
(Jeremy)>> Yeah go for it. [ mechanical humming ]
(Jeremy)>> Up next, the upgrades that will help our Camaro hug the pavement.
(Jimmy)>> You're watching Carcass.
[ MUSIC ]
(Jeremy)>> It's time to get started installing the suspension on the Camaro but before we get started on the rear suspension of the Camaro we're gonna go over a little trick on how to find your rear gear axle ratio without popping the diff cover. Now there's two ways of doing this. One is with the r-p-o tag that you can find inside the car. What you can do is look up the tag number for your axle and that'll tell you what gear ratio you have, but what if you don't have that tag or what if it's missing? Well there's another way to do that. On the front side of the passenger axle tube is your axle identification number. Well we take that first number, plug that into Google, that'll also tell us our gear ratio. Well by looking that up this says we have 2.73 gears and that's just not gonna work for auto cross. So that's why we ordered our remanufactured axle with 3.73 gears cause that's just gonna give us better off the line acceleration.
(Jimmy)>> The first part of our rear suspension install is gonna be these coil overs, but they install a little bit differently than the stock shocks. As you can see the stock shock uses a stud with a nut to hold it in place. On our coil over we have rod end type end with a special bracket that goes on top, and then this stud goes in the original shock location. [ MUSIC ] [ drill humming ]
(Jimmy)>> The coil overs we're using are a single adjustable unit that we got from Summit Racing dot com. The great advantage to using these is just by twisting this dial you can make the shock stiffer or softer. The reason why you might want to do that is because you can actually affect the rate of weight transfer. To illustrate that point if I set these shocks to the softest setting I can push these in and out with relatively little effort. If I turn the shocks to the stiffest setting I can barely push these in by myself. So this is gonna be huge improvement and it's exactly why we're gonna put these on our Camaro.
(Jeremy)>> To put one of these together we'll start with a locking collar, and then the lower spring perch running them all the way down. Then we'll add some Permatex anti-seize and we'll add a shim before adding the coil spring. Then the upper spring perch can go on allowing us to snug up the whole assembly.
(Jimmy)>> With our shocks in place we can install the rest of the suspension kit we picked up from Summit Racing. The lower control arms get bolted in. Then we need to add some shock mounts to our remanufactured axle we got through Autozone.
(Jeremy)>> We'll need to drill out a hole in the stock shock mount to accommodate for our new bracket. So we'll tighten up one bolt and use the other hole as a drill guide. With it drilled out we can finish up the installation. [ drill humming ] [ MUSIC ]
(Jimmy)>> With the axle in position we can lower the Camaro down to it. This allows us to line up the lower control arm with the mount on the axle. Then we'll tap the bolt all the way in.
(Jeremy)>> Next we'll line up the coil over with the new mount we installed on the axle. This gets bolted in as well.
(Jimmy)>> The panhard bar goes in next. This is probably the easiest suspension piece to install but it's super important. It locates the axle laterally with the car, preventing it from moving left and right.
(Jeremy)>> With the lateral movement taken care of we need to add the torque arm. It attaches to the differential housing and prevents the axle from rotating under load.
(Jimmy)>> The last part of this kit for the rear is the sway bar. The new one is thicker than the original and will help reduce body roll, especially when we transition from one turn to another.
(Jeremy)>> That takes care of the rear. Now let's move on to the front. We'll start with the control arms. The kit we got from Summit Racing works with our 1992 Camaro with all the holes lining up in the stock mounts. With the car lowered so we can access the engine bay we can start installing the coil overs.
(Jimmy)>> The new castor/camber plates include a back plate that uses the o-e slots in the shock tower. All we have to do is add the remaining plates and get them bolted in. We're making sure not to drive these home knowing that we'll have to make adjustments later.
(Jeremy)>> Before we can go any further we need to marry the spindle to the coil over. This will just make assembly easier going forward. With it all in one piece we'll slide it through the castor/camber plate and add a nut, leaving it loose for now.
(Jimmy)>> Down below we'll raise the control arm and connect it to the spindle. We'll add the castle nut, firmly tightening it down. Then we'll just add a cotter pin for safety.
(Jeremy)>> With everything installed we'll go back to the engine bay and tighten the nut on the top of our coil over.
(Jimmy)>> To finish up our front suspension install we'll throw in the front sway bar. This is a simple bolt in using the stiffening plates provided in the kit. We'll use the factory bolts and stock mounting locations for the middle sections, and then the provided bolts and bushings for the ends that connect to the control arms. [ drill humming ]
(Jeremy)>> Any time you add more horsepower to your vehicle you're gonna make it harder to stop. So to help with that we picked up this brake upgrade kit from Rock Auto dot com. Now it's designed to help with faster speeds and the high heat that goes along with those faster speeds, and there's a lot of R&D involved in putting a kit together like this, like carbon fiber infused ceramic pads that are thermal scorched for fast break-in times, precision drilled rotors to help with cooling, and they're slotted to help wipe away any gases or debris. Finding a kit like this on Rock Auto dot com is easy. Sorting by year, make, and model, we are able to find what worked for our Camaro and our auto cross application.
(Jimmy)>> Before you install new rotors you should always remove any oils from the manufacturing process. This is where CRC's parts cleaner and degreaser comes in handy. This spray can destroy tough dirt, grease, and grime that builds up on parts over the years, and CRC has been proven side by side to clean 14 times faster than other products on the market, and it dries very fast not leaving a residue behind, which is important for any brake application.
(Jeremy)>> Coming up, we slice and dice so we can make our Camaro look like this.
(Jimmy)>> You're watching Carcass.
[ MUSIC ] [ drill humming ] [ MUSIC ]
(Jimmy)>> It definitely sticks out but we did do this by design.
(Jeremy)>> It looks a little odd from the first set down but I really like it. That's the easiest way we could get the wide wheels and tires on it and give us that wide track width. So the look is right.
(Jimmy)>> The Weld wheels we got from Summit Racing look great with the Continental tires wrapped around them, but the stance of our Camaro looks a little bit funky.
(Jeremy)>> Jimmy ordered these wheels specifically with this back spacing cause that gives us that wide track width, and that's gonna help decrease lateral load transfer, which can help in auto cross and in road racing.
(Jimmy)>> So to fix our stance we ordered these really big fender flares to give it an aggressive cool look. [ MUSIC ]
(Jeremy)>> Oh that does look good doesn't it? Holy cats, that changes the whole look of the car.
(Jimmy)>> I think it's actually gonna fit pretty well on the body too.
(Jeremy)>> Get them installed. These are universal fender flares we picked up from Summit Racing. With them being universal they're not gonna fit right out of the box, and right off the bat we know we need to do a little trimming to the bottom lip.
(Jimmy)>> There are a couple of ways you can do this but we're gonna use a cutoff wheel to make our cut. [ saw buzzing ]
(Jimmy)>> We'll follow that up with a file to clean up the edges.
(Jeremy)>> With our cuts all cleaned up we can now prep the fender to go on the Camaro. We'll start by drilling out the holes for our fastener. Then at the Camaro we'll set the fender exactly where we want it and mark out each hole on the body.
(Jimmy)>> All there's left to do is carefully drill out each hole location with a nineteen-sixty-fourths drill bit. It's a rinse and repeat process drilling all 10 holes. [ drill humming ]
(Jimmy)>> A rivet nut goes in next. This is one of those tools that you may not use often but you're glad to have it when you need it.
(Jeremy)>> With all our rivet nuts in place we'll slap on the included rubber seal and bring in our fender flare adding all the supplied hardware. This is a repetitive process and there's really no kind of technique to this. Just get it good and tight.
(Jimmy)>> Clean install.
(Jeremy)>> Well there rear's gonna be the easy part. The front's gonna be a little more challenging because of the turning radius here. Yeah it's already. We're gonna have to do some major trimming on the front side of this one at least.
(Jimmy)>> Yeah same on the back side of the fender too.
(Jeremy)>> Well the upside to that is the fender flare covers up everything. So we don't have to get too precise on the cut. We can just cut it until it reaches turn. We're gonna outline our cut with some tape and use a cutoff wheel to make a smooth transition to the outside of our tapeline. Now this didn't do the whole job. We'll need to use a reciprocating saw to finish off the rest. [ saw buzzing ]
(Jeremy)>> That's full lock and we still touch up front.
(Jimmy)>> And as the wheel goes through its travel we might risk cutting a tire. So I think we should just cut it farther out here and more up top.
(Jeremy)>> I think the flare will cover all of that. So I'll just grab the cutoff wheel and we'll just cut a bunch out.
(Jimmy)>> This is the kind of thing you can run into when doing mods like this. We wanted to make sure we weren't going to cut too much and leave us without enough material to work with, but like anything it makes for a slower process.
(Jeremy)>> And this is a perfect example. We trimmed less than we needed in the beginning because we didn't know where this fender was gonna land, but the second go around we got it close, and even after we screwed it into place we trimmed a little bit more off before cleaning it up with a sanding disc.
(Jimmy)>> This thing's really looking like something now.
(Jeremy)>> I can honestly say I've never seen a third gen look like this, beefy!
(Jimmy)>> I think though the parts that we're gonna add to it later are really gonna round off the look.
(Jeremy)>> That's right, we have big plans for an aero package to go right along with these fenders.
(Jimmy)>> Next time on Carcass we're adding a splitter to the front end of our 1992 Camaro that should help us grip the pavement.
(Jeremy)>> And out back we're fabbing up a spoiler that will help finish off our auto cross look.


